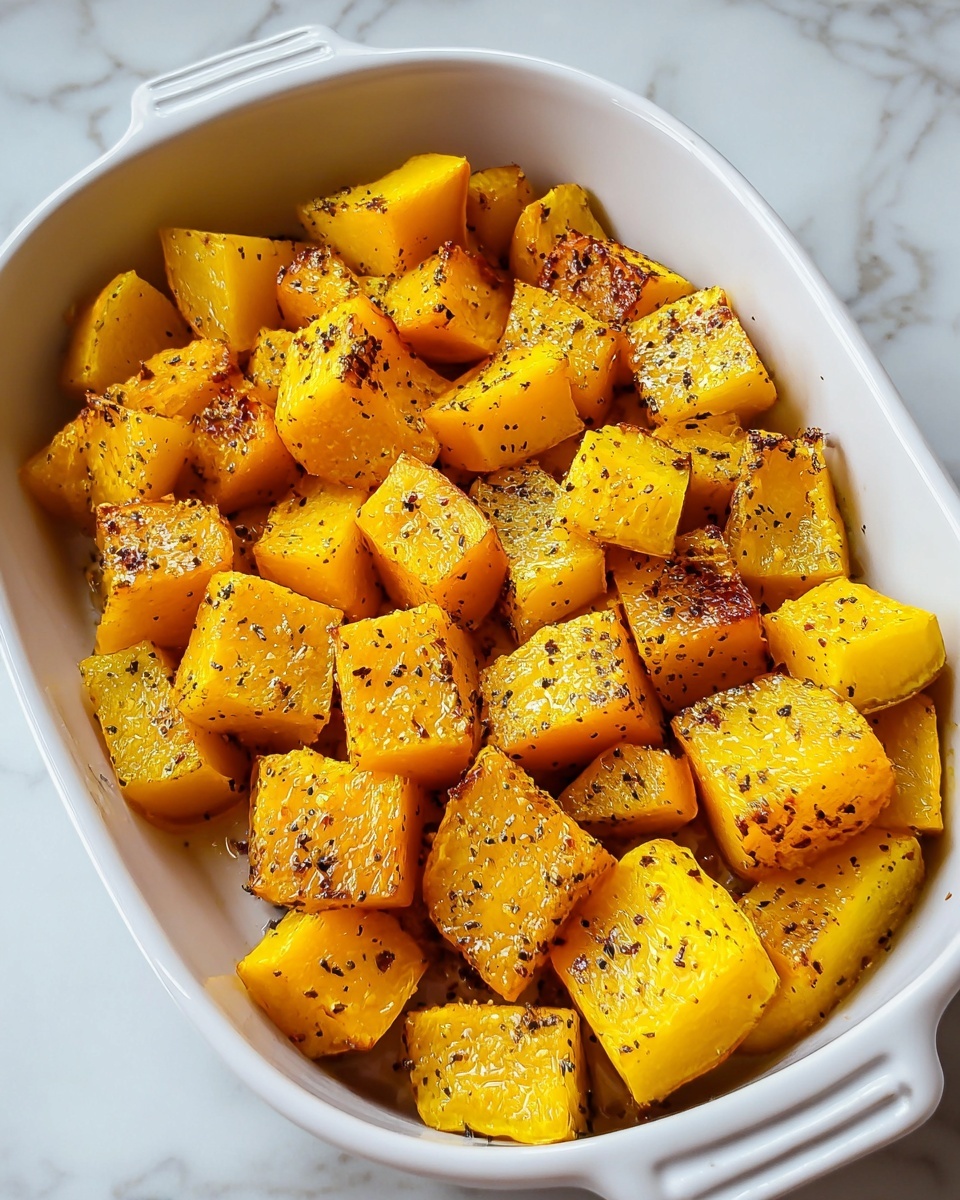
If you’re looking for a comforting dish that’s both easy to prepare and packed with natural sweetness, this Simple Roasted Butternut Squash Recipe is your new best friend in the kitchen. Roasting brings out that deep, caramelized flavor in the squash, creating tender, golden cubes that melt in your mouth. With just a handful of simple ingredients and minimal prep, it’s a perfect side dish or snack that fits beautifully into any meal or season. Trust me, once you try this, you’ll keep coming back for more!
Ingredients You’ll Need
To make this Simple Roasted Butternut Squash Recipe shine, you only need a few straightforward ingredients. Each component plays a vital role, whether it’s enhancing flavor, adding a touch of spice, or giving you that beautiful, roasted color.
- Butternut Squash: The star ingredient, peeled, seeded, and cut into cubes to ensure even roasting and tender bites.
- Olive Oil: Use a high-quality extra virgin olive oil for rich flavor and to help the squash caramelize beautifully in the oven.
- Kosher Salt: Just enough to bring out the squash’s natural sweetness and balance the flavors.
- Freshly Ground Black Pepper: Adds a whisper of heat that perfectly complements the squash’s earthy taste.
- Garlic Powder (optional): For those who adore a little extra savory depth in every bite.
- Cayenne Pepper (optional): A tiny pinch can give your roasted squash a delightful, warming kick.
How to Make Simple Roasted Butternut Squash Recipe
Step 1: Preheat the Oven
Begin by heating your oven to 400 degrees Fahrenheit (200 degrees Celsius). This temperature is ideal for roasting the squash until it’s tender on the inside and beautifully caramelized on the outside without drying out.
Step 2: Prepare the Squash
Now, peel your butternut squash and remove the seeds. Cutting it into uniform cubes is important because it ensures that all pieces cook evenly and have the perfect texture. No one wants some mushy bits and some undercooked chunks!
Step 3: Toss with Seasonings
In a large bowl, mix the cubes with olive oil, kosher salt, and freshly ground black pepper. Make sure every piece is equally coated—this not only locks in moisture but helps the squash caramelize into those delicious golden edges.
Step 4: Arrange on Baking Sheet
Line a baking sheet with parchment paper to prevent sticking and easy cleanup. Spread the squash cubes in a single layer; overcrowding can lead to steaming rather than roasting, which we definitely want to avoid for that crisp exterior.
Step 5: Roast and Flip
Place the tray in the oven and roast for about 25 to 30 minutes. About halfway through, give the squash a gentle flip so that all sides get that gorgeous golden color. This step is key to developing flavor and texture.
Step 6: Check for Doneness
After 25 minutes, pierce a piece of squash with a fork. It should feel tender but not mushy and have a slight caramelized crust. If it’s not quite there yet, pop it back in for a few more minutes.
Step 7: Cool and Serve
Once out of the oven, let the squash cool for a few minutes to settle the flavors and avoid burnt tongues. Serve it warm for the best experience—trust me, that fluffy yet crisp-perfect bite is unbeatable.
How to Serve Simple Roasted Butternut Squash Recipe
Garnishes
A sprinkle of fresh herbs like thyme or rosemary elevates the dish to something special, adding a bright, aromatic note. You can also dust with a touch of grated Parmesan for a savory twist that melts into the roasted goodness.
Side Dishes
This roasted squash pairs fabulously with roasted chicken or pork, and works great alongside quinoa or wild rice if you want a wholesome vegetarian meal. Its sweetness balances bold, savory mains wonderfully.
Creative Ways to Present
Turn this recipe into a salad base by tossing it with arugula, toasted nuts, and a tangy vinaigrette. Alternatively, blend half of the roasted squash into a creamy soup and use the rest as a crunchy topping—double the texture, double the delight!
Make Ahead and Storage
Storing Leftovers
Store any leftover roasted butternut squash in an airtight container in the refrigerator. It’ll keep well for up to 4 days, making it a perfect quick addition to meals throughout the week.
Freezing
If you want to save some for longer, freezing is a good option. Spread the roasted cubes in a single layer on a baking sheet, freeze until solid, then transfer to a zip-top bag or container. Frozen squash keeps nicely for about 3 months.
Reheating
To reheat, pop the squash in a preheated oven at 350 degrees Fahrenheit for 10 to 15 minutes to regain its roasted crispness. You can also microwave it, but oven reheating keeps that delightful texture intact.
FAQs
Can I roast butternut squash without peeling it?
While you technically can roast butternut squash with the skin on, peeling ensures a tender texture and easier eating experience. The skin is quite tough and fibrous, so peeling is generally recommended for this Simple Roasted Butternut Squash Recipe.
Is it necessary to cut the squash into cubes?
Yes, cutting the squash into uniform cubes helps them cook evenly. Smaller or uneven pieces can result in some parts being overcooked while others remain hard.
Can I add other seasonings?
Absolutely! Feel free to experiment with spices like smoked paprika, cinnamon, or even a drizzle of maple syrup to customize the dish to your taste buds.
What if I don’t have parchment paper?
You can use a well-oiled baking sheet, but parchment paper makes cleanup much easier and helps prevent sticking, especially with tender roasted veggies like this.
Is this recipe suitable for meal prep?
Definitely. Roasted butternut squash stores and reheats beautifully, making it an ideal component for lunches or dinner sides throughout the week.
Final Thoughts
This Simple Roasted Butternut Squash Recipe is a true keeper—so easy, so delicious, and endlessly adaptable. Whether you’re new to cooking squash or a seasoned pro, this dish brings cozy warmth and vibrant flavors to your table. Give it a try soon; your taste buds will thank you!
Print
Simple Roasted Butternut Squash Recipe
- Prep Time: 15 minutes
- Cook Time: 30 minutes
- Total Time: 45 minutes
- Yield: 4 servings
- Category: Side Dish
- Method: Baking
- Cuisine: American
- Diet: Gluten Free
Description
This simple roasted butternut squash recipe transforms sweet, nutty squash cubes into a caramelized, flavorful side dish. With minimal ingredients including olive oil, salt, and pepper, it’s an easy and healthy way to enjoy fall produce. Optional spices like garlic powder and cayenne pepper add versatility for extra flavor or a gentle kick.
Ingredients
Butternut Squash
- 2 pounds butternut squash, peeled, seeded, and cut into cubes
Seasonings & Oil
- 2 tablespoons high-quality extra virgin olive oil
- 1 teaspoon kosher salt
- 1/2 teaspoon freshly ground black pepper
- 1 teaspoon garlic powder (optional)
- 1 pinch cayenne pepper (optional)
Instructions
- Preheat Oven: Preheat your oven to 400°F (200°C) to ensure it’s at the optimal temperature for roasting.
- Prepare Squash: Peel the butternut squash and cut it into uniform cubes to ensure even cooking.
- Toss with Seasonings: In a large mixing bowl, combine the cubed squash with olive oil, kosher salt, black pepper, and optional garlic powder and cayenne pepper. Toss thoroughly until the squash is evenly coated.
- Arrange on Baking Sheet: Line a baking sheet with parchment paper and spread the squash cubes in a single layer to allow proper roasting and caramelization.
- Roast the Squash: Place the baking sheet in the preheated oven and roast the squash for 25-30 minutes, flipping the cubes halfway through to promote even browning.
- Check for Doneness: Test the squash for tenderness by piercing with a fork; the exterior should be caramelized and slightly crispy while the inside is soft.
- Cool and Serve: Remove from oven and let the roasted butternut squash cool for a few minutes. Serve warm as a delicious and nutritious side dish.
Notes
- Ensure the squash cubes are cut evenly for uniform cooking.
- Adjust cayenne pepper according to your preferred spice level or omit for a milder flavor.
- Use parchment paper for easier cleanup and to prevent sticking.
- Leftovers can be refrigerated for up to 3 days and reheated in the oven or microwave.


