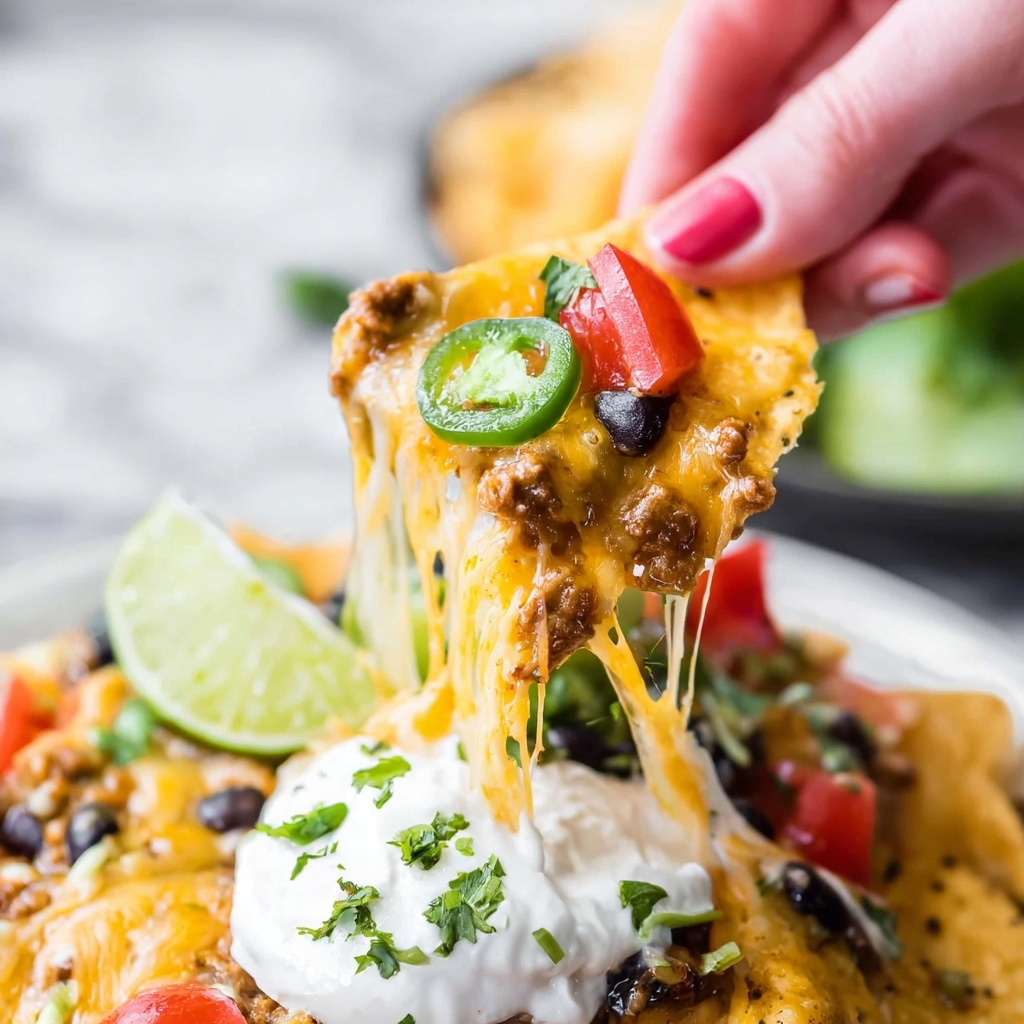
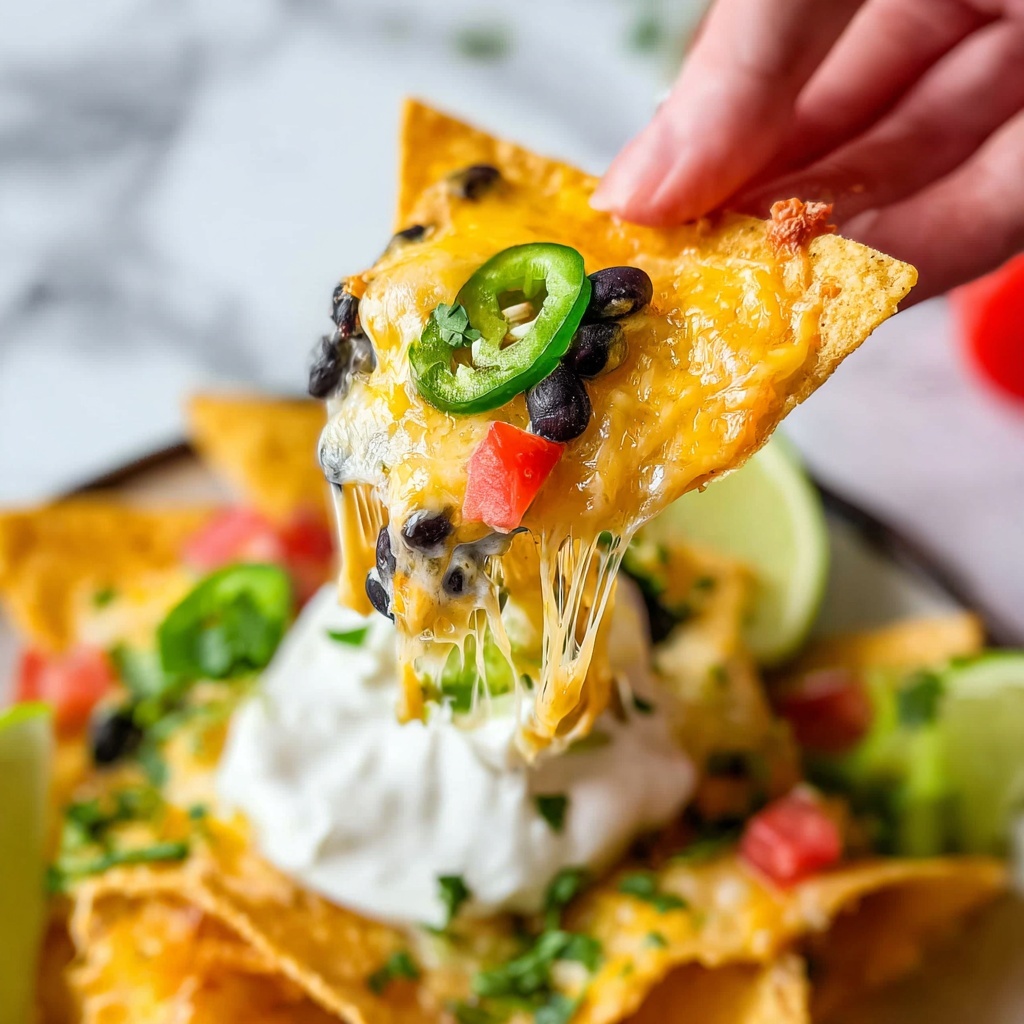
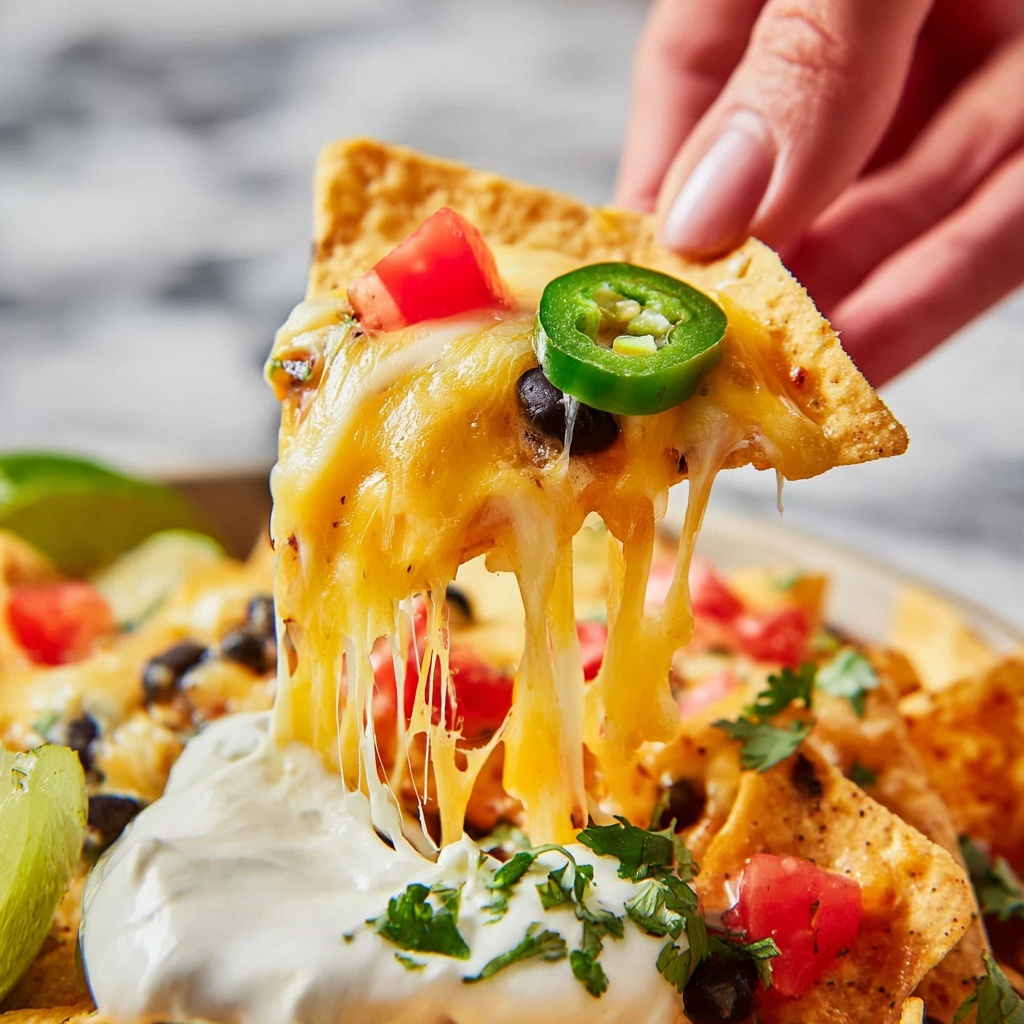
If you are looking for a crowd-pleasing snack or a quick meal that bursts with flavor and satisfying textures, this Easy Rotisserie Chicken Nachos Recipe is your go-to solution. It combines crispy tortilla chips layered with tender rotisserie chicken, hearty beans, and a gooey blanket of melted Mexican cheese, all topped with fresh and zesty garnishes. Not only is this dish simple to put together, but it also brings vibrant colors and bold flavors to your table in under 20 minutes. Whether you’re hosting game night, feeding a hungry family, or just craving a delicious treat, these nachos hit every mark with ease and excitement.
Ingredients You’ll Need
Getting the right ingredients is the secret behind these delicious nachos. Each element plays a special role, from the crunch and saltiness of crisp tortilla chips to the creamy, fresh burst from guacamole or salsa that bring the whole dish to life.
- Tortilla chips: Use a sturdy 12-oz bag to hold all the toppings without getting soggy.
- Shredded rotisserie chicken: Two cups of tender, flavorful chicken create the protein-packed base.
- Canned black or pinto beans: Adds heartiness and balances the spices with gentle earthiness.
- Mexican blend cheese (8 ounces): About two cups for that irresistible melty, stringy texture.
- Pico de gallo salsa: Half a cup of fresh, tangy salsa adds brightness and zing.
- Sour cream: Creamy coolness to top off the nachos and mellow out any heat.
- Guacamole or sliced avocado: A silky, rich touch that complements the salty chips.
- Cilantro (chopped): Fresh herbaceous notes that add a pop of green and flavor.
- Diced tomatoes: Juicy, colorful bursts that contribute freshness and texture.
- Salsa: Additional tangy sauce to customize each bite.
- Pickled jalapenos: For those who love a little spicy kick with acidity.
How to Make Easy Rotisserie Chicken Nachos Recipe
Step 1: Preheat Your Oven
Begin by setting your oven to 425 degrees Fahrenheit. This high temperature is perfect for melting cheese quickly while crisping up the chips just right without drying out the toppings. It’s the first step to achieving that satisfying balance between crunchy and gooey.
Step 2: Prepare Your Baking Surface
Line a rimmed baking sheet or a high-sided skillet with foil or parchment paper. This little trick saves you from scrubbing later and helps catch any melty cheese or toppings that might stray. Plus, it makes cleanup a breeze if you’re making nachos midweek.
Step 3: Layer Your Nachos, First Round
Start by spreading out half of your tortilla chips across the prepared tray or skillet, making sure they’re evenly distributed but with enough wiggle room for toppings. Next, scatter on half of your shredded rotisserie chicken and beans to ensure every bite is packed with flavor. Finally, cover with half of the shredded cheese so it will melt and bind everything together during baking.
Step 4: Repeat the Layers
Now, pile on the remaining chips, chicken, beans, and cheese in the same order. For the second layer of chips, you can arrange them a bit looser; this makes it easier to pull up individual portions once the nachos are cooked. Building these layers not only maximizes flavor but also guarantees consistent cheesiness throughout the dish.
Step 5: Bake Until Bubbly
Pop the tray into your preheated oven and bake for 10 to 12 minutes. Keep an eye as the cheese melts and turns bubbly and golden in spots. This step transforms the dish from good to unforgettable, where every chip is perfectly coated in melted cheese and warm toppings.
Step 6: Add Fresh Toppings and Serve
Once out of the oven, it’s time to pile on your choice of garnishes like pico de gallo, sour cream, guacamole, cilantro, diced tomatoes, salsa, and pickled jalapenos. These fresh elements add cool, crisp contrast to hot, cheesy chips. Serve immediately so everyone can enjoy the layers of flavors at their best temperature.
How to Serve Easy Rotisserie Chicken Nachos Recipe
Garnishes
Adding toppings is where your personality can shine. Feel free to customize with creamy guacamole, tangy sour cream, or spicy pickled jalapenos. Fresh cilantro and diced tomatoes brighten the dish and add a refreshing balance. Layer these toppings on with care, or serve them family-style for a casual, interactive experience.
Side Dishes
While these nachos make a hearty meal themselves, pairing them with a light side like a crisp green salad or a bowl of Mexican street corn can round out your table beautifully. A chilled margarita or sparkling water with lime also complements the layers of flavor wonderfully.
Creative Ways to Present
Try serving the nachos on a large wooden board or colorful ceramic platter for an inviting look. For parties, consider individual nacho cups layered with toppings for easy grab-and-go snacking. You can even add a drizzle of chipotle sauce or a sprinkle of cotija cheese for an extra special touch.
Make Ahead and Storage
Storing Leftovers
If you have any nacho leftovers, store them in an airtight container in the refrigerator. Because nachos tend to get soggy, it’s best to separate any fresh toppings like guacamole or sour cream and only add those fresh when reheating. Leftover chicken and beans help keep the flavor intact after reheating.
Freezing
While you can freeze components like shredded rotisserie chicken or beans separately, assembled nachos don’t freeze well because the chips lose their crunch. Instead, freeze any extra cooked chicken or bean mixtures on their own to use in future batches of this Easy Rotisserie Chicken Nachos Recipe.
Reheating
When you’re ready to enjoy leftovers, spread the nachos on a baking sheet and warm in a 350-degree oven for about 10 minutes or until heated through and the cheese is melty again. Avoid microwaving if possible, as this tends to make chips soggy instead of crisp.
FAQs
Can I use other types of cheese besides a Mexican blend?
Absolutely! Cheddar, Monterey Jack, or even a pepper jack work wonderfully. The Mexican blend is just a convenient combo for flavor and meltability, but feel free to customize according to your preferences.
Is rotisserie chicken necessary, or can I use shredded cooked chicken?
Rotisserie chicken is very convenient and flavorful, but any shredded cooked chicken will do. Using leftovers from a roast chicken or even grilled chicken breasts will work just fine in this recipe.
Can I make these nachos vegetarian?
Yes! Simply omit the chicken and add extra beans, sautéed veggies, or even grilled corn for additional texture and flavor. The cheese and fresh toppings will keep it delicious and satisfying.
How spicy are these nachos?
The base recipe is mild unless you add spicy ingredients like pickled jalapenos or a hot salsa. This makes it easy to adapt for all spice tolerances just by controlling the toppings.
What’s the best way to keep the chips crispy?
Layering the chips with toppings right before baking and serving immediately helps maintain crispiness. Also, using thick, sturdy chips designed for dipping is a simple way to keep them crunchy under all the delicious toppings.
Final Thoughts
I can’t recommend this Easy Rotisserie Chicken Nachos Recipe enough. It’s fun, fast, and totally fantastic for any occasion, whether it’s a casual weeknight or a festive gathering. The blend of melty cheese, juicy chicken, and fresh toppings comes together in a way that feels both indulgent and homemade. Give it a try and prepare for your new favorite nacho night tradition.
Print
Easy Rotisserie Chicken Nachos Recipe
- Prep Time: 5 minutes
- Cook Time: 12 minutes
- Total Time: 17 minutes
- Yield: 6 servings
- Category: Appetizer
- Method: Baking
- Cuisine: Mexican
Description
These Easy Rotisserie Chicken Nachos are a quick and delicious snack or meal, layered with crispy tortilla chips, shredded rotisserie chicken, beans, and melted Mexican blend cheese, then topped with fresh pico de gallo, sour cream, guacamole, and pickled jalapenos for a perfect balance of flavors and textures. Perfect for family gatherings or a casual night in, they come together in just under 20 minutes and satisfy everyone’s cravings with customizable toppings.
Ingredients
Main Ingredients
- 1 12-oz bag tortilla chips
- 2 cups shredded rotisserie chicken
- 1 15-oz can black or pinto beans, drained and rinsed
- 8 ounces shredded Mexican blend cheese (about 2 cups)
Toppings
- 1/2 cup pico de gallo salsa
- Sour cream, for serving
- Guacamole or sliced avocado, for serving
- Cilantro, chopped, for garnish
- Diced tomatoes, for garnish
- Salsa, for serving
- Pickled jalapeños, for garnish
Instructions
- Preheat the oven: Set your oven to 425 degrees Fahrenheit to prepare for baking the nachos.
- Prepare the baking sheet: Line a rimmed baking sheet or a high-sided skillet with foil or parchment paper to make cleanup easier after baking.
- Layer the first half of ingredients: Spread half of the tortilla chips evenly on the prepared baking sheet, then top with half of the shredded rotisserie chicken, half of the drained beans, and half of the shredded Mexican blend cheese.
- Repeat layers: Add the remaining chips on top and distribute the remaining chicken, beans, and cheese evenly. Arrange the chips on top so they are easy to pull out after baking.
- Bake the nachos: Place the baking sheet in the oven and bake for 10 to 12 minutes, or until the cheese has melted completely and is bubbly.
- Add toppings and serve: Remove the nachos from the oven and immediately top with pico de gallo salsa, sour cream, guacamole or sliced avocado, cilantro, diced tomatoes, salsa, and pickled jalapeños, according to your preference. Serve immediately while hot.
- Enjoy family style: Serve the nachos family style so everyone can add their favorite toppings and avoid unwanted garnishes, making it a fun and interactive meal.
Notes
- Use a high-sided skillet or rimmed baking sheet to prevent any toppings from spilling over in the oven.
- For extra crispiness, spread out the chips in a single layer before adding toppings.
- Drain and rinse beans to avoid excess moisture that could make the nachos soggy.
- Customize with your favorite toppings such as olives, jalapeños, or different cheeses.
- Serve immediately for the best texture, as nachos can become soggy when they sit.
- Leftovers can be refrigerated and reheated in the oven to maintain crispiness.

