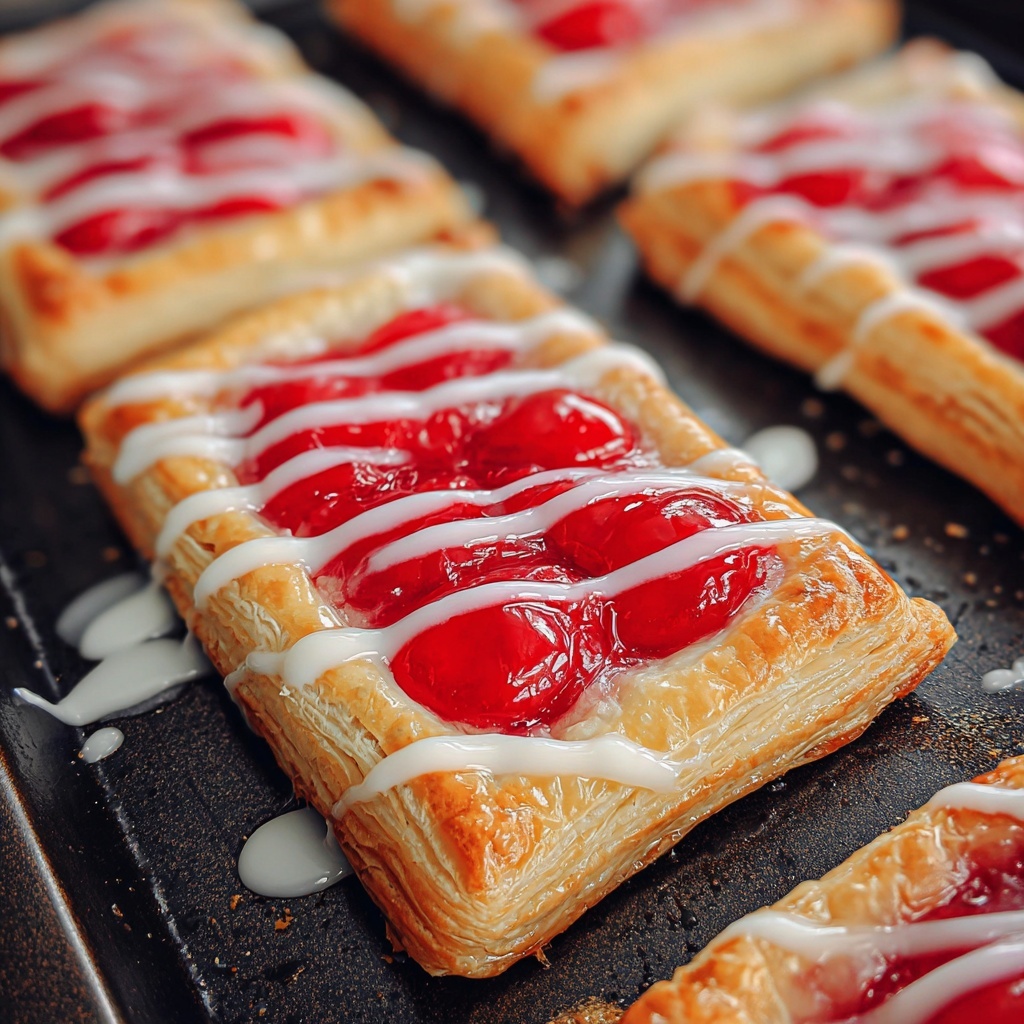
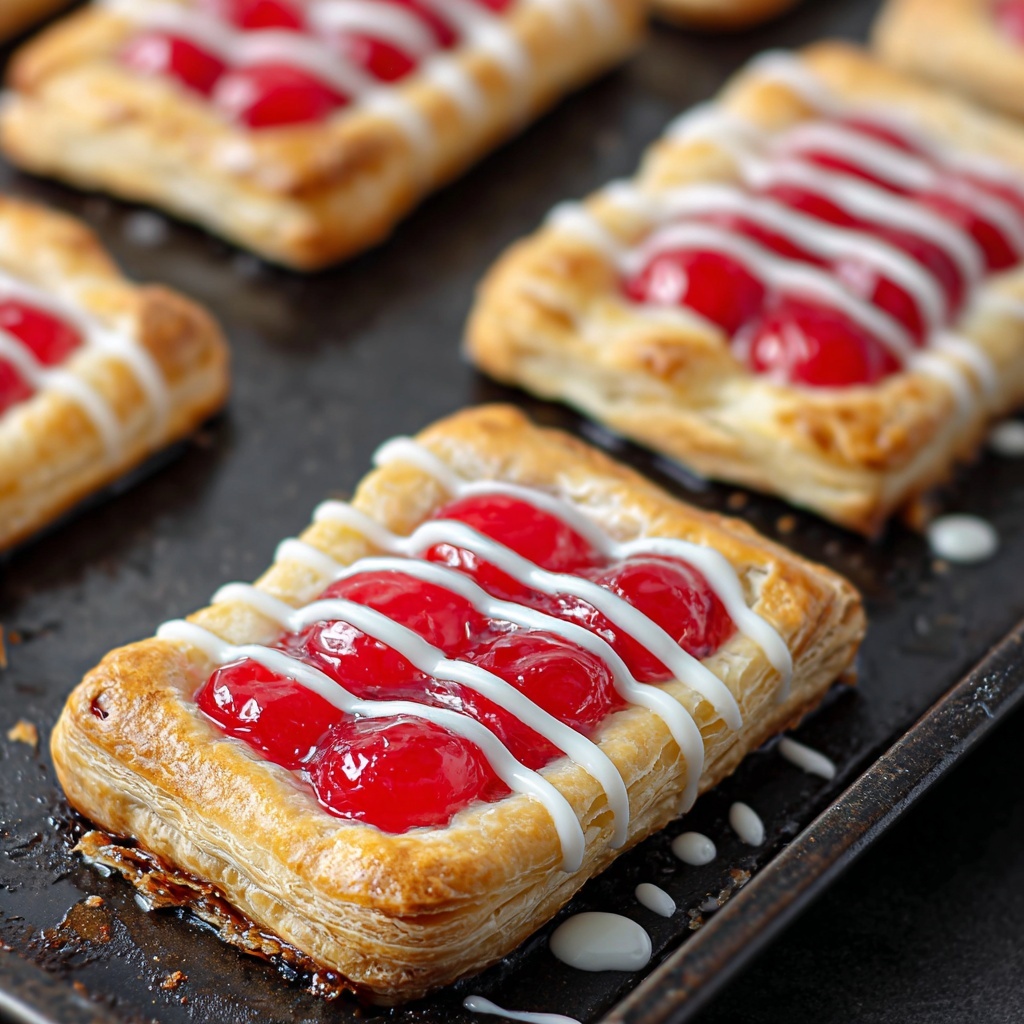
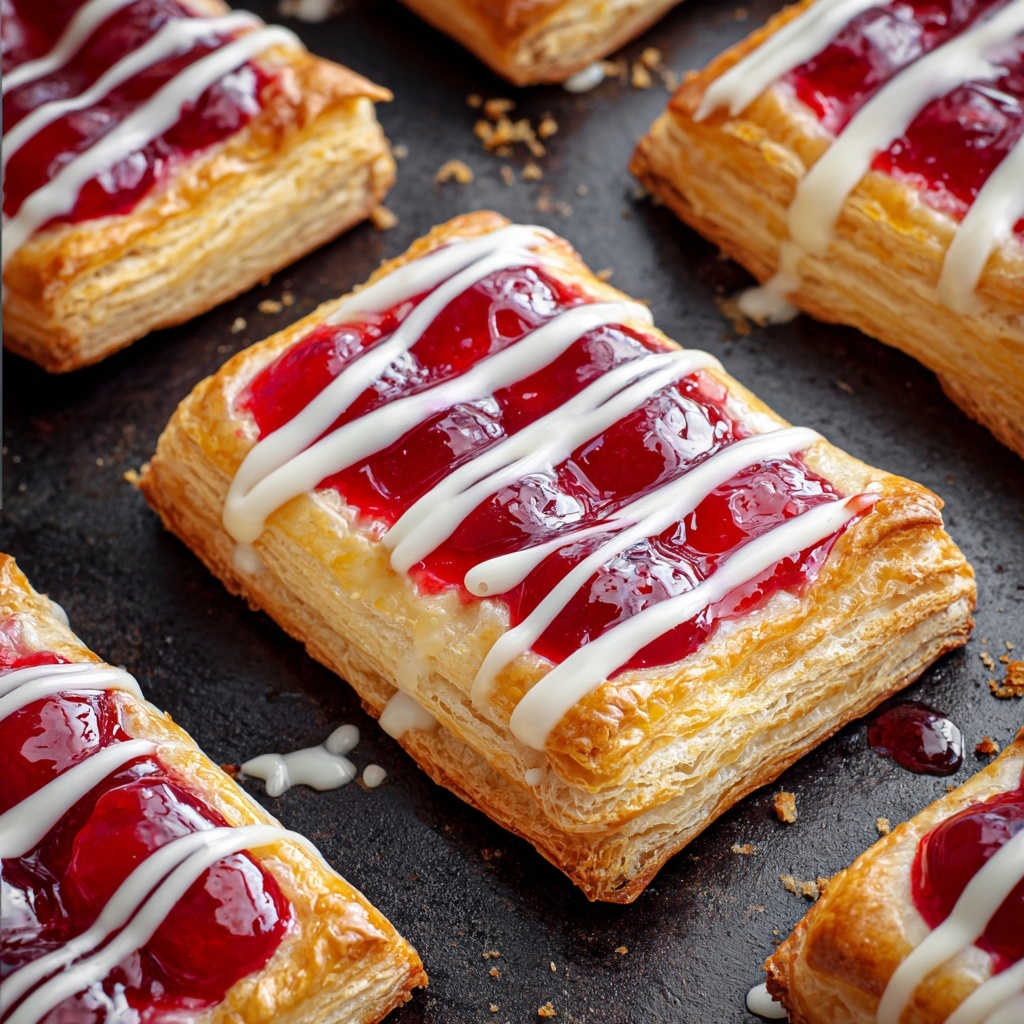
There is nothing quite like the delightful combination of flaky puff pastry, creamy tangy cream cheese, and luscious cherry filling to brighten your day. This Cherry Danish Pastries with Cream Cheese and Cherry Filling Recipe brings together all those qualities in one irresistible treat. Whether you’re serving these at a cozy brunch, a special holiday breakfast, or an indulgent snack, each bite bursts with buttery crispness, sweet tartness, and a silky smooth finish. Trust me, once you try this recipe, these decadent pastries will quickly become your new favorite way to impress friends and family without a ton of fuss.
Ingredients You’ll Need
Let’s talk about how straightforward yet essential these ingredients are to making perfect Cherry Danish Pastries with Cream Cheese and Cherry Filling Recipe. Each element plays a vital role—flaky puff pastry forms the golden crisp base, cream cheese adds creamy richness, and cherry pie filling brings vibrant sweetness and a lovely pop of color.
- 1 17.3 ounce puff pastry (thawed): Provides the flaky, buttery structure that’s key to any Danish pastry.
- 8 ounces cream cheese (softened to room temperature): Adds a creamy, tangy layer that beautifully balances the sweet cherries.
- 1/4 cup granulated sugar: Sweetens the cream cheese without overpowering it.
- 1 1/2 teaspoons vanilla extract (divided): Enhances the flavor with a warm, aromatic note.
- 1 large egg: Used in the egg wash to give the pastry a shiny, golden finish.
- 2 tablespoons water: Combined with egg to make the perfect egg wash texture.
- 1 can cherry pie filling (10 teaspoons): Bursting with sweet and tart cherries for that essential fruity center.
- 1/3 cup powdered sugar: Used to make a smooth glaze that adds the final touch of sweetness.
- 2 teaspoons heavy cream: Gives the glaze a luscious, pourable texture.
How to Make Cherry Danish Pastries with Cream Cheese and Cherry Filling Recipe
Step 1: Preheat Your Oven
Start by getting the oven hot and ready at 400 degrees Fahrenheit. It’s important to have the oven fully warmed so the puff pastry can puff up perfectly and brown beautifully right away.
Step 2: Prepare the Puff Pastry
Lay your two thawed puff pastry sheets flat on your clean workspace. Using a sharp knife, cut each sheet into six equal rectangles, giving you twelve in total. This cut brings you the ideal size for handheld pastries that are just right to savor.
Step 3: Score the Pastry Borders
Carefully score around the edges of each rectangle by cutting about halfway through the dough approximately ½ inch from the edge. This scoring lets the edges puff up gorgeously while the center remains respectfully flat to hold the cream cheese and cherry layers.
Step 4: Dock the Pastry Centers
Using a fork, prick several spots in the center of each rectangle. This little step prevents the center from rising too much as it bakes, creating that perfect space for your delicious fillings.
Step 5: Arrange the Pastries on Baking Sheets
Place your prepared pastries on one or two baking sheets with about an inch of space between each to allow for expansion as they bake. This way, each pastry cooks evenly and forms nicely browned edges.
Step 6: Mix and Spread the Cream Cheese Filling
In a medium bowl, beat together the cream cheese, granulated sugar, and one teaspoon of vanilla extract until smooth and fluffy. Spoon this luscious mixture into the center of each puff pastry piece, spreading evenly but keeping within the scored border.
Step 7: Apply the Egg Wash
Whisk together the egg and water, then gently brush this egg wash over the pastry border of each Danish. This wash is the secret to achieving that shiny, golden crust that makes these pastries look as fabulous as they taste.
Step 8: Bake to Perfection
Pop your trays into the preheated oven and bake for 18 to 20 minutes. You’ll know they’re ready when your Danish pastries are beautifully puffed and golden brown. Then, transfer them to a wire rack to cool just a bit.
Step 9: Add the Cherry Filling
While the pastries are still warm, top each one with a spoonful of cherry pie filling. Spread it gently over the cream cheese layer, covering most but not all of the cheese so each bite has a balanced flavor.
Step 10: Drizzle the Sweet Glaze
In a small bowl, whisk the powdered sugar, heavy cream, and the remaining half teaspoon of vanilla extract into a smooth glaze. Drizzle this finishing touch over the cooled Danish pastries for extra sweetness and a gorgeous presentation.
How to Serve Cherry Danish Pastries with Cream Cheese and Cherry Filling Recipe
Garnishes
Enhance your Cherry Danish Pastries with Cream Cheese and Cherry Filling Recipe by adding fresh mint leaves or a light dusting of powdered sugar just before serving. These little details bring freshness and make the pastries look even more inviting.
Side Dishes
Serve these pastries alongside a fresh fruit salad or a cup of strong coffee or tea for a perfectly balanced breakfast or brunch. The pastries’ sweetness pairs wonderfully with the bright, acidic notes of fresh fruit and the warmth of your favorite morning beverage.
Creative Ways to Present
For a special occasion, arrange your Danish pastries on a tiered dessert stand or a rustic wooden board. Add small bowls of extra cherry filling and cream cheese frosting for guests to customize their own. Presentation like this invites fun and adds an elegant touch without extra effort.
Make Ahead and Storage
Storing Leftovers
If you have leftovers from your Cherry Danish Pastries with Cream Cheese and Cherry Filling Recipe, store them in an airtight container at room temperature for up to two days. This keeps the pastry flaky and the filling deliciously fresh.
Freezing
You can freeze these pastries if you want to enjoy them later. Wrap each one individually in plastic wrap and place them in a freezer-safe bag. Frozen Danish pastries last up to a month without losing their flavor or texture.
Reheating
To enjoy your pastries warm and fresh, reheat them in a 350-degree Fahrenheit oven for about 5 to 8 minutes from frozen or room temperature. This method revives the crispness of the puff pastry while gently warming the creamy filling and cherry topping.
FAQs
Can I use fresh cherries instead of canned cherry pie filling?
Fresh cherries can be a delicious alternative, especially when in season. Just be sure to cook them down with a bit of sugar and cornstarch to create a thick, jam-like consistency similar to pie filling for best results.
Is there a substitute for cream cheese in this recipe?
While cream cheese is ideal for its flavor and texture, mascarpone or ricotta cheese can be used as substitutes. They will give a slightly different taste but still provide a lovely creamy layer in your pastries.
Can I prepare the pastries ahead of time before baking?
Yes! You can assemble the pastries and keep them covered in the refrigerator for a few hours before baking. Just bring them to room temperature and apply the egg wash right before baking for best puff and color.
How do I prevent the puff pastry from becoming soggy with the cream cheese and cherry filling?
Scoring the border and docking the center are key steps that keep the pastry from rising evenly, which helps it stay crisp. Adding the cherry filling after baking, while the pastries are still warm, prevents sogginess as well.
Can this Cherry Danish Pastries with Cream Cheese and Cherry Filling Recipe be made gluten-free?
If you use gluten-free puff pastry, this recipe can definitely be adapted for gluten-free baking. Just ensure all other ingredients, like the pie filling, do not contain gluten additives.
Final Thoughts
This Cherry Danish Pastries with Cream Cheese and Cherry Filling Recipe truly brings a little bakery magic right into your kitchen. It’s approachable, delicious, and guaranteed to brighten your table and your mood. So roll up your sleeves, invite some loved ones over, and get ready to make these crowd-pleasing treats your next favorite indulgence. You deserve it!
Print
Cherry Danish Pastries with Cream Cheese and Cherry Filling Recipe
- Prep Time: 10 minutes
- Cook Time: 20 minutes
- Total Time: 30 minutes
- Yield: 12 servings
- Category: Dessert, Breakfast Pastry
- Method: Baking
- Cuisine: American
Description
This Cherry Danish recipe features flaky, golden puff pastry filled with a creamy sweetened cream cheese layer topped with luscious cherry pie filling and a delicate vanilla glaze. Perfect for breakfast, brunch, or a delightful dessert, these pastries are easy to assemble and bake, delivering a bakery-quality treat at home.
Ingredients
Puff Pastry
- 1 17.3 ounce puff pastry (thawed)
Cream Cheese Filling
- 8 ounces cream cheese (softened to room temperature)
- 1/4 cup granulated sugar
- 1 1/2 teaspoons vanilla extract (divided)
Egg Wash
- 1 large egg
- 2 tablespoons water
Topping
- 1 can cherry pie filling (10 ounces)
Vanilla Glaze
- 1/3 cup powdered sugar
- 2 teaspoons heavy cream
- 1/2 teaspoon vanilla extract
Instructions
- Preheat the oven: Preheat your oven to 400°F (200°C) to ensure it reaches the perfect temperature for baking the puff pastry evenly and achieving a golden crust.
- Prepare puff pastry rectangles: Lay out the two sheets of thawed puff pastry on a clean work surface. Use a sharp knife to cut each sheet into 6 equal rectangles, making 12 total pieces.
- Score borders on pastries: Lightly score a half-inch border around each rectangle by cutting about halfway through the dough. This border will puff up during baking, creating structure while keeping the center flat.
- Dock the center of each pastry: Use a fork to prick several holes in the center inside each scored border. This step helps prevent the center from rising too much while baking.
- Arrange pastries on baking sheet: Place the pastries about 1 inch apart on one large or two medium baking sheets lined with parchment paper or silicone mats.
- Mix cream cheese filling: In a medium bowl, beat together the softened cream cheese, granulated sugar, and 1 teaspoon of vanilla extract with an electric mixer until smooth and creamy.
- Fill the center areas: Spoon the cream cheese mixture evenly onto the centers of each pastry, avoiding the scored border area.
- Prepare and apply egg wash: Whisk together the egg and water in a small bowl. Using a pastry brush, lightly brush the egg wash onto the half-inch border around each pastry to enhance browning and shine.
- Bake the pastries: Bake at 400°F for 18-20 minutes until the puff pastry is golden brown and puffed up around the edges. Remove from the oven and transfer to a wire rack to cool slightly.
- Add cherry filling: While warm, spoon a small amount of cherry pie filling onto the cream cheese center on each Danish, spreading it just enough to mostly cover the cream cheese layer.
- Make vanilla glaze: In a small bowl, whisk together the powdered sugar, heavy cream, and remaining ½ teaspoon vanilla extract until smooth.
- Drizzle glaze and serve: Drizzle the vanilla glaze over the cooled pastries for a sweet finishing touch. Serve warm or at room temperature.
Notes
- Ensure the puff pastry is properly thawed but still cold for best handling and puff during baking.
- You can substitute cherry pie filling with other fruit preserves or jams like raspberry or apricot.
- For extra shine, you can brush the pastries with apricot glaze after baking instead of vanilla glaze if desired.
- Store leftover Danishes in an airtight container at room temperature for up to 2 days or refrigerate for longer freshness.
- The egg wash is essential to give the borders a golden, crisp finish, so don’t skip it.


