If you are looking for a fun, quick, and surprisingly easy way to make your own creamy treat at home, this Mason Jar Ice Cream Recipe is going to become your new favorite dessert hack. Imagine shaking up rich, velvety ice cream right in a mason jar with just a few simple ingredients, then freezing it to creamy perfection. It’s a charming, hands-on method that not only delivers delicious results but also turns the process into a delightful experience you can share with friends and family. This recipe strips ice cream making down to its joyful basics while promising all the indulgence you crave.
Ingredients You’ll Need
Gathering these simple ingredients is all it takes to whip up your own creamy delight. Each component plays an essential role, from the luscious texture to the classic flavor, making every bite satisfying and smooth.
- 1 cup Heavy Whipping Cream (Cold): The rich base that guarantees a smooth, dreamy texture, keeping your ice cream luxuriously creamy.
- 3 tablespoons White Sugar (granulated): Adds just the right amount of natural sweetness without overpowering the flavors.
- 1 teaspoon Vanilla Extract: Brings that iconic, warm vanilla aroma and flavor that everyone loves in ice cream.
- 1 pinch Salt: Enhances all the other flavors and balances the sweetness perfectly.
How to Make Mason Jar Ice Cream Recipe
Step 1: Combine Your Ingredients
Start by pouring the cold heavy whipping cream into your mason jar, then add the sugar, vanilla extract, and just a pinch of salt. It’s important that the cream is cold because it will whip better as you shake the jar, helping form that soft and creamy texture we all adore.
Step 2: Shake, Shake, Shake!
Screw the lid on tightly and get ready for some fun. Shake the jar vigorously for several minutes. This is where the magic happens—the cream thickens and begins turning into ice cream as air gets incorporated with all the ingredients. You’ll know it’s ready when you dip a spoon in and see the mixture coating the back of it. It’s a great arm workout, and trust me, the satisfaction of homemade ice cream makes every shake worth it.
Step 3: Freeze to Perfection
Once you’ve got that creamy base, place the jar in your freezer for a few hours until it reaches the consistency you love. Whether you prefer it soft and spoonable right away or a bit more firm, this recipe lets you control the texture. Plus, the jar keeps your ice cream fresh and ready whenever you’re in the mood for a treat.
How to Serve Mason Jar Ice Cream Recipe
Garnishes
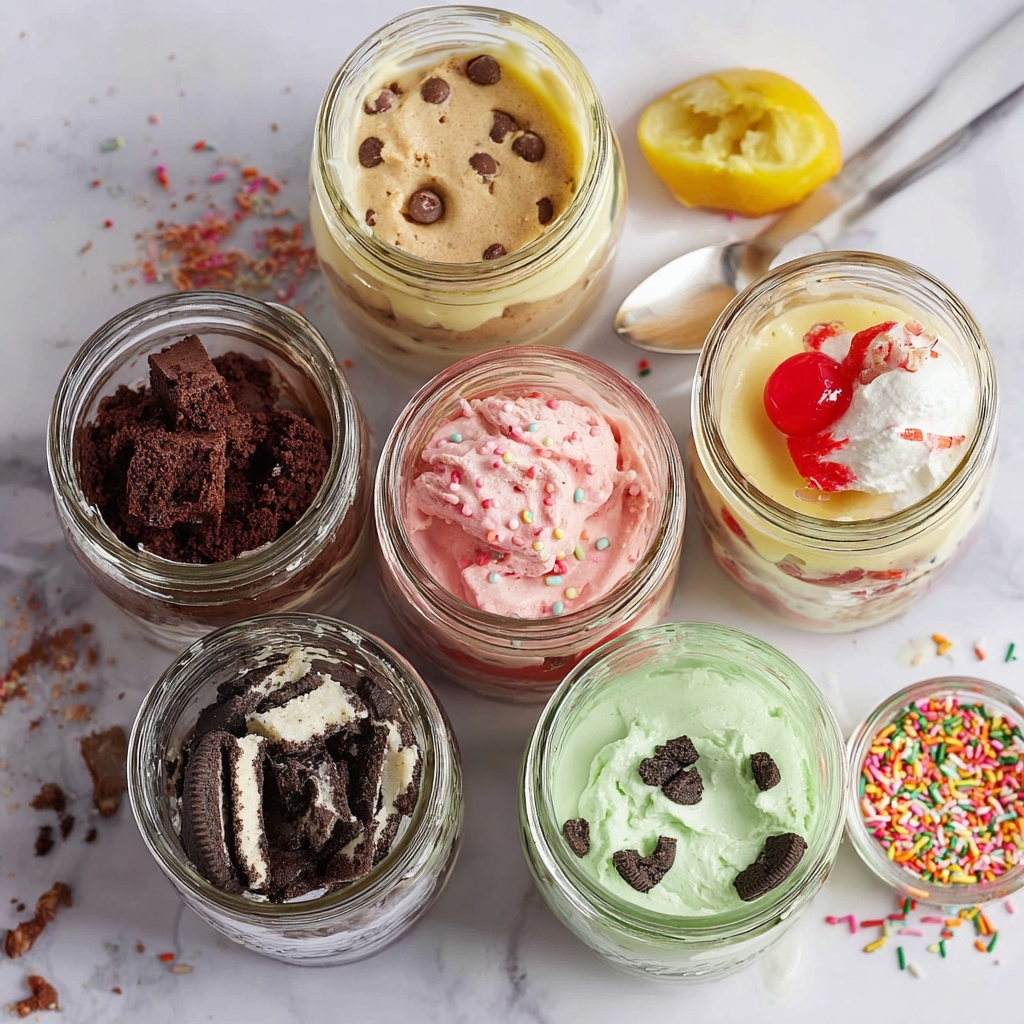
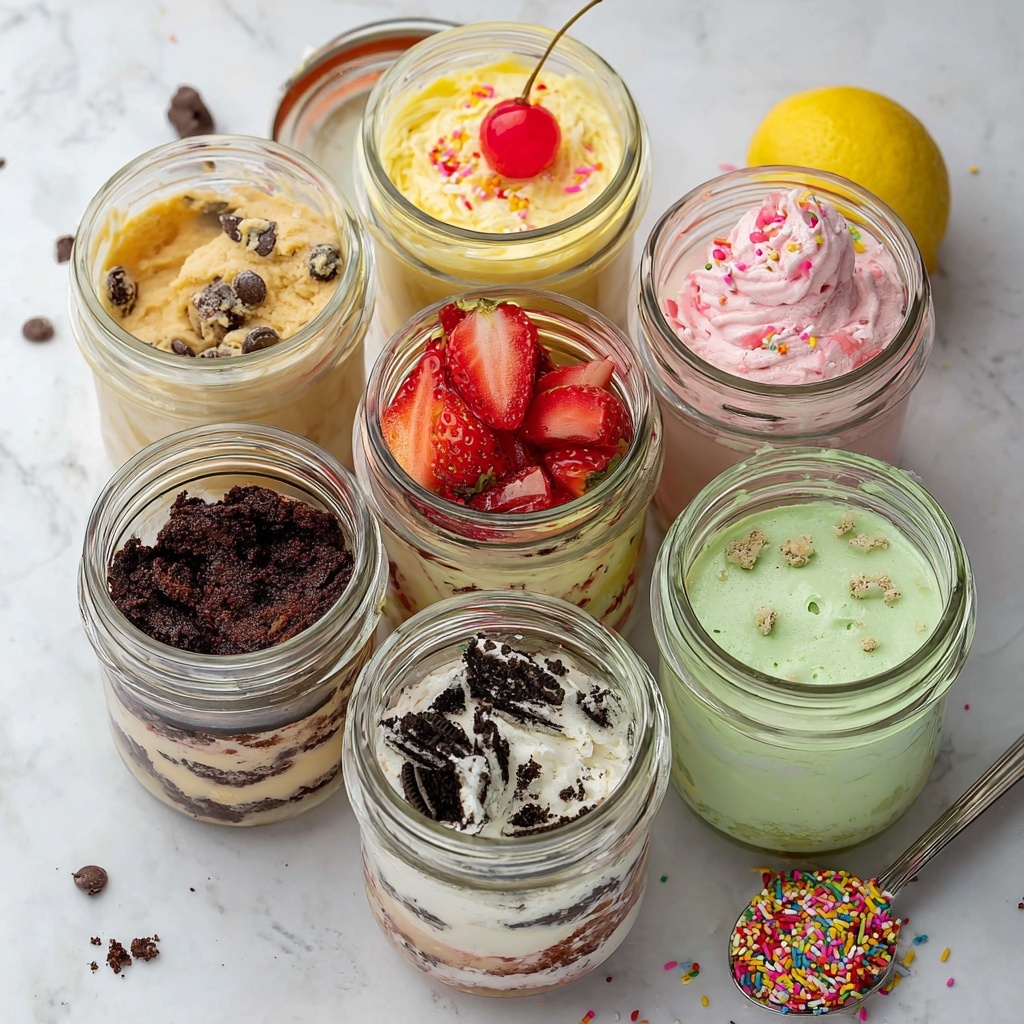
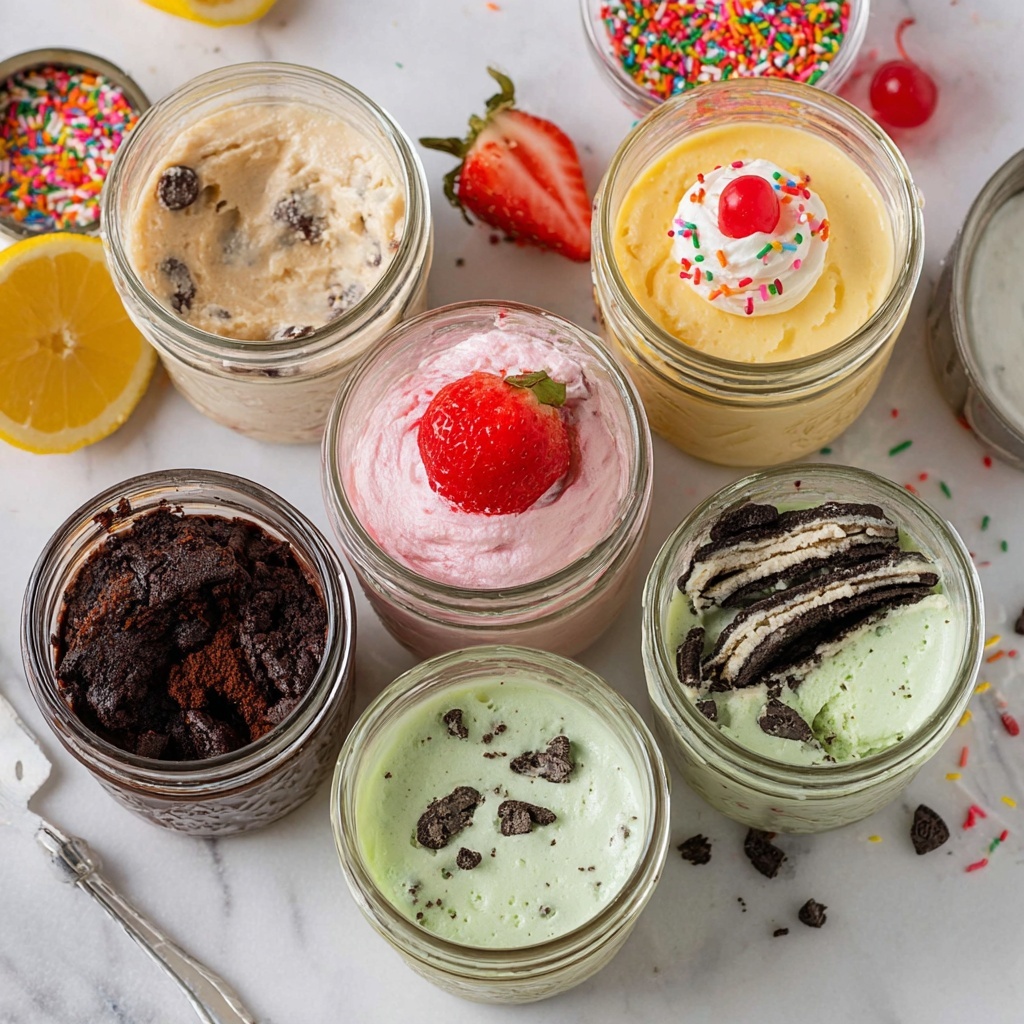
Enhance your Mason Jar Ice Cream Recipe with toppings that add extra flavor and fun textures. Try fresh berries, a drizzle of chocolate or caramel sauce, crushed nuts, or vibrant sprinkles. These little touches elevate the experience and make each serving feel festive and personalized.
Side Dishes
This ice cream pairs beautifully with crispy cookies, warm brownies, or even slices of fresh fruit. The cold creaminess complements warm, chewy, or juicy accompaniments perfectly, making dessert time feel indulgent yet balanced.
Creative Ways to Present
Serving your Mason Jar Ice Cream Recipe in the jar itself is charming and convenient, but you can also scoop it into colorful bowls or waffle cones for a more classic feel. For a fun twist, layer it with fruit compote or cookie crumbs inside the jar for an eye-catching parfait effect that’s sure to impress guests.
Make Ahead and Storage
Storing Leftovers
If you have any leftovers, keep them tightly sealed in the mason jar or transfer to an airtight container. Store it in the freezer to maintain freshness and creaminess. Give it a quick stir before serving again to restore that smooth texture.
Freezing
Your Mason Jar Ice Cream Recipe freezes beautifully and can be stored for up to two weeks without losing flavor or texture. Just be sure to keep the lid firmly shut to protect it from absorbing any freezer odors or developing ice crystals.
Reheating
Since this is ice cream, reheating isn’t necessary. If it gets too firm in the freezer, simply let it sit out at room temperature for 5 to 10 minutes to soften before digging in. That’s the beauty of this recipe—it’s ready when you are, with no complicated prep required.
FAQs
Can I use a different type of cream in this Mason Jar Ice Cream Recipe?
Heavy whipping cream is best because of its high fat content, which helps achieve that rich, creamy texture. Using lighter creams or milk will result in a thinner consistency, so it’s recommended to stick with heavy cream for optimal results.
How long do I need to shake the jar?
Typically, shaking for about 5 to 7 minutes does the trick, but it depends on how vigorously you shake. You’re aiming for the mixture to thicken and coat the back of a spoon. It might take a little longer at first, but with practice, you’ll get the timing just right.
Can I add mix-ins like chocolate chips or fruit?
Absolutely! Once you’ve shaken the mixture and it’s thickened, you can gently fold in small mix-ins before freezing. Just be careful not to over-shake after adding extras to maintain the texture.
What size mason jar should I use?
A pint-sized (16 oz) mason jar works perfectly for this recipe. It leaves enough space for shaking the ingredients without spilling and freezes evenly for great texture.
Can kids help make this recipe?
Definitely! This Mason Jar Ice Cream Recipe is a wonderful activity for kids—they love shaking the jar and seeing the transformation happen. Just make sure the lid is on tight and supervise the shaking to avoid any spills.
Final Thoughts
This Mason Jar Ice Cream Recipe is not only delicious but also incredibly rewarding to make, turning a few simple ingredients into a creamy delight you can enjoy anytime. It’s perfect for a quick sweet fix or a fun project to share with loved ones. Give it a try—you’ll be amazed at how easy and satisfying homemade ice cream can be!
Print
Mason Jar Ice Cream Recipe
- Prep Time: 5 minutes
- Cook Time: 0 minutes
- Total Time: 5 minutes prep + freezing time
- Yield: 2 to 2.2 servings
- Category: Dessert
- Method: No-Cook
- Cuisine: American
- Diet: Vegetarian
Description
This Mason Jar Ice Cream recipe is a quick and easy no-churn dessert that you can make at home with just a few simple ingredients. Using a mason jar, you can shake up the mixture to create a creamy, delicious homemade ice cream without the need for an ice cream maker. Perfect for a fun kitchen activity or a last-minute treat, this recipe yields about two servings of smooth vanilla ice cream.
Ingredients
Ice Cream Base
- 1 cup Heavy Whipping Cream (Cold)
- 3 tablespoons White granulated Sugar
- 1 teaspoon Vanilla Extract
- 1 pinch Salt
Instructions
- Add Ingredients: Pour the cold heavy whipping cream, sugar, vanilla extract, and a pinch of salt into a clean mason jar.
- Shake the Mixture: Firmly screw on the lid and shake the jar vigorously for several minutes. Continue shaking until the mixture thickens and when you dip a spoon in, it coats the back of the spoon smoothly.
- Freeze the Ice Cream: Place the mason jar in the freezer and let it freeze for several hours or until the ice cream reaches your desired consistency.
Notes
- Make sure the heavy whipping cream is cold for the best results.
- Shaking the jar vigorously is key to properly whipping the cream inside the jar.
- You can customize the ice cream by adding mix-ins such as chocolate chips, fruit, or nuts before freezing.
- Use a tightly sealing lid to prevent ice crystals from forming during freezing.
- Allow the ice cream to sit at room temperature for a few minutes before serving for easier scooping.

