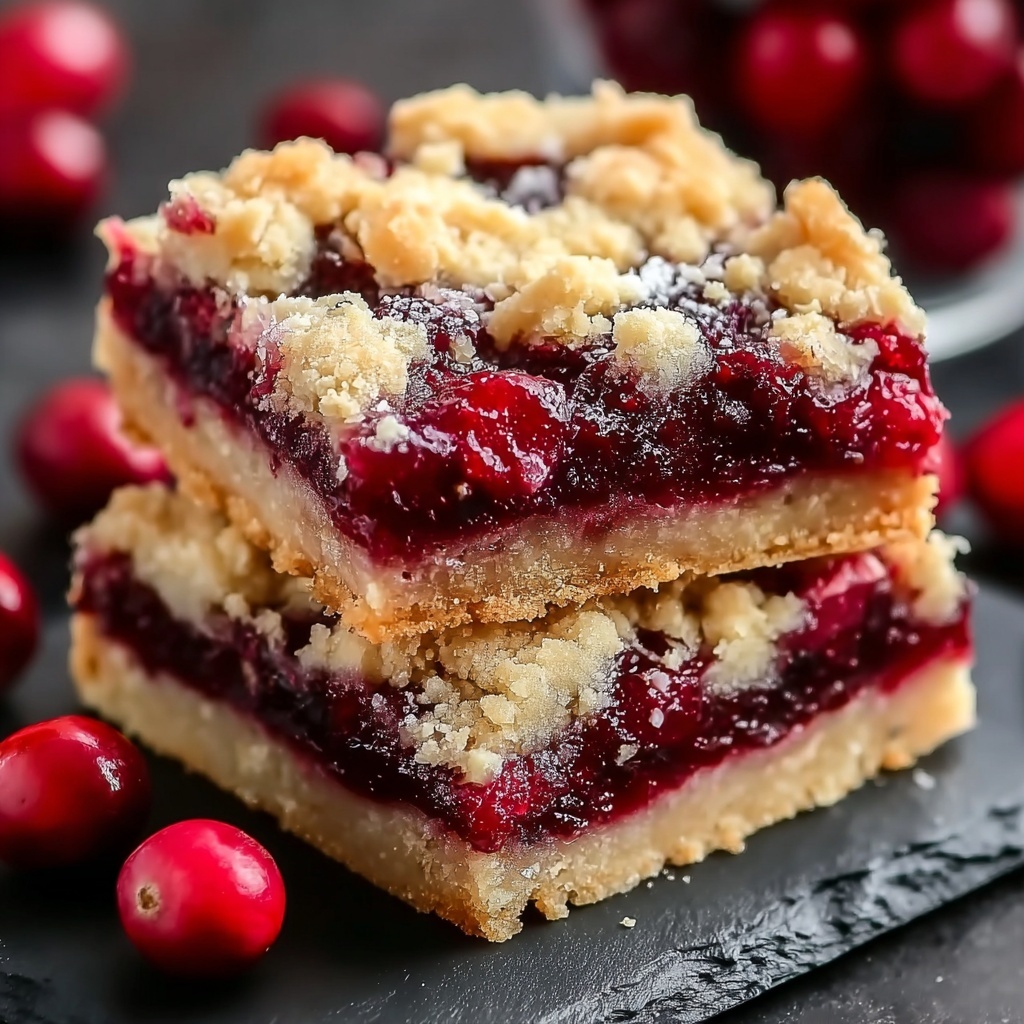
If you love the sweet tang of cherries baked into a buttery, tender crust, then you are going to adore this Easy Cherry Pie Bars Recipe. These bars are an irresistible treat that combines the rich flavors of classic cherry pie with a simple baking method perfect for any skill level. Whether you’re looking for a cozy dessert to share with friends or a festive addition to a party spread, these cherry pie bars deliver that perfect balance of sweetness, texture, and charm without any fuss. Get ready to fall in love with a new favorite that makes enjoying cherry pie even easier!
Ingredients You’ll Need
The beauty of this Easy Cherry Pie Bars Recipe is how it uses straightforward, pantry-friendly ingredients that work together like magic. Each component adds something special: from the creamy butter that brings moistness and richness, to the almond extract that gives a surprisingly delightful flair.
- 1 cup softened butter: Essential for that tender crumb and rich buttery flavor.
- 1 cup sugar: Adds the perfect sweetness to balance the tart cherries.
- 2 large eggs (room temperature): Binds the ingredients together and gives structure.
- 1 tsp almond extract: Gives a lovely hint of nuttiness that pairs beautifully with cherry.
- 2 ½ cups all-purpose flour: The backbone of the bars, giving them structure and crumb.
- 1 (21 oz) can cherry pie filling: The star of the show, delivering juicy cherries and vibrant color.
How to Make Easy Cherry Pie Bars Recipe
Step 1: Preheat and Prepare
Start by preheating your oven to 350°F (175°C). This ensures your oven is at just the right temperature when it’s time to bake, helping your cherry pie bars cook evenly with that perfect golden crust.
Step 2: Cream Butter and Sugar
In a mixing bowl, beat the softened butter and sugar together until the mixture is light and fluffy. This step is key in creating a tender texture, as it incorporates air into the mixture, making the bars wonderfully soft.
Step 3: Add Eggs and Extracts
Next, add the eggs one at a time, mixing well after each addition. This prevents curdling and ensures your batter stays smooth. Then stir in the almond extract along with vanilla extract, infusing the batter with warm, aromatic undertones.
Step 4: Combine Dry Ingredients
In a separate bowl, whisk together the all-purpose flour and a pinch of salt. Gradually add this into your wet mix, stirring until just combined—don’t overmix! Overworking the dough can make your bars tough instead of tender.
Step 5: Assemble the Bars
Press half of your dough evenly into a greased 9×13 inch baking pan. This forms the sturdy base for your cherry filling. Then spread the cherry pie filling evenly over the dough, ensuring every bite will have juicy cherries.
Step 6: Add the Topping
Drop spoonfuls of the remaining dough over the cherry layer, allowing some of the cherries to peek through. This crumbly top gives the bars a charming, homemade look and adds delightful texture contrasts.
Step 7: Bake to Perfection
Bake the bars in the preheated oven for 35 to 40 minutes, or until the top turns a beautiful golden brown. The kitchen will smell heavenly, signaling that your Easy Cherry Pie Bars Recipe is almost ready!
Step 8: Cool and Glaze
Let the bars cool completely before adding a simple glaze made from confectioners’ sugar, almond extract, vanilla, and a splash of milk. This glaze adds a smooth sweetness and pretty finish that’s hard to resist.
How to Serve Easy Cherry Pie Bars Recipe
Garnishes
For an extra touch, sprinkle some toasted sliced almonds or a light dusting of powdered sugar over the bars. Fresh cherries on top can enhance both the visual appeal and cherry flavor, making them look as good as they taste.
Side Dishes
These cherry pie bars pair beautifully with a scoop of vanilla ice cream or a dollop of freshly whipped cream. If you want something lighter, serve with a side of fresh fruit salad to complement the rich, sweet flavors.
Creative Ways to Present
Cut your cherry pie bars into bite-sized squares or triangles for a charming dessert platter. Layer them between sheets of parchment paper in a pretty box for gifting. You can also drizzle extra glaze or even melted white chocolate for a festive touch at celebrations.
Make Ahead and Storage
Storing Leftovers
Once cooled, store your cherry pie bars in an airtight container at room temperature for up to two days. For longer freshness, keep them in the refrigerator where they’ll stay moist and delicious for around a week.
Freezing
These bars freeze wonderfully! Wrap individual pieces tightly in plastic wrap, then place them in a freezer bag or container. When you’re ready to enjoy, thaw at room temperature or gently warm in the oven to revive their fresh-baked charm.
Reheating
For a warm treat, reheat your cherry pie bars in a low oven (about 300°F) for 10 minutes or until warmed through. This brings back that freshly baked feeling, making every bite extra comforting.
FAQs
Can I use fresh cherries instead of canned pie filling?
You certainly can! Just cook fresh pitted cherries with sugar and a little cornstarch until bubbly to mimic pie filling. This will give your bars a fresher cherry taste, though the texture may be slightly different.
Is almond extract necessary in the recipe?
While almond extract adds a distinctive nutty aroma that enhances the cherry flavor, you can substitute with vanilla extract if preferred. However, the almond extract truly makes these bars special.
Can I make these bars gluten-free?
Absolutely! Try replacing the all-purpose flour with a gluten-free flour blend that measures cup-for-cup, ensuring the texture stays as delicious as the original.
How long do these cherry pie bars last?
Stored properly, they keep well for up to one week refrigerated. Beyond that, freezing is your best option to maintain freshness and flavor.
Can I double this recipe for a larger batch?
Yes, simply double the ingredients and bake in a larger pan or in two 9×13 pans. Just keep an eye on the baking time, as larger batches may take a bit longer to cook through.
Final Thoughts
This Easy Cherry Pie Bars Recipe is a true winner in my kitchen, combining simplicity with delicious results every time. It’s the kind of dessert that invites smiles and second helpings, perfect for sharing or treating yourself. Give it a try on your next baking day—you might just make it a staple in your recipe collection!
Print
Easy Cherry Pie Bars Recipe
- Prep Time: 15 minutes
- Cook Time: 35 minutes
- Total Time: 50 minutes
- Yield: 12 bars (approximately 12 servings)
- Category: Dessert
- Method: Baking
- Cuisine: American
Description
These Easy Cherry Pie Bars combine a tender, buttery crust with sweet and tart cherry pie filling, making a delightful and convenient dessert perfect for any occasion. With a simple preparation and baking process, these bars are a crowd-pleaser that can be served at gatherings or enjoyed as a sweet treat at home.
Ingredients
For the Dough
- 1 cup softened butter
- 1 cup sugar
- 2 large eggs (room temperature)
- 1 tsp almond extract
- 2 ½ cups all-purpose flour
- ½ tsp salt
For the Filling
- 1 (21 oz) can cherry pie filling
For the Glaze
- Confectioners’ sugar (about ¾ cup)
- ¼ tsp almond extract
- ½ tsp vanilla extract
- 1–2 tbsp milk
Instructions
- Preheat Oven: Preheat your oven to 350°F (175°C) to prepare for baking the bars evenly.
- Cream Butter and Sugar: In a mixing bowl, cream together the softened butter and sugar until the mixture is light and fluffy. This ensures a tender crust.
- Add Eggs and Extracts: Add the eggs one at a time, mixing thoroughly after each addition, then stir in almond and vanilla extracts for flavor.
- Combine Dry Ingredients: In another bowl, whisk the flour and salt together; gradually incorporate this into the wet ingredients until just combined, avoiding overmixing for a tender texture.
- Press Dough Base: Press half of the dough evenly into a greased 9×13 inch baking pan to form the crust base.
- Add Cherry Filling: Spread the cherry pie filling evenly over the pressed dough to ensure balanced flavor in every bar.
- Top with Remaining Dough: Drop spoonfuls of the remaining dough over the filling, allowing some of the cherry filling to peek through for a rustic look.
- Bake: Bake the bars in the preheated oven for 35–40 minutes, or until the top is golden brown and the filling is bubbling.
- Cool and Glaze: Allow the bars to cool completely, then drizzle with a glaze made from confectioners’ sugar, almond extract, vanilla, and milk to add sweetness and shine.
Notes
- Ensure the butter is softened to room temperature for easier creaming with sugar.
- Do not overmix the flour to keep the bars tender.
- You can substitute almond extract with vanilla extract if desired.
- For a thicker glaze, reduce the amount of milk added.
- Store bars in an airtight container at room temperature for up to 3 days or refrigerate for up to a week.
