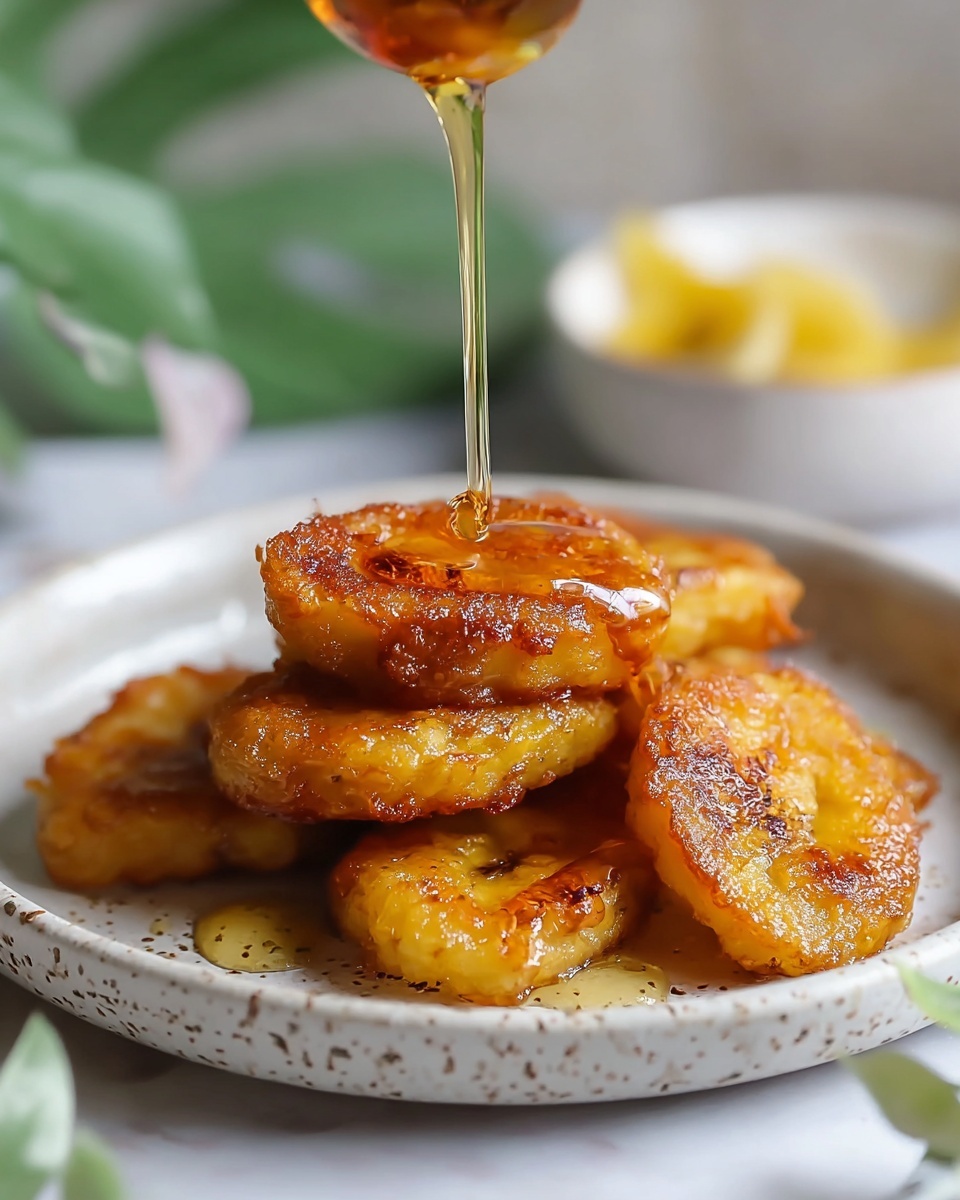
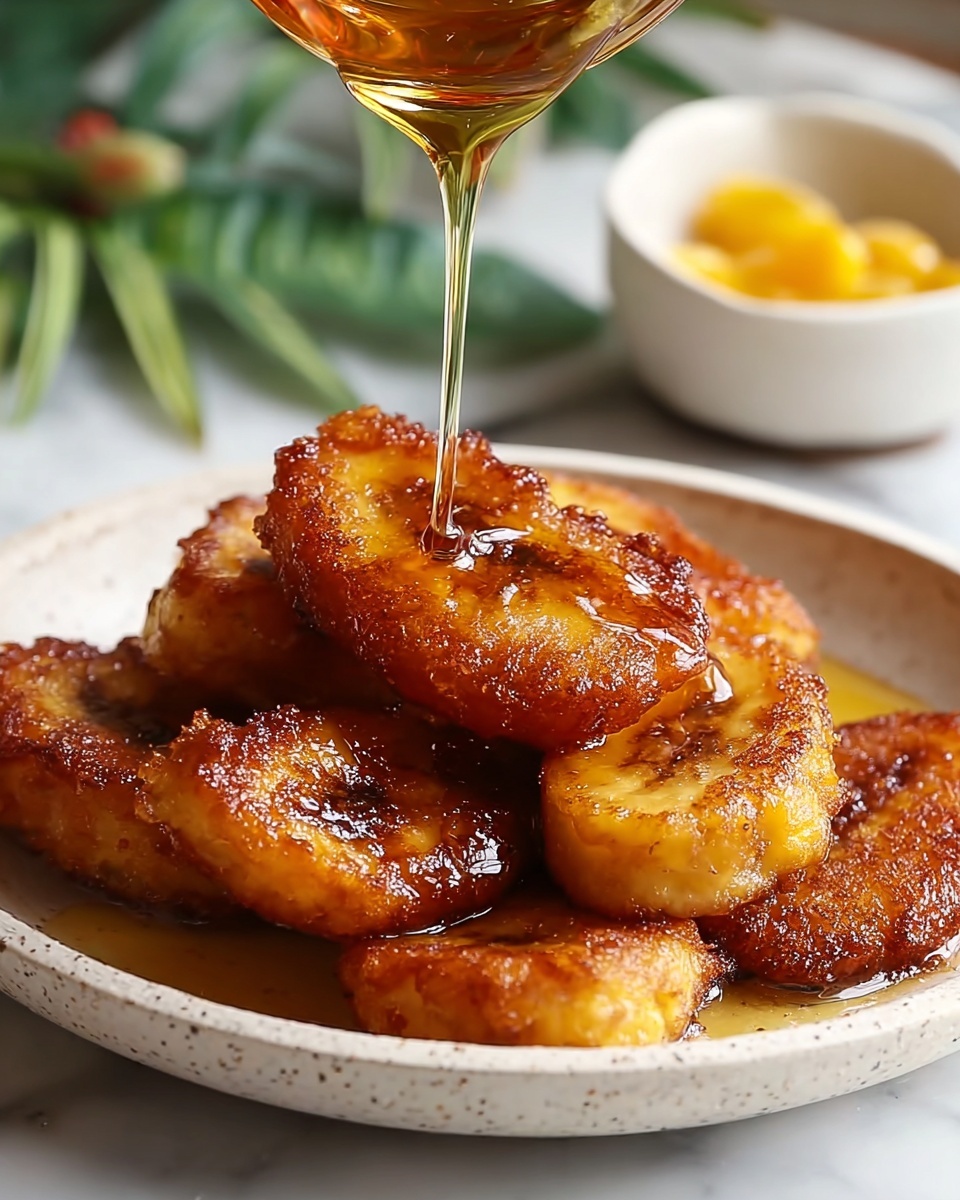
If you’re on the hunt for a sweet treat that feels just like a warm hug on a plate, then this Fried Honey Fritters Recipe is exactly what you need. These golden, crispy fritters boast a perfect balance of crunchy exterior and soft, fluffy interior, all wrapped in a drizzle of luscious honey sweetness. It’s an irresistible combination that makes them perfect for breakfast, dessert, or an anytime indulgence. Trust me, once you try this Fried Honey Fritters Recipe, it will quickly become one of your go-to favorites for sharing with friends and family.
Ingredients You’ll Need
The magic of this Fried Honey Fritters Recipe really comes down to a simple handful of ingredients, but each one is essential in building flavor, texture, and that gorgeous golden color that screams deliciousness. Here’s what you’ll need to whip up these honey-drenched delights:
- All-purpose flour: The sturdy base that gives structure to your fritters for a tender bite.
- Baking powder: The secret to getting those light, airy pockets inside every fritter.
- Granulated sugar: Adds just a touch of sweetness to complement the honey glaze.
- Salt: Enhances all the flavors and balances the sweetness beautifully.
- Milk: Helps create a smooth batter that’s easy to fry to perfection.
- Egg: Binds the ingredients together and adds richness to each bite.
- Honey: The showstopper topping—it infuses each fritter with a natural floral sweetness.
- Vegetable oil: For frying, this neutral oil ensures the fritters get crispy without overpowering flavor.
- Cinnamon (optional): Adds a warm, cozy note that pairs wonderfully with honey.
How to Make Fried Honey Fritters Recipe
Step 1: Prepare the batter
Start by combining your dry ingredients—flour, baking powder, sugar, salt, and cinnamon if you’re using it—in a large bowl. In a separate bowl, whisk together the milk and egg until smooth, then gradually mix the wet into the dry until you have a smooth, thick batter. It should be easy to scoop but thick enough to hold shape in the hot oil.
Step 2: Heat the oil
Pour vegetable oil into a deep skillet or saucepan to a depth of about 2 inches. Heat the oil over medium heat until it reaches about 350°F. If you don’t have a thermometer, drop a small bit of batter in the oil—if it sizzles and rises to the surface quickly, you’re ready to fry!
Step 3: Fry the fritters
Using a small spoon or cookie scoop, carefully drop spoonfuls of batter into the hot oil. Don’t overcrowd the pan; fry in batches for best results. Let the fritters cook for about 2 to 3 minutes on each side or until they’re deep golden brown and crispy on the outside.
Step 4: Drain and honey glaze
Remove the fritters with a slotted spoon and place them on paper towels to drain excess oil. While they’re still warm, generously drizzle honey over the top so the fritters soak up that sticky, sweet goodness that really makes this Fried Honey Fritters Recipe sing.
How to Serve Fried Honey Fritters Recipe

Garnishes
Sprinkle freshly chopped nuts like pistachios or walnuts on top for a crunch contrast, or dust with powdered sugar for an elegant touch. A pinch of cinnamon can intensify the warm flavors and make each bite feel extra special.
Side Dishes
Fritters pair wonderfully with fresh fruit like sliced berries or citrus segments that add brightness to the plate. For a truly indulgent experience, serve alongside a scoop of vanilla ice cream or a side of creamy Greek yogurt.
Creative Ways to Present
Try serving your fritters stacked like a mini tower drizzled with honey and a few sprigs of mint for a lovely presentation. You can also turn this Fried Honey Fritters Recipe into bite-sized desserts by making smaller fritters and threading them onto skewers with fresh fruit for a playful party treat.
Make Ahead and Storage
Storing Leftovers
If you happen to have leftovers, store them in an airtight container at room temperature for up to two days. This keeps the fritters crisp and flavorful without getting soggy, especially if you keep the honey drizzle separate until just before serving.
Freezing
For longer storage, freeze your cooked and cooled fritters on a baking sheet until firm, then transfer to a freezer-safe bag or container. They’ll keep well for up to one month and can be quickly reheated in a toaster oven or air fryer for that freshly-fried crispiness.
Reheating
To reheat your fritters, avoid the microwave if possible. Instead, warm them in a 350°F oven for about 5 to 7 minutes or pop them in a hot skillet for a minute or two per side. This method revitalizes their crunch and keeps them tasting freshly made.
FAQs
Can I use a different sweetener instead of honey?
Absolutely! Maple syrup or agave nectar work well as alternatives to honey, although each will add a slightly different flavor profile. Honey remains the classic choice that highlights the warm, earthy notes of the fritters the best.
Are these fritters gluten-free?
This Fried Honey Fritters Recipe relies on all-purpose flour, which contains gluten. However, you can experiment with a gluten-free flour blend adjusted for frying, but results might vary slightly in texture.
Can I bake these instead of frying?
While frying is what gives these fritters their signature crispiness, you can try baking them at 400°F on a greased sheet for about 15–20 minutes. Keep in mind that baking will produce a softer texture rather than that perfect crunch.
Is it important to use hot oil for frying?
Yes! Proper oil temperature is crucial. If the oil is too cool, the fritters will absorb too much oil and become greasy. Too hot, and the outside may burn before the inside cooks through. Aim for around 350°F for the best results.
What’s the best way to serve these for a crowd?
Make mini fritters that are easy to grab and eat with your hands, place them on a platter with small bowls of honey and garnishes on the side. This setup invites guests to customize their treats and makes serving stress-free.
Final Thoughts
There’s something so comforting and joyful about making and sharing this Fried Honey Fritters Recipe with the people you love. The combination of crispy, tender fritters soaked in sweet honey is a simple pleasure that never gets old. Give this recipe a try—you’ll quickly see why it has a special place in my heart and kitchen. Happy frying!
Print
Fried Honey Fritters Recipe
- Prep Time: 20 minutes
- Cook Time: 20 minutes
- Total Time: 40 minutes
- Yield: 12 cupcakes
- Category: Dessert
- Method: Baking
- Cuisine: American
- Diet: Vegetarian
Description
Ultimate Double Chocolate Cupcakes are moist, rich, and bursting with chocolate flavor, perfect for any chocolate lover. These cupcakes combine cocoa powder and semi-sweet chocolate chips for double the chocolate goodness, topped with a creamy chocolate frosting that’s smooth and fluffy. Ideal for celebrations or a decadent treat at home, this recipe is straightforward with a tender crumb and irresistible taste.
Ingredients
Cupcake Batter
- 1 cup all-purpose flour
- 1/2 cup unsweetened cocoa powder
- 1 teaspoon baking powder
- 1/2 teaspoon baking soda
- 1/4 teaspoon salt
- 1/2 cup buttermilk, room temperature
- 1/2 cup vegetable oil
- 2 large eggs, room temperature
- 1 teaspoon vanilla extract
- 1 cup granulated sugar
- 1/2 cup hot water or brewed coffee
- 3/4 cup semi-sweet chocolate chips
Chocolate Frosting
- 1/2 cup unsalted butter, softened
- 1/2 cup unsweetened cocoa powder
- 2 cups powdered sugar
- 1/4 cup heavy cream, plus more as needed
- 1/2 teaspoon vanilla extract
- Pinch of salt
Instructions
- Preheat Oven and Prepare Pan: Preheat your oven to 350°F (175°C) and line a 12-cup muffin pan with paper liners to ensure the cupcakes bake evenly and are easy to remove.
- Combine Dry Ingredients: In a medium bowl, whisk together all-purpose flour, unsweetened cocoa powder, baking powder, baking soda, and salt. This step ensures the leavening agents and cocoa are evenly distributed.
- Mix Wet Ingredients: In a large bowl, whisk buttermilk, vegetable oil, eggs, vanilla extract, and granulated sugar together until smooth and well combined, creating a smooth base for the batter.
- Incorporate Dry Ingredients: Slowly add the dry ingredient mixture to the wet ingredients, stirring gently to combine without overmixing to keep the cupcakes tender.
- Add Hot Liquid: Mix in the hot water or brewed coffee carefully; this thins the batter slightly and enhances the chocolate flavor, resulting in moist cupcakes.
- Fold in Chocolate Chips: Gently fold in the semi-sweet chocolate chips to distribute them evenly throughout the batter for bursts of melted chocolate.
- Fill Cupcake Liners: Divide the batter evenly into the paper-lined muffin pan, filling each about two-thirds full to allow room for rising.
- Bake Cupcakes: Bake in the preheated oven for 18 to 22 minutes, or until a toothpick inserted into the center comes out clean, signaling they are fully baked.
- Cool Completely: Remove the cupcakes from the oven and allow them to cool completely in the pan before frosting to prevent the frosting from melting.
- Prepare Frosting: Beat softened butter and cocoa powder together until smooth. Gradually add powdered sugar, alternating with heavy cream, beating until the frosting is fluffy and smooth. Add vanilla extract and a pinch of salt, then beat again. If needed, add more heavy cream for desired consistency.
- Frost Cupcakes: Using a piping bag or spatula, frost the cooled cupcakes evenly. Optionally, garnish with extra chocolate chips or chocolate shavings for an extra chocolate touch.
Notes
- For a deeper chocolate flavor, use brewed coffee instead of hot water in the batter.
- These cupcakes freeze well; frost them after thawing to maintain the best texture.
- Room temperature ingredients ensure a smooth batter and better cupcake texture.
- Adjust heavy cream quantity in frosting to achieve desired consistency.

