
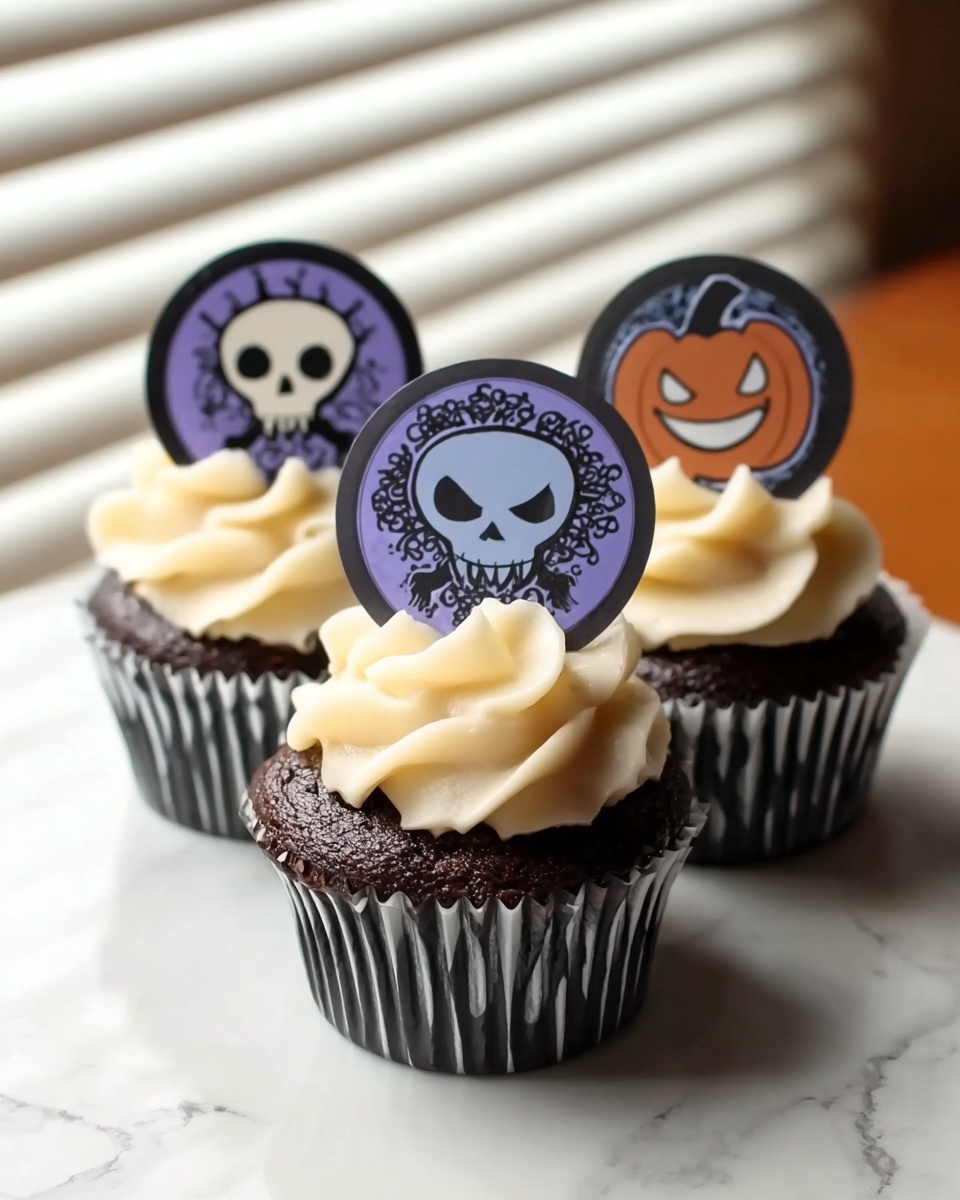
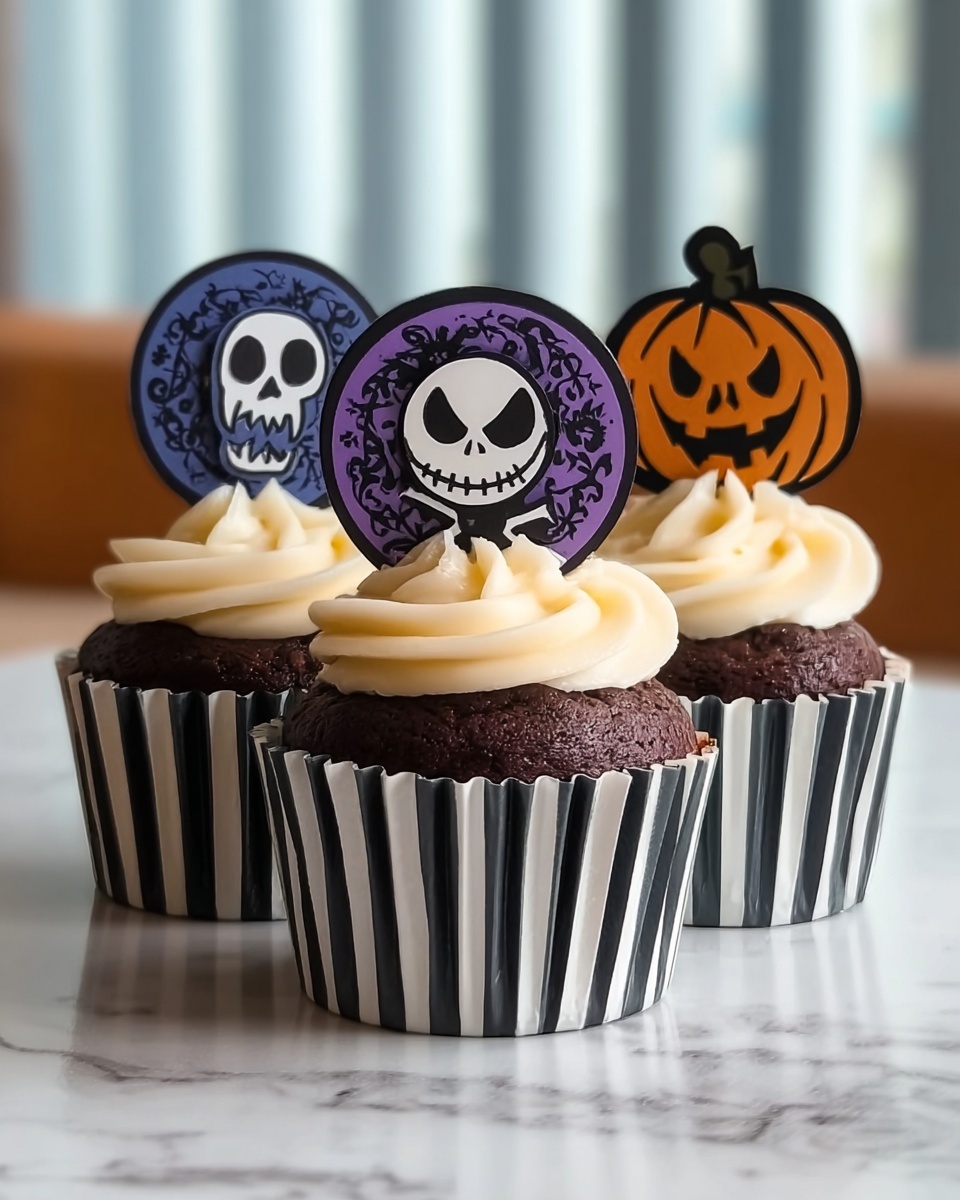
If you are looking for a festive and fun way to celebrate the spooky season, the Stamped Halloween Cupcakes Recipe is an absolute must-try. These moist chocolate cupcakes come alive with vibrant, colorful buttercream and charming fondant designs that you can customize with Halloween-themed stamps. Whether you’re hosting a party or just want to delight your family with a seasonal treat, this recipe blends the perfect balance of rich chocolate flavor and playful decoration, making every bite a little celebration of Halloween joy.
Ingredients You’ll Need
The beauty of this Stamped Halloween Cupcakes Recipe lies in its simple yet essential ingredients. Each one plays an important role in creating that perfect cupcake texture and eye-catching appearance that’s so much fun to make and even more fun to eat.
- Chocolate cake mix: The base for moist and chocolaty cupcakes that everyone loves.
- Large eggs: These bind the ingredients together and add richness.
- Vegetable oil: Keeps the cupcakes tender and soft.
- Water: Adds moisture to ensure the perfect crumb.
- Unsalted butter (softened): Creates a creamy, smooth buttercream frosting.
- Powdered sugar: Sweetens and thickens the frosting perfectly.
- Heavy cream: Adds lightness and fluffy texture to the frosting.
- Vanilla extract: Enhances flavor with a warm, inviting note.
- Food coloring (orange, purple, black): Brings those classic Halloween colors to your frosting.
- Halloween-themed fondant stamps or cookie stamps: To create beautifully imprinted festive designs.
- White fondant: The canvas for your stamped Halloween decorations.
- Cornstarch: Prevents sticking when rolling out fondant.
- Cupcake liners: Makes removing and serving cupcakes easier and mess-free.
How to Make Stamped Halloween Cupcakes Recipe
Step 1: Prepare and Bake the Cupcakes
Start by preheating your oven to 350°F (175°C) and lining a muffin tin with cupcake liners. In a large bowl, combine the chocolate cake mix with eggs, vegetable oil, and water according to the package instructions. Mixing it until smooth will ensure your cupcakes are irresistibly tender. Pour the batter evenly into the liners, filling each about two-thirds full, so they rise perfectly. Bake for 18 to 20 minutes, and test with a toothpick to make sure it comes out clean. Once baked, let your cupcakes cool completely on a wire rack to get ready for frosting and decorating.
Step 2: Whip Up the Buttercream Frosting
While the cupcakes cool, prepare the buttercream frosting by beating softened butter until it’s creamy and smooth. Gradually add powdered sugar, then vanilla extract and heavy cream, continuing to beat until you achieve a fluffy, light texture. Divide the frosting into different bowls and add food coloring — orange and purple work wonderfully for Halloween vibes. This colorful buttercream will not only add flavor but also an irresistible visual pop to your cupcakes.
Step 3: Frost the Cupcakes
Using a piping bag or a simple spatula, generously frost your cooled cupcakes. The bright orange and purple hues provide a colorful canvas that’s perfect for the final decorative step. Don’t worry about perfection here — the goal is to spread some joyful seasonal colors that complement your stamped fondant decorations.
Step 4: Stamp and Decorate the Fondant Toppers
Lightly dust your work surface with cornstarch and roll out the white fondant to about an eighth of an inch thick. Use your Halloween-themed stamps to imprint spooky shapes like bats, pumpkins, and ghosts into the fondant. Carefully cut out shapes or circles that fit the cupcake tops. Gently press these stamped fondant pieces onto the frosted cupcakes, creating impressively detailed decorations that elevate these cupcakes from simple desserts to delightful Halloween treats.
How to Serve Stamped Halloween Cupcakes Recipe
Garnishes
Once your cupcakes are beautifully stamped and frosted, consider adding a final touch with edible glitter, sprinkles, or even tiny candy eyes to make those cute ghosts or bats pop. These little embellishments add texture and sparkle, making each cupcake more festive and fun to look at and enjoy.
Side Dishes
These cupcakes are fantastic on their own but pairing them with a spooky hot chocolate or a creamy pumpkin spice latte can take your Halloween celebrations next level. Fresh fruit like blackberries or candy corn alongside can also provide an exciting contrast of flavors and textures that guests will love.
Creative Ways to Present
Display your stamped Halloween cupcakes on a tiered cake stand surrounded by cobweb decor, mini pumpkins, or string lights for a dramatic effect. Wrapping individual cupcakes in clear cellophane tied with black or orange ribbons makes great party favors. You can also create a themed dessert table with coordinating colors and props to wow your guests and make these cupcakes the centerpiece of your Halloween spread.
Make Ahead and Storage
Storing Leftovers
To keep your stamped Halloween cupcakes fresh, store them in an airtight container at room temperature for up to two days. If your kitchen is warm or humid, moving them to the refrigerator will help maintain their moisture and frosting texture, but allow them to come to room temperature before serving for the best experience.
Freezing
If you want to prepare these cupcakes in advance, they freeze wonderfully. Freeze them in a single layer on a baking sheet first, then transfer to a freezer-safe container, separated by parchment paper to prevent sticking. Thaw in the refrigerator overnight and bring them to room temperature before serving. The fondant and frosting will retain their shape and flavor beautifully.
Reheating
Since these treats are best served at room temperature, reheating isn’t usually necessary. However, if you prefer a slightly warm cupcake, heat it gently in the microwave for 10 to 15 seconds. Avoid reheating the fondant topper directly to prevent melting or distortion.
FAQs
Can I use homemade chocolate cake instead of cake mix?
Absolutely! If you have a favorite homemade recipe, feel free to use it. The cake mix keeps things quick and easy, but homemade cake will add a personal touch that’s just as delicious.
What if I don’t have Halloween-themed fondant stamps?
No problem! Small cookie cutters, clean rubber stamps, or even freehand designs with a knife or toothpick can create charming decorations. Creativity always wins the day!
Can I make the frosting without heavy cream?
You can substitute the heavy cream with milk or even water, but note that it may result in a slightly less fluffy frosting. Adjust by adding a bit more powdered sugar to retain texture.
How long do the cupcakes stay fresh after decorating?
For the best taste and texture, enjoy the cupcakes within two days when stored airtight at room temperature. After that, the fondant may start to dry out, and the cake might lose some moisture.
Is it possible to make these cupcakes vegan?
With some ingredient swaps like vegan butter, egg replacers, and dairy-free milk alternatives, you can definitely adapt this Stamped Halloween Cupcakes Recipe to fit a vegan diet. Just keep in mind the texture and flavor might vary slightly.
Final Thoughts
Making the Stamped Halloween Cupcakes Recipe is such a joyful way to embrace Halloween spirit in your kitchen. From the rich chocolate base to the colorful frosting and whimsical fondant designs, every element combines to delight both the eyes and the palate. Whether you’re baking for kids, friends, or just yourself, these cupcakes will fill your home with warmth and fun. So gather your ingredients, get stamping, and enjoy the spooktacular magic of these festive treats!
Print
Stamped Halloween Cupcakes Recipe
- Prep Time: 20 minutes
- Cook Time: 20 minutes
- Total Time: 40 minutes
- Yield: 12 cupcakes
- Category: Dessert
- Method: Baking
- Cuisine: American
- Diet: Vegetarian
Description
Delight in these festive Stamped Halloween Cupcakes featuring rich chocolate cake topped with creamy, colorful buttercream and adorned with spooky Halloween-themed fondant stamps. Perfect for Halloween parties and celebrations, these cupcakes combine classic flavors with playful, decorative touches that bring the spirit of the holiday to your dessert table.
Ingredients
Cake Ingredients
- 1 box (15.25 oz) chocolate cake mix
- 3 large eggs
- 1/2 cup vegetable oil
- 1 cup water
Buttercream Frosting
- 1/2 cup unsalted butter, softened
- 2 cups powdered sugar
- 1/4 cup heavy cream
- 1 teaspoon vanilla extract
- Food coloring (orange, purple, black)
Decorations
- 4 oz white fondant
- Cornstarch (for rolling)
- Halloween-themed fondant stamps or cookie stamps
- Cupcake liners
Instructions
- Preheat and Prepare: Preheat your oven to 350°F (175°C) and line a muffin tin with cupcake liners to ensure easy removal and neat presentation.
- Mix the Cake Batter: In a large mixing bowl, prepare the chocolate cake mix by combining it with 3 large eggs, 1/2 cup vegetable oil, and 1 cup water. Stir the mixture until smooth and free of lumps for an even batter.
- Fill the Cupcake Liners: Divide the batter evenly among the cupcake liners, filling each about two-thirds full to allow for rising without overflowing during baking.
- Bake the Cupcakes: Place the muffin tin in the oven and bake the cupcakes for 18–20 minutes. Check doneness by inserting a toothpick into the center; it should come out clean when fully baked. Remove and transfer cupcakes to a wire rack to cool completely.
- Prepare the Buttercream Frosting: While cupcakes cool, beat softened butter in a bowl until creamy. Gradually beat in powdered sugar until combined. Add vanilla extract and heavy cream and continue mixing until the frosting is smooth and fluffy.
- Color the Frosting: Divide the buttercream into separate bowls and tint each with your desired Halloween colors such as orange and purple for a festive look.
- Frost the Cupcakes: Using a piping bag or spatula, evenly frost each cooled cupcake with colored buttercream, creating a smooth or decorative swirl finish.
- Roll and Stamp Fondant: Dust a surface lightly with cornstarch and roll out the white fondant to about 1/8-inch thickness. Use Halloween-themed stamps or cookie cutters to imprint spooky designs like bats, pumpkins, or ghosts onto the fondant.
- Cut and Apply Fondant Decorations: Cut the stamped fondant into shapes that fit atop the cupcakes. Gently press the fondant decorations onto the frosted cupcakes to complete the look.
- Serve and Enjoy: Arrange your festive cupcakes on a platter and serve to enjoy a fun and flavorful Halloween treat with family and friends.
Notes
- If you don’t have fondant stamps, small cookie cutters or clean rubber stamps can be used as alternatives for imprinting designs.
- You can opt for either homemade or store-bought fondant depending on your preference and convenience.
- Sprinkle edible glitter or Halloween-themed sprinkles on the frosting before applying fondant for extra texture and sparkle.


