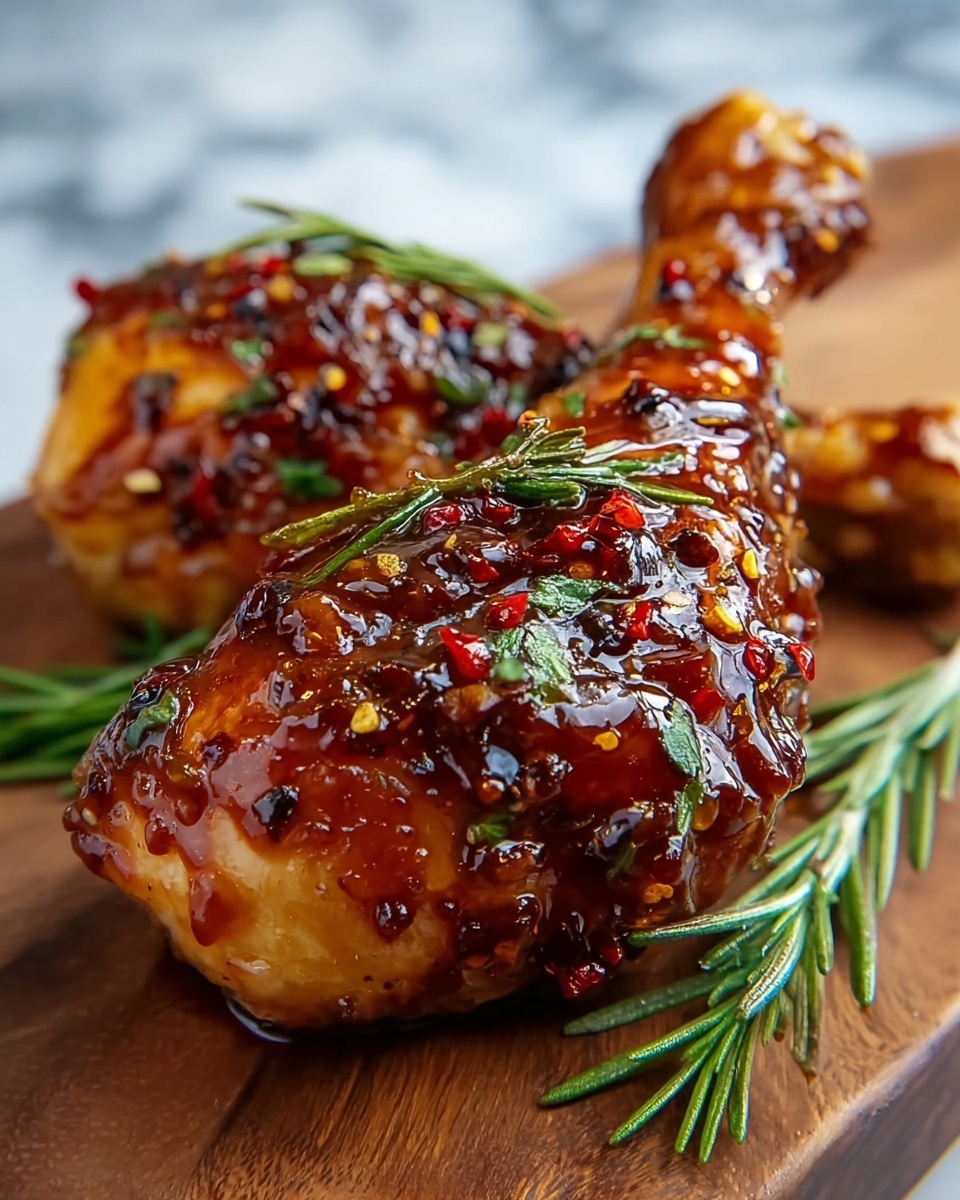
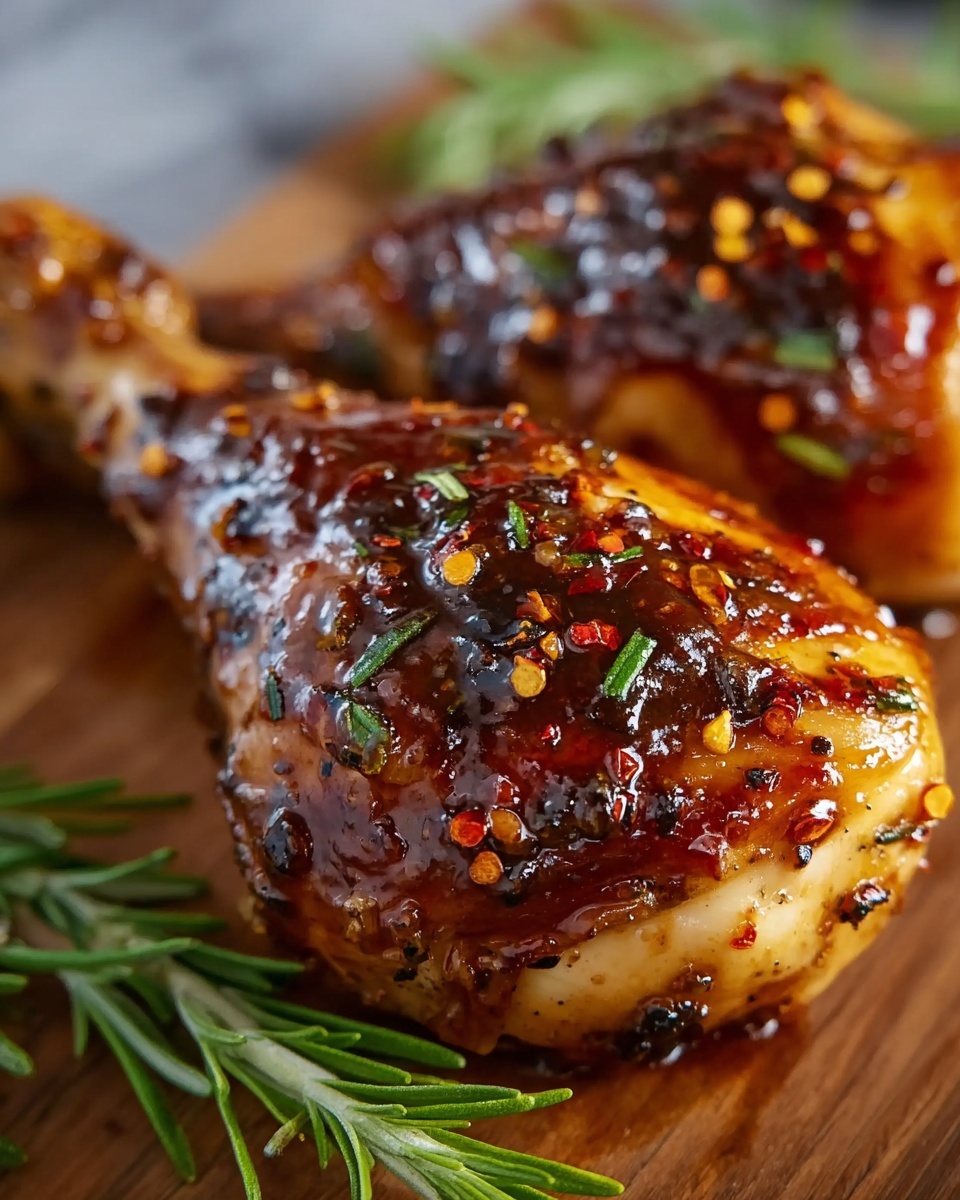
If you are craving a deliciously crispy, juicy, and perfectly seasoned chicken dish that comes together quickly and easily, this Air Fryer Chicken Legs Recipe is your new best friend in the kitchen. With simple pantry staples bringing bold flavors and an irresistible golden finish, these chicken drumsticks elevate weeknight dinners and casual gatherings alike. What makes this recipe truly shine is how the air fryer locks in moisture while crisping up the skin to perfection, delivering a satisfying crunch without the hassle of frying in oil. Trust me, once you try this recipe, it will become your go-to for effortless, crowd-pleasing meals.
Ingredients You’ll Need
The beauty of this Air Fryer Chicken Legs Recipe lies in its straightforward ingredients, each playing a special role in building a flavor-packed and visually appealing dish. From aromatic spices to a touch of olive oil, these components come together to create a mouthwatering experience that is both healthy and satisfying.
- 6 chicken drumsticks: Choose drumsticks with the skin on for maximum crispy texture and juicy meat inside.
- 1 tablespoon olive oil: Helps the seasoning stick and promotes even browning while adding a subtle fruity richness.
- 1 teaspoon garlic powder: Brings deep, savory notes that elevate the chicken’s taste without overpowering.
- 1 teaspoon onion powder: Adds a mild sweetness and a hint of tangy complexity that pairs beautifully with garlic.
- 1 teaspoon smoked paprika: Delivers a smoky warmth and vibrant color, making every bite irresistible.
- ½ teaspoon salt: Essential for enhancing all the flavors and balancing the spices just right.
- ½ teaspoon black pepper: Provides a gentle heat and earthiness to complement the other spices.
- ½ teaspoon dried oregano: Offers a fragrant herbal kick that brightens the overall profile.
- ¼ teaspoon cayenne pepper (optional): Adds a touch of fiery heat for those who like a bit of a spicy punch.
How to Make Air Fryer Chicken Legs Recipe
Step 1: Preheat and Prepare
Start by preheating your air fryer to 400°F (200°C) for 3 to 5 minutes. This step ensures your chicken legs start cooking immediately once inside, helping achieve that perfect crisp on the skin. Meanwhile, pat the chicken dry with paper towels—this is a crucial tip for crispiness, as removing excess moisture prevents soggy skin.
Step 2: Season the Chicken
Place the dried drumsticks in a large bowl and drizzle with olive oil, tossing to coat evenly so every inch will capture the flavors. In a small bowl, combine the garlic powder, onion powder, smoked paprika, salt, black pepper, oregano, and cayenne pepper if you’re using it. Sprinkle this seasoning blend generously over the chicken, rubbing it in until the legs are fully coated. This hands-on seasoning ensures every bite bursts with flavor.
Step 3: Air Fry the Chicken Legs
Arrange the seasoned chicken legs in a single layer inside the air fryer basket. Make sure to leave space between each piece so the hot air can circulate freely, which is key to making the skin crisp and beautifully golden. Cook the chicken for 10 minutes, then flip each piece carefully and continue cooking for another 10 to 12 minutes. Use a meat thermometer to check that the internal temperature reaches at least 165°F (74°C) to guarantee the chicken is safe and tender.
Step 4: Rest Before Serving
Once done, remove the drumsticks and let them rest for a few minutes. This resting period allows juices to redistribute inside the meat, keeping every bite juicy and full of flavor. Trust me, this little pause makes all the difference in taste and texture.
How to Serve Air Fryer Chicken Legs Recipe

Garnishes
When it comes to garnishing your crispy chicken legs, a sprinkle of freshly chopped parsley or cilantro adds a lovely burst of color and fresh aroma. For a little extra zing, a wedge of lemon on the side is fantastic for squeezing over the chicken just before eating—the citrus brightens the smoky, savory flavors wonderfully.
Side Dishes
This Air Fryer Chicken Legs Recipe pairs beautifully with a variety of sides — think of roasted vegetables, a crisp green salad, or fragrant rice pilaf to complement the rich and crispy drumsticks. For something heartier, creamy mashed potatoes or buttery corn on the cob make a classic, comforting combo that’s sure to satisfy everyone at the table.
Creative Ways to Present
Presentation can be fun! Try stacking the chicken legs on a rustic wooden board surrounded by small bowls of dipping sauces like tangy barbecue, honey mustard, or cooling ranch. You can even turn this recipe into a casual finger food feast by serving the drumsticks with toothpicks for easy snacking at parties or game days.
Make Ahead and Storage
Storing Leftovers
If you have leftover chicken legs, let them cool completely before placing them in an airtight container. Stored in the refrigerator, they will stay good for up to 3 to 4 days. This makes for a wonderful quick meal option when you need a tasty, protein-packed lunch or dinner in a pinch.
Freezing
You can also freeze cooked chicken legs for longer storage. Wrap each piece tightly in plastic wrap or foil, then place in a freezer-safe bag or container. Frozen chicken legs keep their best quality for up to 2 months. Just be sure to thaw them overnight in the refrigerator before reheating.
Reheating
To reheat and revive that crispy skin, the air fryer is your best bet. Heat at 350°F (175°C) for approximately 5 to 7 minutes until warmed through. Alternatively, you can use a conventional oven set to the same temperature. Avoid microwaving if you want to maintain the crunch, as it tends to make the skin rubbery.
FAQs
Can I use frozen chicken legs for this recipe?
It is best to use fully thawed chicken legs for the Air Fryer Chicken Legs Recipe to ensure even cooking and safety. If using frozen, thaw the drumsticks overnight in the refrigerator before air frying.
How do I know when the chicken legs are fully cooked?
The most reliable way is to use a meat thermometer; the internal temperature should reach 165°F (74°C). The skin should be golden and crispy, and the juices should run clear when pierced.
Can I make this recipe spicy?
Absolutely! Adjust the cayenne pepper amount or add your favorite chili powder to the seasoning mix for a spicier kick. You can also sprinkle some hot sauce after cooking for extra heat.
Is it necessary to use olive oil?
While not mandatory, olive oil helps the seasoning stick better and aids in crisping the skin. You can substitute it with other oils like avocado or vegetable oil, but olive oil adds a lovely flavor as well.
Can I cook other parts of chicken using this method?
Yes, you can use the same approach to cook chicken thighs or wings. Cooking times may vary slightly, so adjust accordingly and always check internal temperature for safety.
Final Thoughts
There is something incredibly satisfying about biting into a crisp, perfectly seasoned chicken leg cooked effortlessly in the air fryer. This Air Fryer Chicken Legs Recipe is a true game changer — simple to make, packed with flavor, and ideal for busy weeknights or casual get-togethers. I encourage you to give it a try and experience just how easy and rewarding homemade crispy chicken can be. Once you have this recipe in your arsenal, it might just become your new family favorite!
Print
Air Fryer Chicken Legs Recipe
- Prep Time: 10 minutes
- Cook Time: 20 minutes
- Total Time: 30 minutes
- Yield: 6 drumsticks (serves 3–4)
- Category: Main Course
- Method: Air Frying
- Cuisine: American
- Diet: Gluten Free
Description
This Air Fryer Chicken Legs recipe delivers juicy, flavorful drumsticks with irresistibly crispy skin in under 30 minutes. Perfectly seasoned with a blend of garlic, onion, smoked paprika, and herbs, these gluten-free chicken legs are an easy and healthy main course that comes together quickly in the air fryer for a convenient weeknight meal.
Ingredients
Chicken
- 6 chicken drumsticks
- 1 tablespoon olive oil
Seasoning Mix
- 1 teaspoon garlic powder
- 1 teaspoon onion powder
- 1 teaspoon smoked paprika
- ½ teaspoon salt
- ½ teaspoon black pepper
- ½ teaspoon dried oregano
- ¼ teaspoon cayenne pepper (optional)
Instructions
- Preheat the Air Fryer: Preheat your air fryer to 400°F (200°C) for 3 to 5 minutes to ensure it reaches the optimal temperature before cooking.
- Prepare the Chicken: Pat the chicken legs dry with paper towels to remove excess moisture which helps achieve crispy skin. Place the drumsticks in a large bowl.
- Coat with Olive Oil: Drizzle the olive oil over the chicken drumsticks and toss them well to coat evenly. This helps the seasoning stick and promotes browning while air frying.
- Mix and Apply Seasonings: In a small bowl, combine garlic powder, onion powder, smoked paprika, salt, black pepper, dried oregano, and cayenne pepper if using. Sprinkle this seasoning mix over the chicken and rub it in thoroughly so every piece is well coated.
- Arrange in Air Fryer Basket: Place the seasoned chicken legs in a single layer in the air fryer basket, making sure to leave some space between each drumstick for even air circulation.
- Cook the Chicken: Air fry the drumsticks at 400°F for 10 minutes. Then flip each piece over and cook for an additional 10 to 12 minutes, or until the internal temperature reaches 165°F (74°C) and the skin is crisp and golden brown.
- Rest and Serve: Remove the chicken legs from the air fryer and let them rest for a few minutes before serving. This allows the juices to redistribute making the chicken tender and juicy.
Notes
- For extra crispy skin, spray the chicken lightly with cooking spray before air frying.
- You can marinate the chicken for a few hours beforehand to deepen the flavor.
- Adjust the amount of cayenne pepper according to your heat preference.

