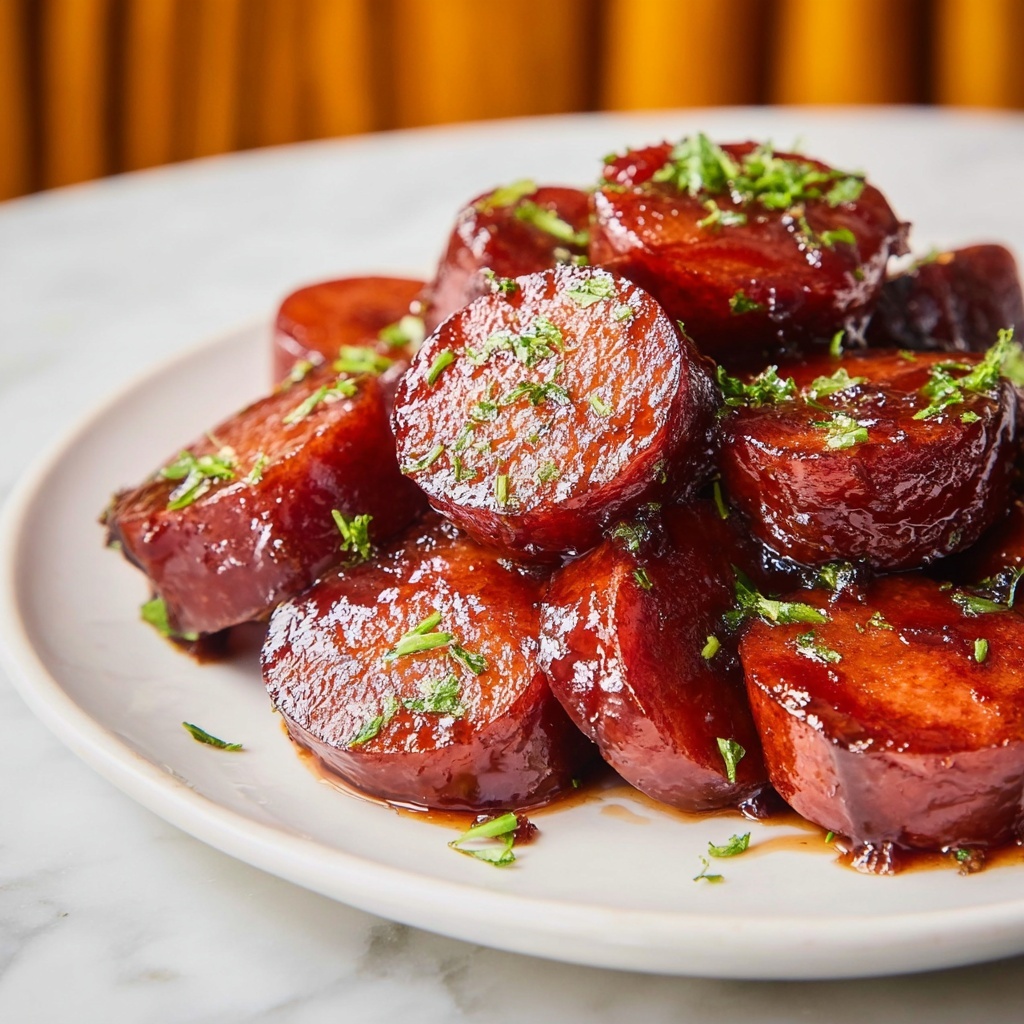
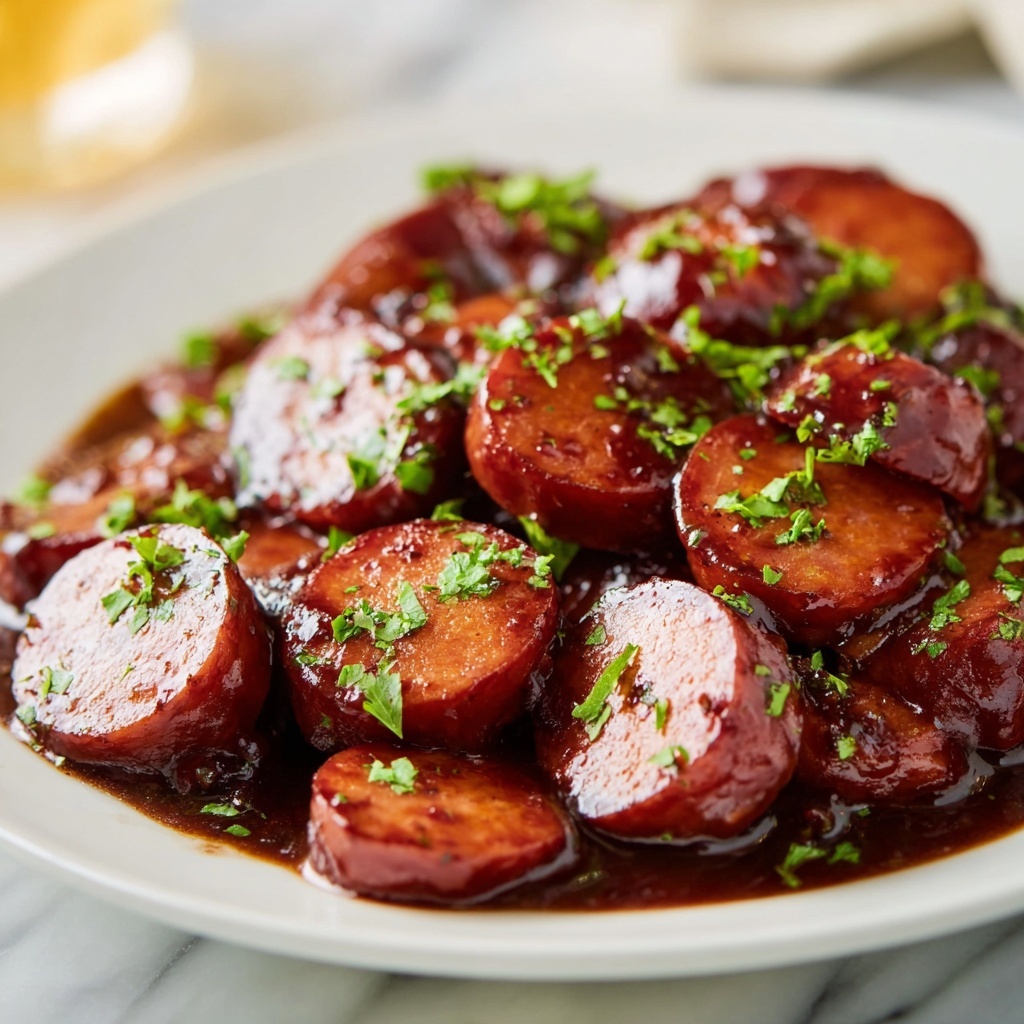
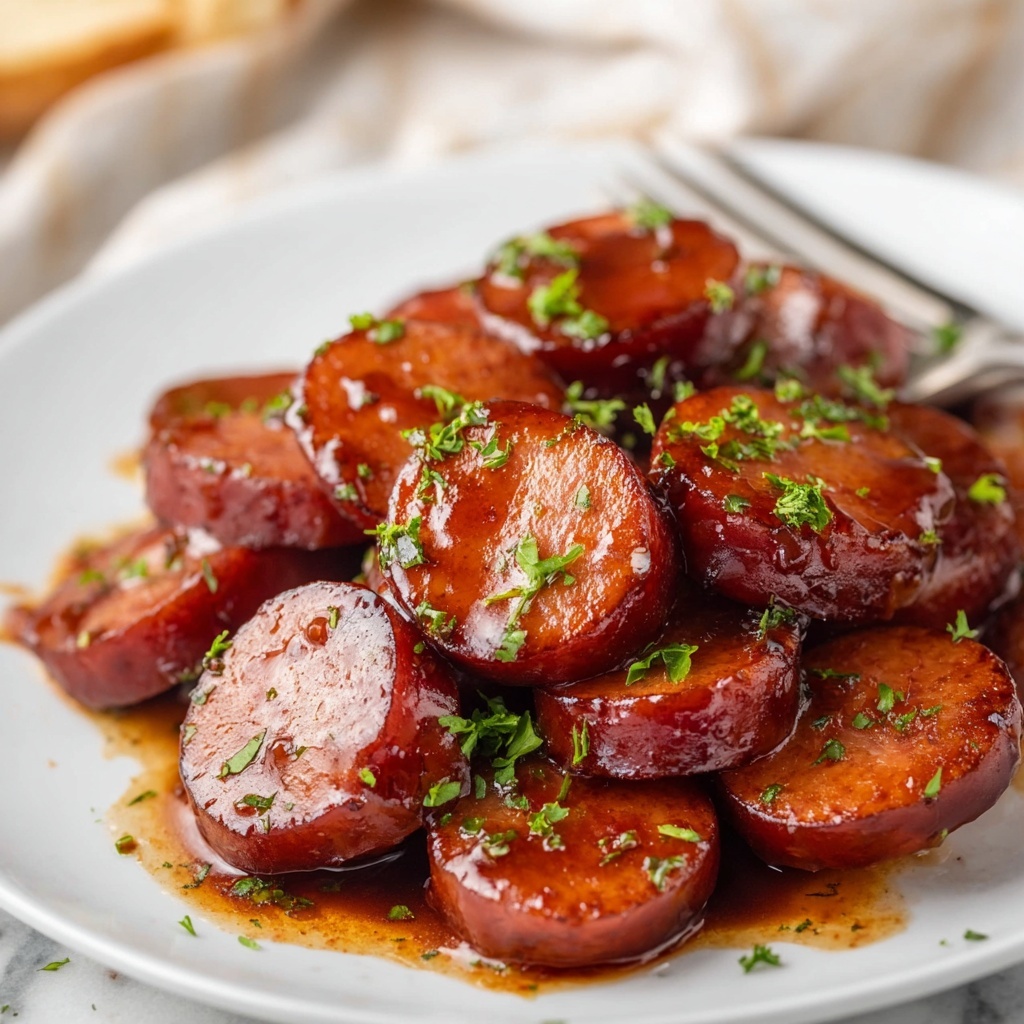
If you’re looking for a crowd-pleasing appetizer that bursts with flavor, the BBQ Kielbasa Bites Recipe is exactly what you need. This dish combines the smoky, savory goodness of kielbasa sausage with a rich, sticky barbecue glaze that perfectly balances sweet, spicy, and tangy notes. Whether you’re hosting a party or treating yourself to a satisfying snack, these bites are simple to prepare and impossible not to love. Trust me, once you try this BBQ Kielbasa Bites Recipe, it’ll become a favorite for every game day, cookout, or casual get-together.
Ingredients You’ll Need
The magic of this BBQ Kielbasa Bites Recipe lies in its simplicity. Each ingredient plays a key role—from the robust sausage to the flavorful sauce blend—creating a harmony of textures and tastes that’s totally irresistible.
- Kielbasa sausage: Two 14-ounce links sliced into bite-sized pieces for that perfect meaty base.
- BBQ sauce: One cup, bringing tangy sweetness and that classic smoky grill flavor.
- Brown sugar: Half a cup, adds depth and caramelization to the glaze.
- Minced dried onion: One teaspoon, for subtle savory undertones.
- Red pepper flake: Half a teaspoon, to give a gentle spicy kick without overpowering the dish.
- Garlic salt: Half a teaspoon, enhancing the flavors with a garlicky saltiness.
- Dijon mustard: One tablespoon, introduces a mild tang to balance sweetness.
- Parsley: Fresh, for a pop of bright color and freshness when garnishing.
How to Make BBQ Kielbasa Bites Recipe
Step 1: Preheat the Oven
Start by heating your oven to 400 degrees Fahrenheit. This temperature is perfect for caramelizing the glaze on the kielbasa slices while making sure they cook evenly through, locking in all the juicy flavors.
Step 2: Mix the Sauce
In a large mixing bowl, whisk together the BBQ sauce, brown sugar, minced dried onion, garlic salt, red pepper flake, and Dijon mustard. This combination makes a luscious, sticky glaze that’ll coat each piece of sausage perfectly, creating a beautiful balance of sweet, savory, and mildly spicy notes.
Step 3: Toss the Sausage
Add your sliced kielbasa to the bowl with the sauce and toss until every bite is generously covered. This step is important because it ensures each piece will bake up juicy, flavorful, and glistening with that irresistible barbecue coating.
Step 4: Prepare for Baking
Transfer the sauced kielbasa into a 9×13 inch baking dish, spreading everything into an even layer to promote uniform caramelization and cooking.
Step 5: Bake and Stir
Place the dish in the oven and bake for 30 minutes, making sure to stir once or twice during cooking. These brief stirs help the kielbasa brown evenly and allow the sauce to thicken into a sticky, glossy finish.
Step 6: Achieve the Perfect Glaze
Once done, your kielbasa bites should be beautifully glazy and caramelized. This step is where the magic happens—those browned edges and sticky sauce make each bite a flavor-packed delight.
Step 7: Garnish and Serve
Finish with a sprinkle of fresh parsley to add a touch of color and a fresh herbal note that brightens the whole dish.
How to Serve BBQ Kielbasa Bites Recipe
Garnishes
Fresh parsley is the classic garnish here, adding vibrant green color and a mild, fresh flavor contrast to the rich, caramelized sausage. You can also experiment with finely chopped green onions or a dusting of smoked paprika for an extra layer of flavor and visual appeal.
Side Dishes
These BBQ Kielbasa Bites pair amazingly well with crispy roasted potatoes, creamy coleslaw, or even a fresh garden salad to balance out the richness. For a party, serve them alongside crusty bread or soft pretzel bites to soak up every last drop of that delicious glaze.
Creative Ways to Present
Want to wow your guests? Serve the bites on skewers as finger foods, or present them over a platter of grilled veggies. Another fun idea is layering them on slider buns for mini BBQ sausage sandwiches that are sure to disappear fast.
Make Ahead and Storage
Storing Leftovers
After enjoying your BBQ Kielbasa Bites Recipe, store any leftovers in an airtight container in the refrigerator. They will stay fresh and flavorful for up to 3 days, making for a quick and tasty snack or meal the next day.
Freezing
You can freeze the cooked kielbasa bites by placing them in a freezer-safe container or bag. Be sure to remove as much air as possible before sealing. They keep well in the freezer for up to two months, perfect for preparing in advance for future gatherings.
Reheating
Reheat leftovers in a skillet over medium heat or in the oven at 350 degrees Fahrenheit until warmed through. Avoid microwaving if possible, as reheating slowly helps maintain the glaze’s luscious texture and prevents the sausage from drying out.
FAQs
Can I use a different type of sausage for this recipe?
Absolutely! While kielbasa is traditional and adds great flavor, you can swap in smoked sausage or even chorizo for a different twist. Just choose a sausage with a sturdy texture that holds up well to baking.
Is there a way to make this recipe less spicy?
Yes! Simply reduce or omit the red pepper flakes to make it milder. The BBQ sauce and other seasonings will still provide plenty of flavor without the heat.
Can I make this on the grill instead of the oven?
Definitely. Toss the sauced kielbasa slices in a grill-safe pan or foil packet and cook over medium heat, stirring occasionally until caramelized and heated through. This will add an extra smoky flavor dimension.
How can I make this recipe gluten-free?
Check that your BBQ sauce and Dijon mustard are gluten-free, as these are common sources of gluten. Most kielbasa sausages are naturally gluten-free but verify the label to be sure.
What is the best way to serve these for a party?
Serve them warm in a large dish with toothpicks or small skewers for easy grabbing. Pair with a variety of dipping sauces like ranch, extra BBQ sauce, or spicy mustard to please every palate.
Final Thoughts
If you’re craving a simple yet show-stopping appetizer, the BBQ Kielbasa Bites Recipe is your new best friend in the kitchen. Its effortless preparation and mouthwatering flavors make it perfect for any occasion. Give this recipe a try and prepare to impress your family, friends, and even yourself with a snack that’s bursting with bold barbeque goodness.
Print
BBQ Kielbasa Bites Recipe
- Prep Time: 5 minutes
- Cook Time: 30 minutes
- Total Time: 35 minutes
- Yield: 6 servings
- Category: Appetizer
- Method: Baking
- Cuisine: American
Description
Delicious BBQ Kielbasa Bites featuring sliced kielbasa sausage baked in a rich, sweet and tangy BBQ sauce with a hint of spice and garlic. Perfect as an appetizer or party snack, these caramelized and glazy bites are garnished with fresh parsley for a burst of color and flavor.
Ingredients
BBQ Kielbasa Bites Ingredients
- 2 (14 ounce) kielbasa sausages, sliced
- 1 cup BBQ sauce
- ½ cup brown sugar
- 1 teaspoon minced dried onion
- ½ teaspoon red pepper flakes
- ½ teaspoon garlic salt
- 1 tablespoon Dijon mustard
- Parsley for garnish
Instructions
- Preheat Oven: Preheat your oven to 400 degrees Fahrenheit to prepare for baking the kielbasa bites.
- Make the Sauce Mixture: In a large mixing bowl, combine BBQ sauce, brown sugar, minced dried onion, garlic salt, red pepper flakes, and Dijon mustard. Mix thoroughly until smooth and well blended.
- Toss Sausage in Sauce: Add the sliced kielbasa sausage into the sauce mixture bowl and toss well to ensure every piece is coated evenly with the sauce.
- Arrange in Baking Dish: Transfer the coated kielbasa slices into a 9×13 inch baking dish, spreading them out evenly for uniform cooking.
- Bake the Kielbasa: Place the baking dish in the preheated oven and bake for 30 minutes. Stir the sausage bites once or twice during baking to promote even caramelization and prevent sticking.
- Achieve Caramelization: Continue baking until the sausage bites become nicely glazy and caramelized, with the sauce thickening and sticking to the meat.
- Garnish and Serve: Remove from the oven, sprinkle fresh parsley over the top for garnishing, and serve hot as a flavorful appetizer or snack.
Notes
- Ensure to stir the sausage bites during baking to avoid burning and to promote even caramelization.
- Adjust the amount of red pepper flakes based on desired spice level.
- Serving with toothpicks makes them easy to enjoy at parties.
- Can be made ahead and reheated for convenience.


