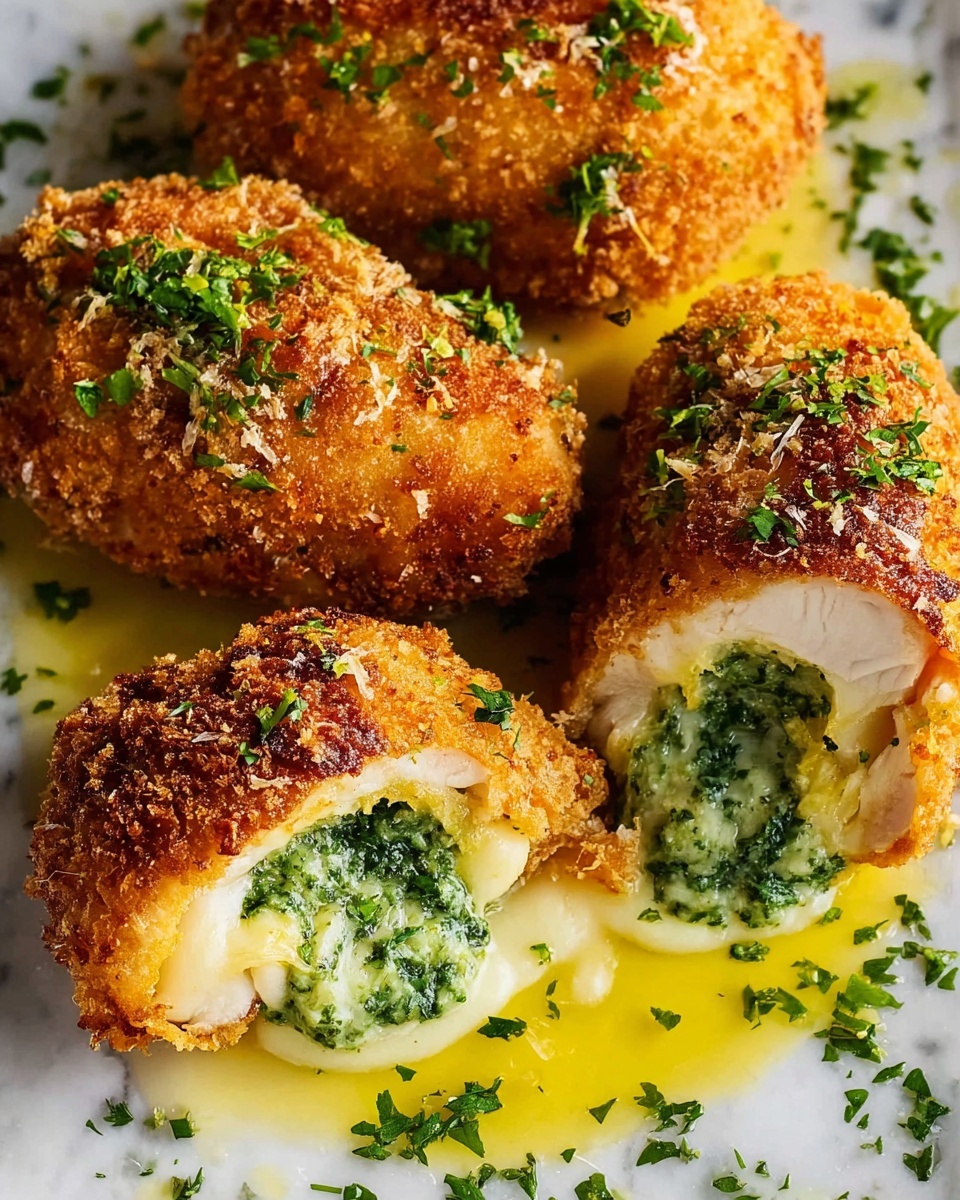
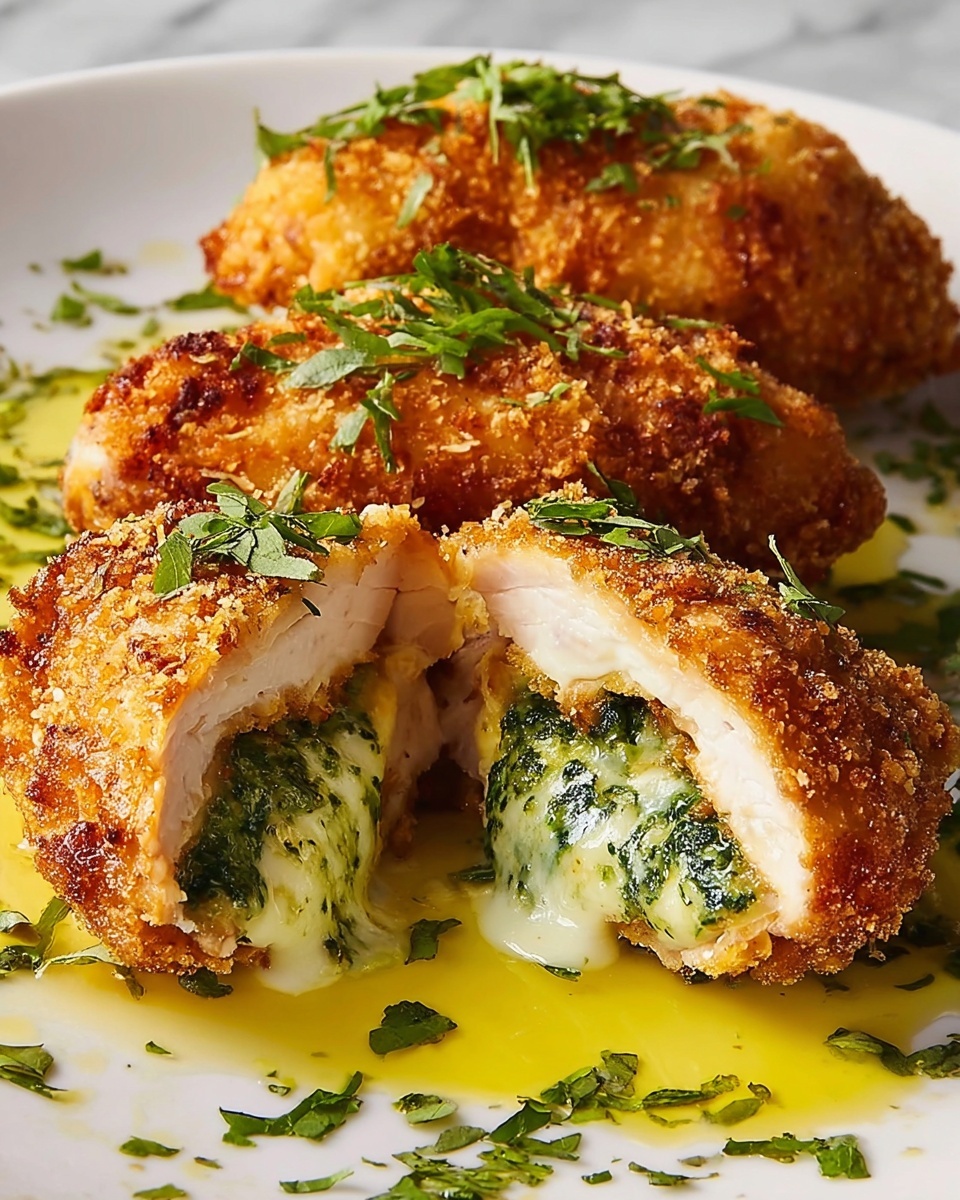
If you have a craving for a dish that’s bursting with flavor and elegance, this Chicken Kiev with Garlic Butter Recipe is an absolute must-try. This classic Eastern European favorite features tender chicken breasts wrapped around a heavenly, aromatic garlic butter that melts irresistibly in your mouth. Each bite delivers a crispy golden crust and a luscious burst of herby, buttery goodness that feels both indulgent and comforting. It’s not just a meal; it’s a delicious experience that will quickly become a beloved staple in your kitchen.
Ingredients You’ll Need
These ingredients are simple, yet each one plays a vital role in creating the perfect balance of flavors and textures. From the fresh garlic and parsley that brighten the butter to the crisp panko breadcrumbs that give you that satisfying crunch, every component is essential to this dish’s magic.
- 4 boneless, skinless chicken breasts: The hearty base of the dish that wraps around the flavorful butter.
- ½ cup unsalted butter (softened): Creates the rich, velvety garlic butter filling.
- 2 cloves garlic (minced): Provides that punch of aromatic, savory flavor.
- 2 tablespoons fresh parsley (chopped): Adds a fresh, herby note and vibrant color.
- 1 teaspoon lemon juice: Lifts the flavors with a touch of bright acidity.
- ½ teaspoon salt: Seasoning that enhances all the ingredients.
- ¼ teaspoon black pepper: Adds gentle warmth and depth.
- 1 cup all-purpose flour: Helps the chicken hold onto its buttery surprise.
- 2 large eggs (beaten): The perfect binder to coat the chicken evenly.
- 1 ½ cups breadcrumbs (preferably panko): Gives that coveted crunchy, golden crust.
- Vegetable oil for frying: Provides the perfect medium to fry the chicken to crisp perfection.
How to Make Chicken Kiev with Garlic Butter Recipe
Step 1: Prepare the Garlic Butter
Start by blending softened butter with minced garlic, chopped parsley, lemon juice, salt, and pepper in a small bowl until everything is beautifully combined. Then, lay this mixture onto plastic wrap and shape it into a log before chilling it in the refrigerator for about 30 minutes to firm up. This ensures the butter will hold together when wrapped inside the chicken.
Step 2: Pound and Stuff the Chicken
To make stuffing easy and even, place each chicken breast between two sheets of plastic wrap and gently pound to about half an inch thickness. Next, slice the chilled garlic butter log into four equal pieces and place one in the center of each flattened chicken breast. Fold the sides carefully over the butter and roll the chicken tightly, securing with toothpicks if needed. Chill these rolled delights in the fridge for another 30 minutes, which helps them stay perfectly sealed during cooking.
Step 3: Bread the Chicken Rolls
Create your breading station by placing flour, beaten eggs, and panko breadcrumbs in three separate shallow bowls. Dredge each chicken roll first in flour, then dip in egg, and finally coat thoroughly with breadcrumbs. This multi-step breading creates a protective, crispy shell that locks in the juicy garlic butter filling.
Step 4: Fry and Bake to Perfection
Heat about an inch of vegetable oil in a deep skillet over medium heat. Gently fry each chicken roll for 4 to 5 minutes per side, or until the crust turns a gorgeous golden brown. Transfer the crispy rolls to a baking sheet and finish cooking them in a preheated oven at 375°F for 15 to 18 minutes, until the internal temperature reaches a safe 165°F. Let the chicken rest for five minutes to allow the juices and buttery filling to settle before serving.
How to Serve Chicken Kiev with Garlic Butter Recipe

Garnishes
Simple garnishes elevate the presentation and add fresh notes that complement the rich chicken. Try a sprinkle of finely chopped parsley or a few thin lemon slices for a bright, zesty touch that highlights the herby garlic butter.
Side Dishes
Pair this Chicken Kiev with creamy mashed potatoes to soak up all the luscious butter or a crisp green salad with a tart vinaigrette to balance the richness. Roasted vegetables or steamed green beans also work wonderfully to add color and texture to your plate.
Creative Ways to Present
For a festive occasion, slice the rolled chicken into elegant medallions to showcase the melting garlic butter center. Alternatively, serve each whole roll on a rustic wooden board accompanied by herb sprigs and lemon wedges to create an inviting, rustic charm.
Make Ahead and Storage
Storing Leftovers
Keep your cooked Chicken Kiev in an airtight container in the refrigerator for up to three days. To maintain some of that delightful crispness, reheat gently in the oven rather than the microwave.
Freezing
You can freeze both unbaked and cooked Chicken Kiev. Wrap the chicken rolls tightly in plastic wrap and then foil before freezing. For best results, cook from frozen or thaw overnight in the refrigerator before frying and baking as usual.
Reheating
Reheat leftover Chicken Kiev in a preheated oven at 350°F for about 15 minutes or until warmed through. Cover loosely with foil to prevent drying, and avoid microwaving if you want to keep the crispy crust intact.
FAQs
Can I make Chicken Kiev with frozen chicken breasts?
It’s best to thaw chicken breasts completely before pounding and stuffing. This ensures even cooking and helps the chicken wrap around the garlic butter without tearing.
What can I substitute for panko breadcrumbs?
If you don’t have panko, regular breadcrumbs work fine. They won’t be quite as crunchy, but they’ll still provide a nice coating for the chicken.
How do I prevent the garlic butter from leaking out during cooking?
Chilling the rolled chicken well before frying helps seal everything in tightly. Make sure to fold and roll the chicken firmly and use toothpicks if needed to keep the butter contained.
Is Chicken Kiev very rich or heavy to eat?
While it’s definitely indulgent due to the buttery filling, pairing Chicken Kiev with fresh, light sides like salad or steamed veggies helps balance the richness and keeps the meal enjoyable.
Can I bake Chicken Kiev without frying first?
Frying gives Chicken Kiev its signature golden crust. You could bake without frying, but it will lack the same crunch and color that make the dish so special.
Final Thoughts
This Chicken Kiev with Garlic Butter Recipe is a delicious journey to the heart of classic Eastern European comfort food. It’s a wonderful dish to share with family and friends when you want to impress or simply savor something unforgettable. Give it a try—you’ll quickly understand why it’s a timeless favorite!
Print
Chicken Kiev with Garlic Butter Recipe
- Prep Time: 30 minutes
- Cook Time: 30 minutes
- Total Time: 1 hour
- Yield: 4 servings
- Category: Main Course
- Method: Frying
- Cuisine: Eastern European
Description
Chicken Kiev with Garlic Butter is a classic Eastern European dish featuring tender chicken breasts stuffed with a flavorful garlic herb butter, breaded and crisp-fried, then finished in the oven to perfection. This recipe combines a crunchy exterior with a rich, buttery, and aromatic filling, making for an indulgent and satisfying main course.
Ingredients
For the Garlic Butter
- ½ cup unsalted butter (softened)
- 2 cloves garlic (minced)
- 2 tablespoons fresh parsley (chopped)
- 1 teaspoon lemon juice
- ½ teaspoon salt
- ¼ teaspoon black pepper
For the Chicken
- 4 boneless, skinless chicken breasts
- 1 cup all-purpose flour
- 2 large eggs (beaten)
- 1 ½ cups breadcrumbs (preferably panko)
- Vegetable oil for frying
Instructions
- Prepare Garlic Butter: In a small bowl, combine softened butter with minced garlic, chopped parsley, lemon juice, salt, and black pepper. Mix well, then transfer onto a piece of plastic wrap, shape into a log, and refrigerate until firm, about 30 minutes.
- Prepare Chicken: Place chicken breasts between two sheets of plastic wrap and pound to about ½-inch thickness to tenderize. Cut the chilled garlic butter into four equal pieces and place one piece in the center of each chicken breast. Fold the sides over the butter and roll tightly, securing with toothpicks if necessary. Chill the rolled chicken in the refrigerator for 30 minutes to help hold their shape.
- Bread the Chicken: Set up a breading station with separate bowls of flour, beaten eggs, and breadcrumbs. Dredge each chicken roll first in flour, then dip in beaten eggs, and finally coat thoroughly with breadcrumbs.
- Fry the Chicken: Heat about 1 inch of vegetable oil in a deep skillet over medium heat. Fry each chicken roll for 4 to 5 minutes per side, or until golden brown and crispy. Be careful not to let the butter leak out during frying.
- Bake and Finish: Transfer the fried chicken rolls to a baking sheet and place in a preheated oven at 375°F (190°C). Bake for 15 to 18 minutes, or until the internal temperature reaches 165°F (74°C), ensuring the chicken is fully cooked. Let the chicken rest for 5 minutes before serving.
Notes
- To prevent butter from leaking during cooking, ensure the chicken is well sealed and properly chilled before frying.
- Use panko breadcrumbs for extra crispiness.
- Serve Chicken Kiev with mashed potatoes or a crisp green salad for a complete, balanced meal.
- Handle toothpicks carefully and remove before serving.

