If you are searching for a sweet treat that dazzles with festive charm and creamy delight, this Christmas Tree Fudge Recipe is an absolute winner. Imagine luscious layers of smooth vanilla almond bark melded with velvety white baking chips and the sweet richness of condensed milk, all transformed into a delightful green Christmas tree shape. This fudge is not just delicious but also a complete showstopper at holiday gatherings, bringing joy and nostalgia with every bite. Let me walk you through how this magical Christmas Tree Fudge Recipe can become your new holiday favorite.
Ingredients You’ll Need
The beauty of this Christmas Tree Fudge Recipe lies in the simplicity and accessibility of the ingredients. Each one has a special role to play, from the creamy texture to the festive colors, ensuring your fudge tastes as amazing as it looks.
- White baking chips: These provide a smooth, creamy base that melts beautifully for that classic fudge texture.
- Vanilla almond bark: Adds a sweet, vanilla-flavored richness and is perfect for melting and forming the fudge layers.
- Sweetened condensed milk: Brings luscious creaminess and sweetness that binds everything perfectly.
- Salt: Just a pinch to balance flavors and enhance the sweetness without overpowering it.
- Pure vanilla extract: Delivers warm, aromatic notes that brighten the fudge’s flavor profile.
- Green oil-based food coloring: Essential for creating the vibrant green shade of the Christmas tree drizzle without affecting the fudge consistency.
- Yellow star sprinkles: The charming finishing touch, mimicking the star atop the tree.
- Holiday sprinkles (optional): Sprinkle on festive cheer and texture to personalize your fudge trees.
How to Make Christmas Tree Fudge Recipe
Step 1: Melting the Base
Begin by lining an 8×8 inch square baking pan with parchment paper; this makes removing your fudge a breeze later on. Next, combine 2 cups of white baking chips, 8 ounces of vanilla almond bark, a 14-ounce can of sweetened condensed milk, and a pinch of salt in a double boiler. Gently heat over medium, stirring regularly until everything melts into a silky, smooth mixture. Once melted, remove from heat and stir in 1 teaspoon of pure vanilla extract for that comforting aroma and flavor boost.
Step 2: Setting the Fudge
Pour your luscious melted fudge mixture into the prepared pan and let it rest to set. You can leave it at room temperature for about 4 to 6 hours, or speed it up by chilling it in the refrigerator for 2 to 4 hours. Once firm, cut it evenly into 16 squares so each piece is perfectly sized for festive snacking.
Step 3: Decorating with the Christmas Tree Design
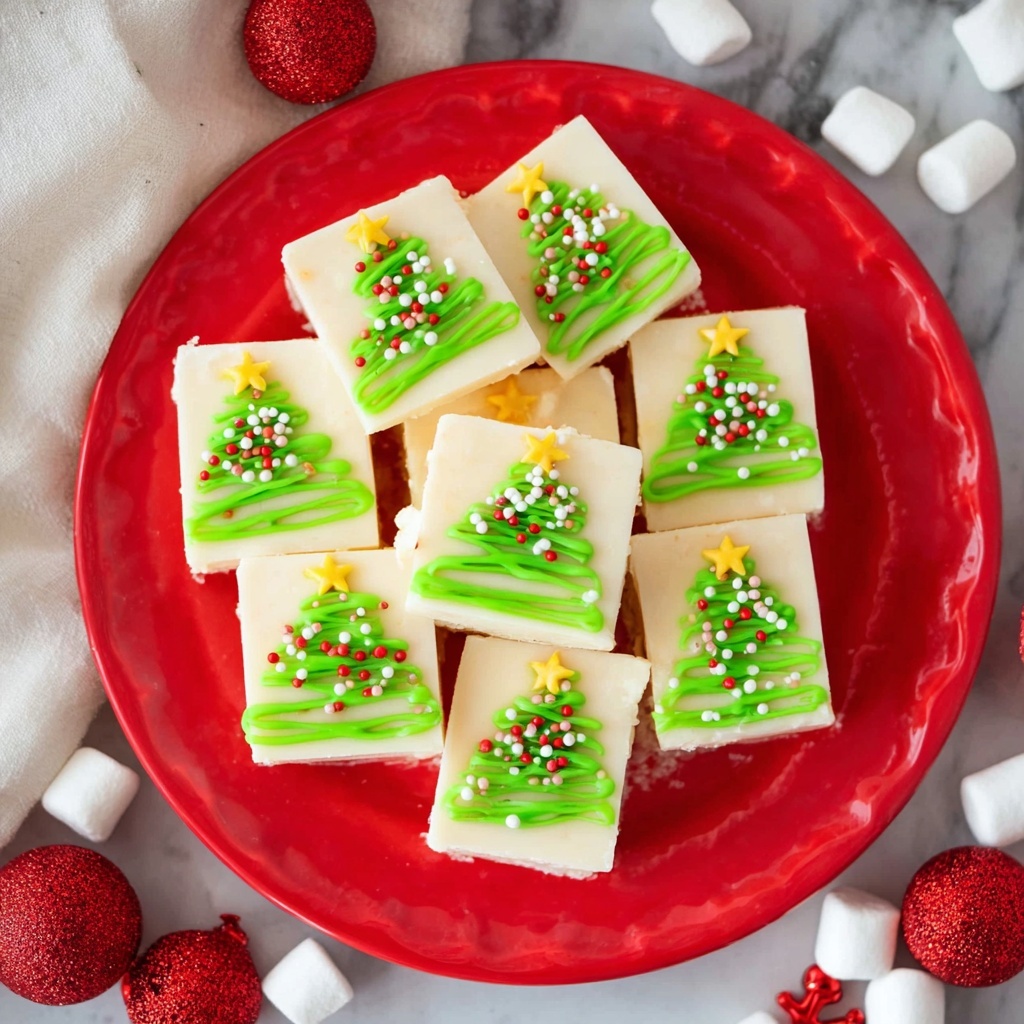
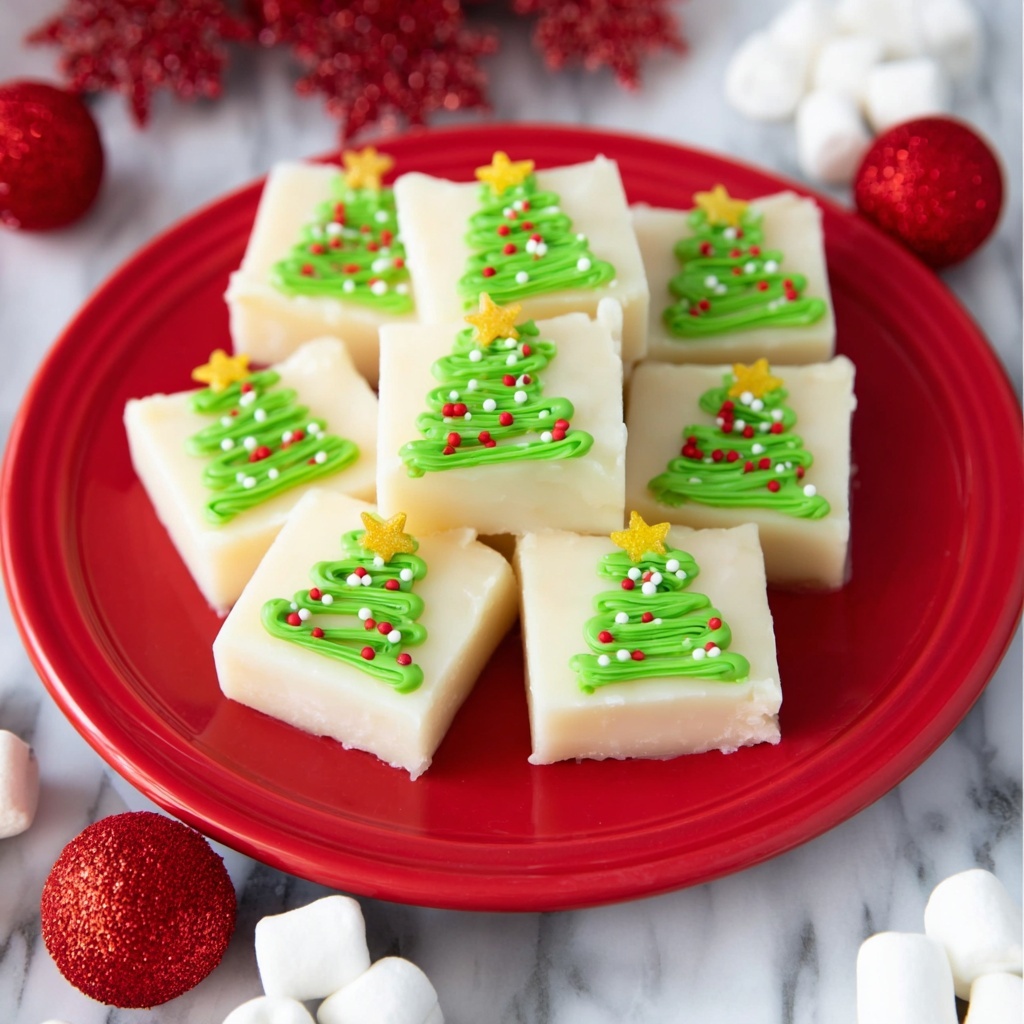
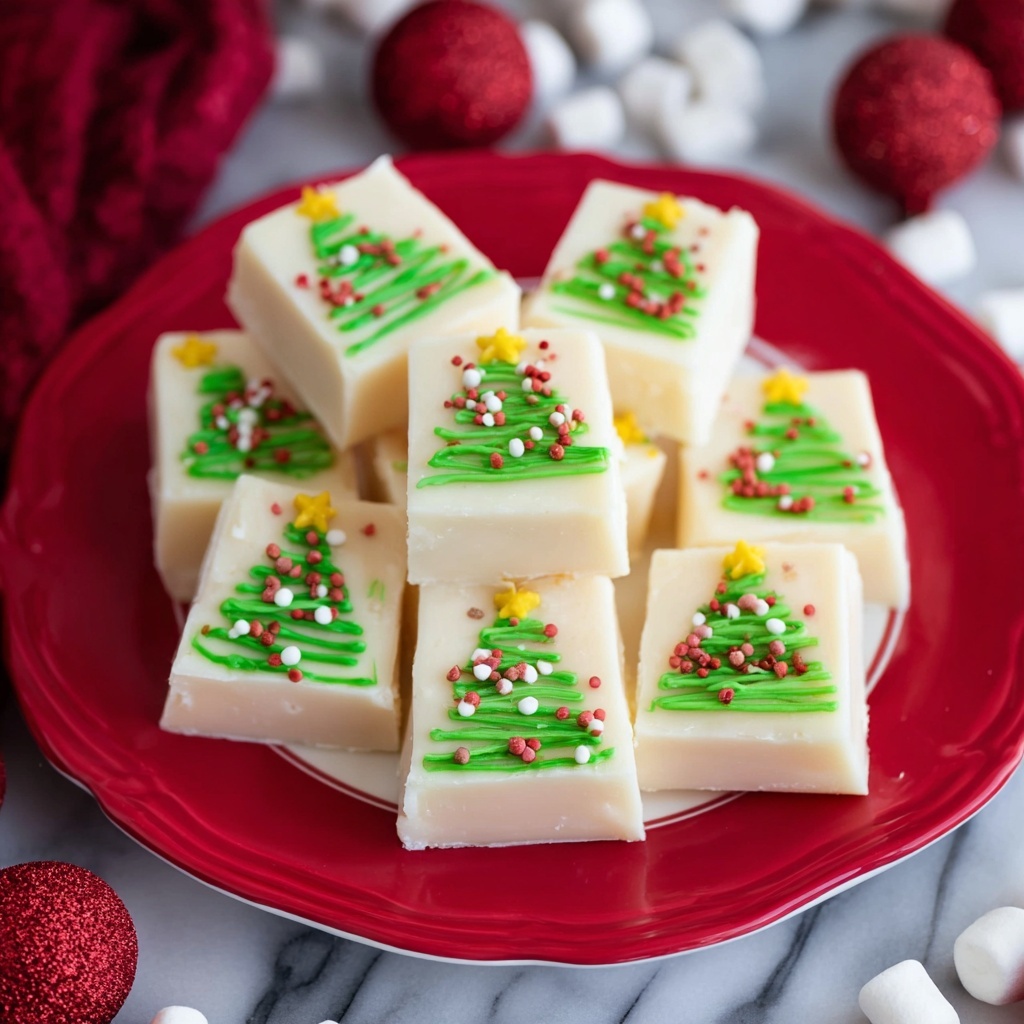
Heat the remaining 8 ounces of vanilla almond bark in 30-second bursts in the microwave until it starts to smooth out but still has a few lumps—that residual heat will help melt those lumps without burning. Stir in about 8 drops of green oil-based food coloring and mix until you achieve a rich, even color. Pour this colored almond bark into a zippered plastic bag and snip off a tiny corner. Drizzle the green mixture over your fudge squares using a consistent back-and-forth motion starting narrow at the top and gradually widening to form a beautiful Christmas tree shape on each square. Complete the design by placing a yellow star sprinkle at the top and adding some festive holiday sprinkles for extra sparkle and cheer.
How to Serve Christmas Tree Fudge Recipe
Garnishes
Decorations really bring this Christmas Tree Fudge Recipe to life. I love using bright yellow star sprinkles right at the top—they make the green drizzle look exactly like a twinkling tree. Feel free to get creative with holiday-themed sprinkles like red and white pearls or sparkling sugar crystals to add joyful texture that complements the fudge’s creamy sweetness.
Side Dishes
This fudge is rich, so keeping side dishes light and simple works best. A fresh fruit platter with tangy cranberry or orange slices pairs wonderfully by cutting through the sweetness, as does a warm cup of spiced tea or peppermint-flavored coffee. These sides balance the experience and keep the festive mood flowing.
Creative Ways to Present
Presentation is half the fun when sharing the Christmas Tree Fudge Recipe. Arrange your fudge squares on a festive platter sprinkled with pine needles or edible glitter to really dazzle. Wrapping individual pieces in clear cellophane tied with red and green ribbons makes them perfect for edible gifts or party favors. You can even stack them in a decorative tin lined with holiday-themed napkins for an instant eye-catcher.
Make Ahead and Storage
Storing Leftovers
If you have any leftovers (which might be a challenge), wrap the fudge tightly in plastic wrap or store it in an airtight container at room temperature. It stays fresh for about one week, making it easy to prepare ahead of time or enjoy throughout the holiday season.
Freezing
This Christmas Tree Fudge Recipe freezes beautifully. Wrap each piece individually in wax paper, then place them in a freezer-safe container or ziplock bag. When stored properly, fudge keeps its delicious texture and flavor for up to three months, letting you enjoy a festive treat whenever you want.
Reheating
Fudge is best enjoyed cold or at room temperature, so reheating isn’t necessary. Simply thaw frozen fudge in the refrigerator overnight or leave it on the countertop for a few hours before serving to regain that perfect creamy consistency.
FAQs
Can I use different colors for the fudge drizzle?
Absolutely! While green is traditional for the Christmas tree look, feel free to experiment with red, blue, or even gold oil-based food coloring to match your holiday decor or personal style.
Is it possible to make this fudge without a double boiler?
If you don’t have a double boiler, you can melt ingredients gently in the microwave in short bursts, stirring frequently to avoid burning, or place a heatproof bowl over a pot of simmering water while ensuring the bowl does not touch the water.
What makes oil-based food coloring necessary here?
Oil-based coloring mixes well with chocolate and almond bark without causing it to seize or become grainy, unlike water-based colors, which can ruin the smooth texture of the fudge.
Can I substitute regular chocolate for white baking chips?
You can try it, but white baking chips are preferred for this recipe because they give a creamy texture and mild flavor that complements the vanilla almond bark perfectly and helps achieve the signature look and taste.
How long does it take for the fudge to fully set?
Typically, it takes about 4 to 6 hours at room temperature or 2 to 4 hours in the fridge. Leaving it too long in the fridge may make the fudge firmer, so keep an eye on it for your preferred texture.
Final Thoughts
This Christmas Tree Fudge Recipe is a heartwarming blend of creamy, sweet, and festive elements that everyone will adore. It’s a joy to make, share, and indulge in throughout the holiday season. Give this recipe a try and watch smiles light up just like the twinkling tree on your fudge!
Print
Christmas Tree Fudge Recipe
- Prep Time: 15 minutes
- Cook Time: 0 minutes
- Total Time: 4 hours 15 minutes to 6 hours 15 minutes (including setting time)
- Yield: 16 squares
- Category: Dessert
- Method: Stovetop
- Cuisine: American
Description
This festive Christmas Tree Fudge is a creamy, rich treat perfect for holiday celebrations. Made with white baking chips, vanilla almond bark, and sweetened condensed milk, this no-bake fudge is easy to prepare and decorated with green-colored almond bark drizzles and cheerful holiday sprinkles to resemble a Christmas tree. It sets quickly and makes a delightful gift or party dessert.
Ingredients
Fudge Base
- 2 cups white baking chips
- 8 ounces vanilla almond bark (half of 16 oz package)
- 1 (14 oz) can sweetened condensed milk
- 1/8 teaspoon salt
- 1 teaspoon pure vanilla extract
- 8 ounces vanilla almond bark (remaining half of 16 oz package)
Decoration
- Green oil-based food coloring (about 8 drops)
- Yellow star sprinkles (or yellow sprinkles)
- Holiday sprinkles (optional)
Instructions
- Prepare pan and melt fudge base: Line an 8×8-inch square baking pan with parchment paper. In a double boiler over medium heat, combine 2 cups white baking chips, 8 ounces of vanilla almond bark, 1 can sweetened condensed milk, and salt. Stir regularly until the mixture is melted and smooth. Remove from heat and stir in 1 teaspoon pure vanilla extract thoroughly.
- Set the fudge: Pour the smooth fudge mixture into the prepared pan, spreading evenly. Allow it to sit at room temperature for 4 to 6 hours or refrigerate for 2 to 4 hours until it firms up. Once set, remove the fudge from the pan and cut it into 16 squares.
- Prepare decoration drizzle: Heat the remaining 8 ounces of vanilla almond bark in 30-second intervals in a microwave-safe bowl until nearly smooth. Use residual heat to melt any remaining lumps without burning. Add approximately 8 drops of green oil-based food coloring to the melted almond bark and mix well.
- Decorate the fudge: Transfer the green almond bark into a zippered plastic bag and cut a small tip off one corner. Drizzle the green bark over the fudge squares in a back-and-forth pattern starting with small lines at the top, gradually expanding to create a Christmas tree shape. Top each fudge square with a yellow star sprinkle and additional holiday sprinkles as desired.
Notes
- Use oil-based food coloring for melting chocolate to avoid seizing or texture changes.
- Make sure to use parchment paper in the pan for easy removal of fudge.
- Allow fudge to fully set before decorating to prevent melting or smudging.
- Store fudge in an airtight container at room temperature or refrigerated for longer freshness.
- You can customize the sprinkles to your preference for different holiday themes.


