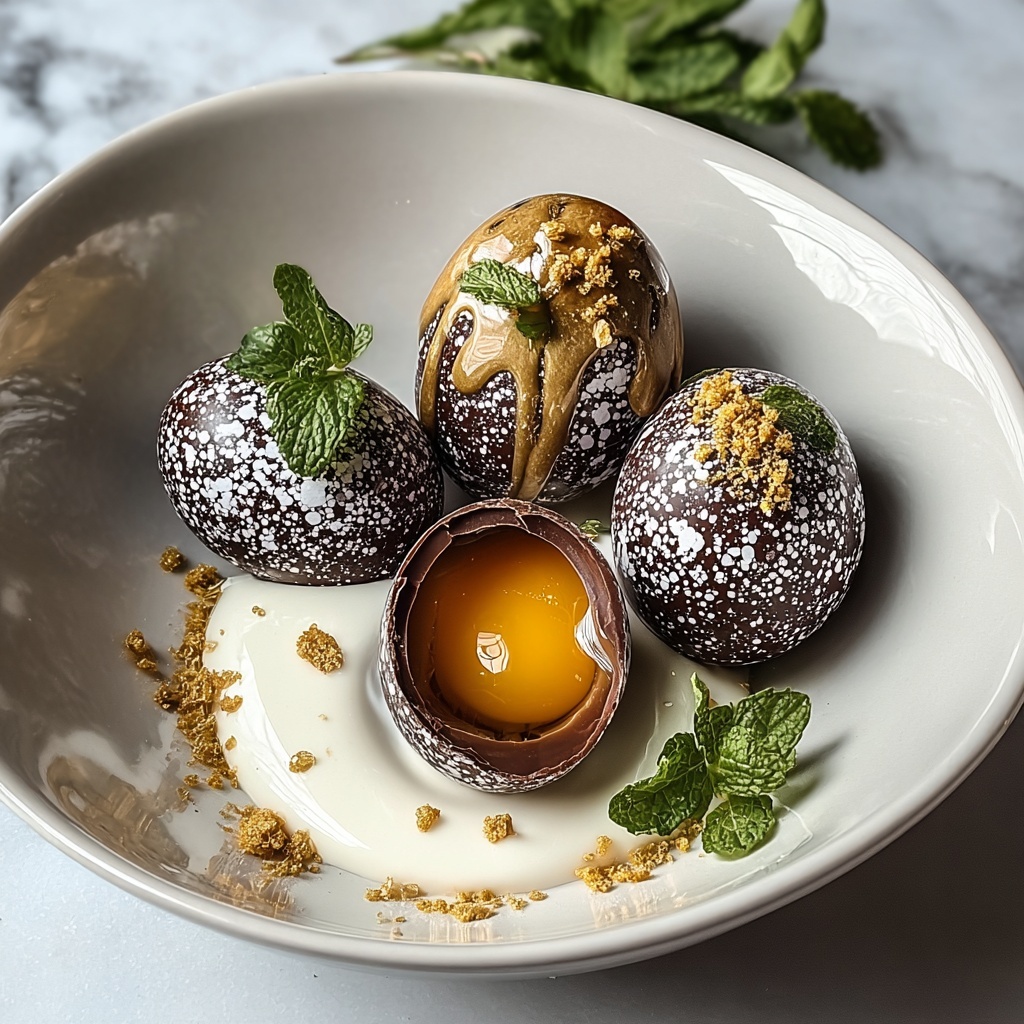
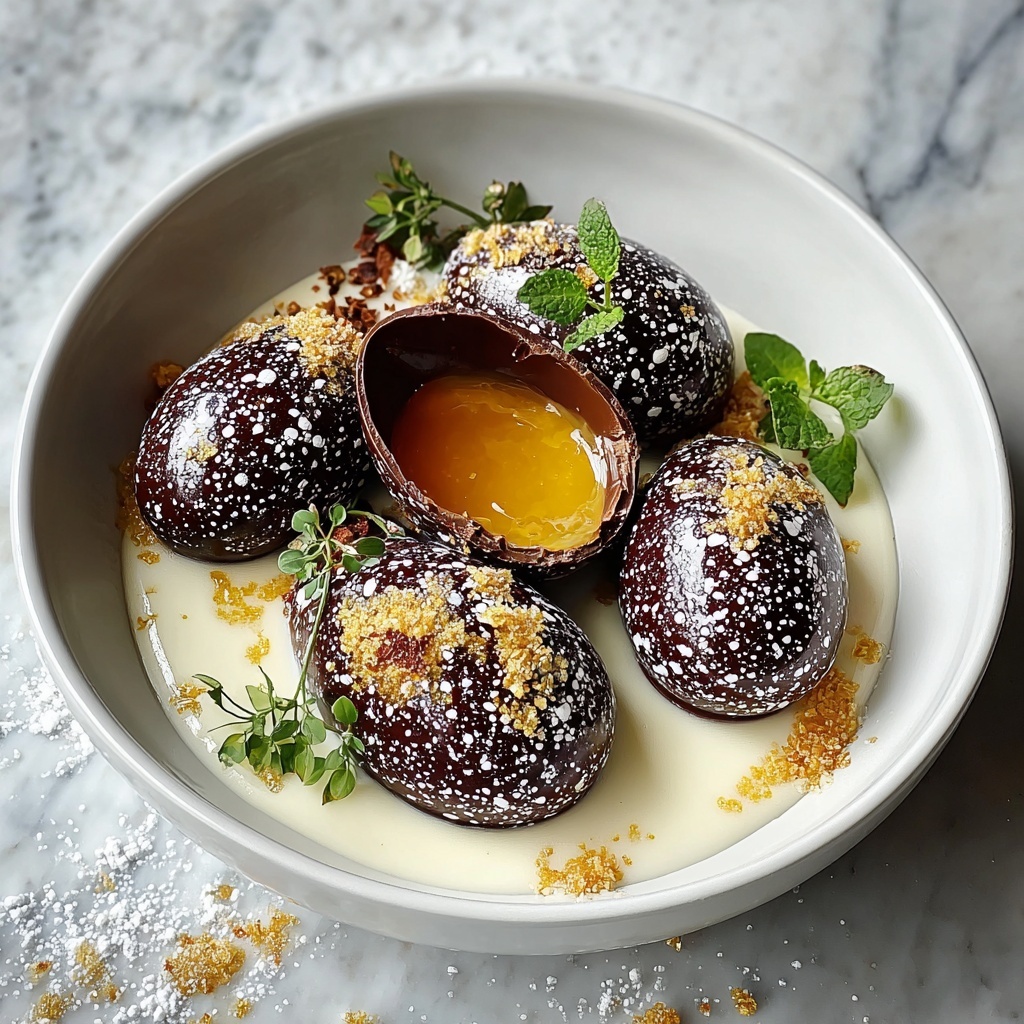
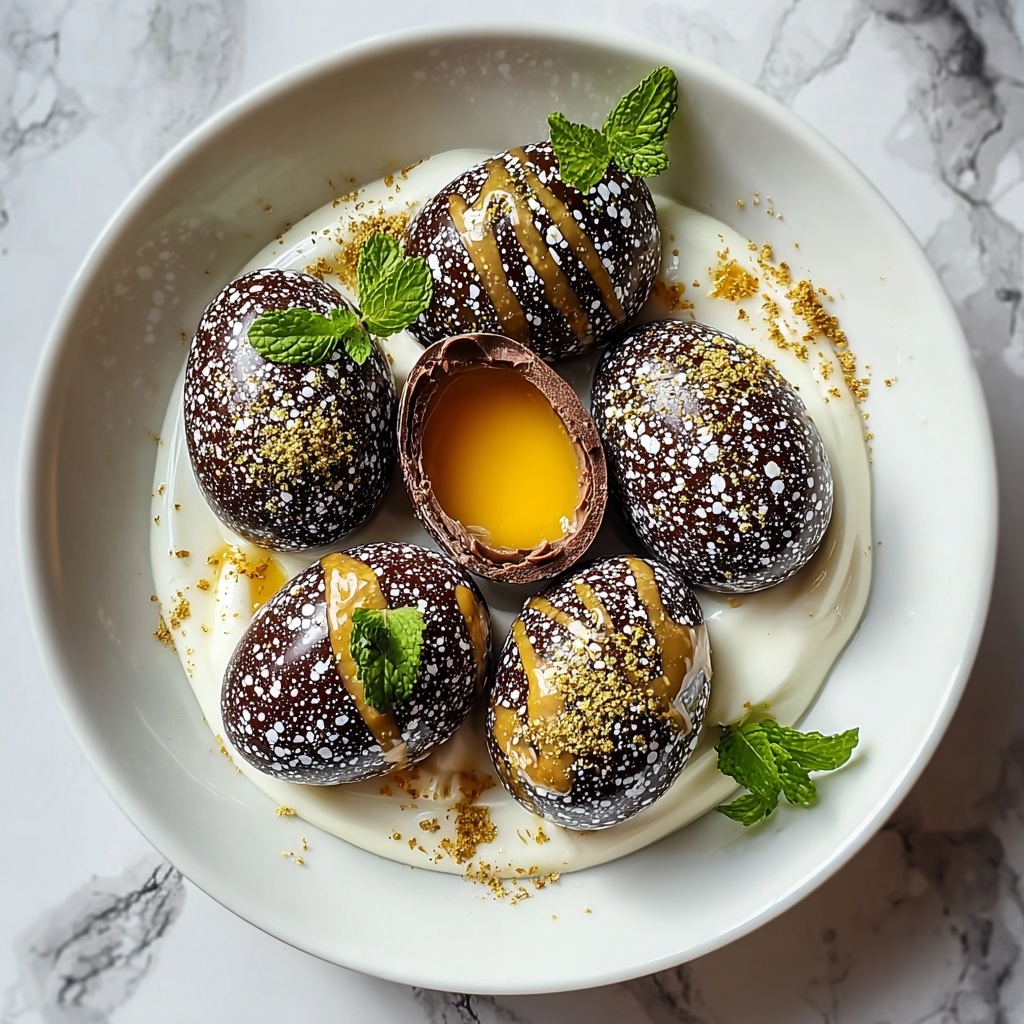
If you’re ready to delight your taste buds with a treat that’s both nostalgic and indulgent, look no further than this Homemade Chocolate-Covered Easter Eggs with Peanut Butter and Coconut Recipe. It’s a beautiful blend of rich chocolate, creamy peanut butter, and delicate shredded coconut all wrapped into adorable little egg shapes that scream festive fun. These homemade treasures are perfect for sharing, gifting, or savoring quietly with a cup of tea—each bite is a perfect dance of flavors and textures that will have you coming back for more.
Ingredients You’ll Need
Gathering all the ingredients for this Homemade Chocolate-Covered Easter Eggs with Peanut Butter and Coconut Recipe is as simple as can be. Each item plays a key role in achieving that perfect balance of taste, creaminess, and crunch.
- Powdered sugar: Adds the essential sweetness and smooth texture to the filling.
- Unsweetened cocoa powder: Brings in the deep chocolate flavor with no added sugar.
- Butter, softened: Provides richness and helps bind the mixture for a creamy consistency.
- Milk: Adds moisture, making the dough easier to work with and smoother.
- Vanilla extract: Enhances all the other flavors with a subtle, aromatic touch.
- Graham cracker crumbs: Give a lovely crunch and a bit of a toasty, buttery flavor.
- Creamy peanut butter: Delivers a velvety texture and that irresistible nutty richness.
- Shredded coconut: Adds chewiness and a tropical twist that brightens every bite.
- Chocolate chips: Used to create the glossy chocolate coating that seals the deal perfectly.
- Shortening: Helps smooth out the chocolate for dipping, ensuring a shiny, flawless finish.
How to Make Homemade Chocolate-Covered Easter Eggs with Peanut Butter and Coconut Recipe
Step 1: Prepare the cocoa and sugar mixture
First, sift together the powdered sugar and cocoa powder in a large bowl. This step is important to get rid of any lumps and guarantees a silky smooth base for the dough, setting the stage for a flawless texture.
Step 2: Cream butter into the mixture
Add the softened butter to the dry ingredients and use a mixer to blend them until perfectly smooth and combined. This process turns the mixture from dry to creamy, which is essential for shaping the eggs later.
Step 3: Incorporate milk and vanilla
Stir in the milk and vanilla extract, mixing until you get a uniform, smooth batter. The milk loosens the mixture slightly while the vanilla deepens the flavor, making everything taste just a bit more special.
Step 4: Fold in graham cracker crumbs
Slowly stir the graham cracker crumbs into the mixture until evenly distributed. These crumbs add a subtle crunch and a bit of that classic, buttery goodness that complements the chocolate beautifully.
Step 5: Add peanut butter
Mix in the creamy peanut butter thoroughly. This step adds a luscious nutty layer to your eggs, ensuring each bite is irresistibly rich and smooth.
Step 6: Mix in shredded coconut
Gently fold the shredded coconut into the dough to spread its chewy, tropical texture evenly. The coconut not only tastes great but gives a charming, rustic look to your homemade eggs.
Step 7: Shape the eggs
Line a baking sheet with parchment or wax paper. Then, scoop small amounts of dough, about the size of a large walnut, and roll each into an egg shape before placing them on the sheet. This makes them cute and portioned perfectly for snacking.
Step 8: Chill the eggs
Pop the tray into the refrigerator for at least 30 minutes to let the eggs firm up. Chilling helps them hold their shape during the chocolate coating process.
Step 9: Melt the chocolate coating
While the eggs chill, melt your chocolate chips and shortening together in short bursts in the microwave, stirring often. This keeps the chocolate smooth and glossy for dipping.
Step 10: Dip and coat the eggs
Once firm, dip the eggs into the melted chocolate, making sure each one is fully covered. Use a fork or spoon to remove them carefully, letting excess chocolate drip back into the bowl. This step creates that beautiful, shiny shell.
Step 11: Set the chocolate coating
Return the dipped eggs to the baking sheet and refrigerate them for another 30 minutes. This chilling sets the chocolate, giving you that satisfying snap when you bite into them.
Step 12: Bring to room temperature
Before serving or storing, take the eggs out of the fridge to let them come to room temperature. This ensures the flavors and textures are at their best when you enjoy them.
Step 13: Store your creation
Finally, keep your Homemade Chocolate-Covered Easter Eggs with Peanut Butter and Coconut Recipe fresh by storing them in an airtight container at room temperature or in the fridge if you want them to last longer.
How to Serve Homemade Chocolate-Covered Easter Eggs with Peanut Butter and Coconut Recipe
Garnishes
To make these eggs even more festive and eye-catching, sprinkle a little toasted shredded coconut or crushed peanuts on top right after dipping them in chocolate. A drizzle of white or colored chocolate over the dark coating can add a beautiful, artistic touch that’s perfect for holiday celebrations.
Side Dishes
These eggs pair wonderfully with a simple cup of strong coffee or a creamy latte. If you’re serving them at a gathering, a light fruit salad or some fresh berries can balance out the richness beautifully and refresh the palate.
Creative Ways to Present
For a charming presentation, arrange the eggs in a basket lined with pastel shredded paper or edible grass. You could place them inside decorated mini egg cartons or wrap them individually in cellophane tied with colorful ribbons to create lovely homemade gifts.
Make Ahead and Storage
Storing Leftovers
If you end up with extra eggs, store them in an airtight container at room temperature for a few days. For longer storage, keep them in the refrigerator, where they’ll stay fresh and maintain their texture for up to two weeks.
Freezing
You can freeze these eggs for up to one month. Place them in a single layer on a baking sheet to freeze initially, then transfer them to a sealed container or freezer bag. Thaw in the refrigerator before serving for the best flavor and texture.
Reheating
These eggs are best enjoyed cold or at room temperature, so reheating isn’t necessary. If the chocolate becomes too hard straight out of the fridge, simply let them sit out for 15 to 20 minutes to soften slightly before digging in.
FAQs
Can I use crunchy peanut butter instead of creamy?
Yes! Crunchy peanut butter can add an extra layer of texture to your eggs, making them delightfully nutty. Just keep in mind it might slightly change the smoothness of the filling.
What type of chocolate should I use for dipping?
Semisweet or bittersweet chocolate chips work beautifully for the coating. You can also use milk chocolate if you prefer a sweeter, creamier shell. Adding shortening helps to keep the chocolate shiny and smooth.
Can I substitute shredded coconut with something else?
Absolutely. If you’re not a fan of coconut, try finely chopped nuts or even crushed graham crackers to keep a bit of texture while maintaining the flavor balance.
How long do these Homemade Chocolate-Covered Easter Eggs last?
Stored properly, these eggs will last about two weeks in the refrigerator and up to a month in the freezer. Just make sure they’re kept in an airtight container to preserve freshness.
Is this recipe suitable for kids to make?
This recipe is definitely kid-friendly with adult supervision, especially during the chocolate melting and dipping steps. It’s a fun, hands-on way to get kids involved in festive cooking!
Final Thoughts
I honestly can’t recommend this Homemade Chocolate-Covered Easter Eggs with Peanut Butter and Coconut Recipe enough. It’s a delightful mix of flavors and textures that brings so much joy with every bite. Whether you’re making it for a special holiday treat or simply because you love chocolate and peanut butter, these little eggs are guaranteed to brighten your day. So, gather your ingredients, roll up your sleeves, and enjoy this sweet project that’s as fun to make as it is to eat!
Print
Homemade Chocolate-Covered Easter Eggs with Peanut Butter and Coconut Recipe
- Prep Time: 0h 20m
- Cook Time: 0h 5m
- Total Time: 1h 10m
- Yield: Approximately 24 Easter eggs
- Category: Dessert
- Method: No-Cook
- Cuisine: American
Description
Delight in these creamy, rich homemade Easter eggs made with a decadent blend of powdered sugar, cocoa, peanut butter, and graham cracker crumbs, all coated in smooth melted chocolate. Perfectly shaped and chilled for a festive treat that’s both delicious and fun to make.
Ingredients
Dry Ingredients
- 1 1/2 cups powdered sugar
- 1/2 cup unsweetened cocoa powder
- 3 cups graham cracker crumbs
- 1/2 cup shredded coconut
- 1/2 cup chocolate chips
Wet Ingredients
- 1/4 cup butter, softened
- 2 tablespoons milk
- 1 teaspoon vanilla extract
- 1/2 cup creamy peanut butter
- 2 tablespoons shortening
Instructions
- Mix dry ingredients: In a large mixing bowl, sift together the powdered sugar and cocoa powder to remove any lumps, ensuring a smooth base for the dough.
- Combine butter: Add the softened butter to the dry mixture and beat with a hand mixer or stand mixer until smooth and thoroughly blended.
- Add liquids: Pour in the milk and vanilla extract, mixing continuously until the mixture becomes smooth and fully incorporated.
- Incorporate crumbs: Gradually add the graham cracker crumbs, stirring well until the dough holds together evenly.
- Add peanut butter: Mix in the creamy peanut butter thoroughly, blending it evenly throughout the dough.
- Fold in coconut: Gently fold the shredded coconut into the dough until evenly distributed.
- Prepare tray: Line a baking sheet with parchment or wax paper to prevent sticking during chilling and dipping.
- Shape eggs: Take small portions of dough and roll them into egg shapes about the size of large walnuts, placing them on the prepared sheet.
- Chill eggs: Refrigerate the shaped eggs for at least 30 minutes to firm up for easier dipping.
- Melt chocolate coating: While chilling, melt chocolate chips and shortening in a microwave-safe bowl using 30-second intervals, stirring between to achieve a smooth, consistent melt.
- Dip eggs: Once firm, dip each egg fully into the melted chocolate, allowing excess chocolate to drip off before placing eggs back on the lined baking sheet.
- Set chocolate coating: Refrigerate the chocolate-covered eggs for at least 30 minutes until the chocolate hardens completely.
- Final step: Remove eggs from the refrigerator and let them come to room temperature before serving or storing in an airtight container to maintain freshness.
Notes
- Ensure butter is softened to blend smoothly with the dry ingredients.
- Refrigeration time is important to help the eggs firm up before and after dipping.
- Use parchment or wax paper to prevent sticking during chilling and dipping.
- Microwave chocolate in short intervals to avoid burning and ensure smooth texture.
- Store in an airtight container at room temperature for up to a week or refrigerate for longer shelf life.


