
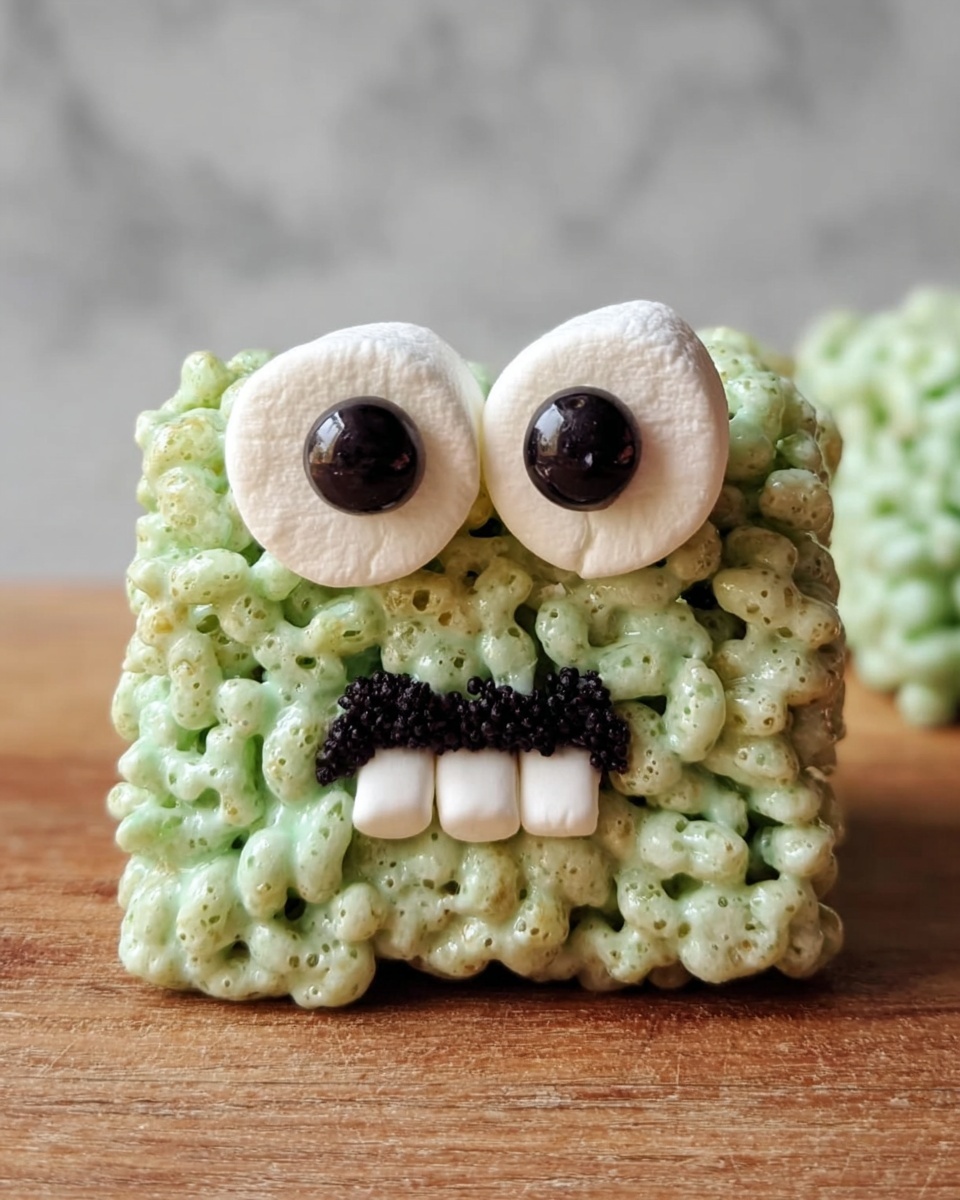
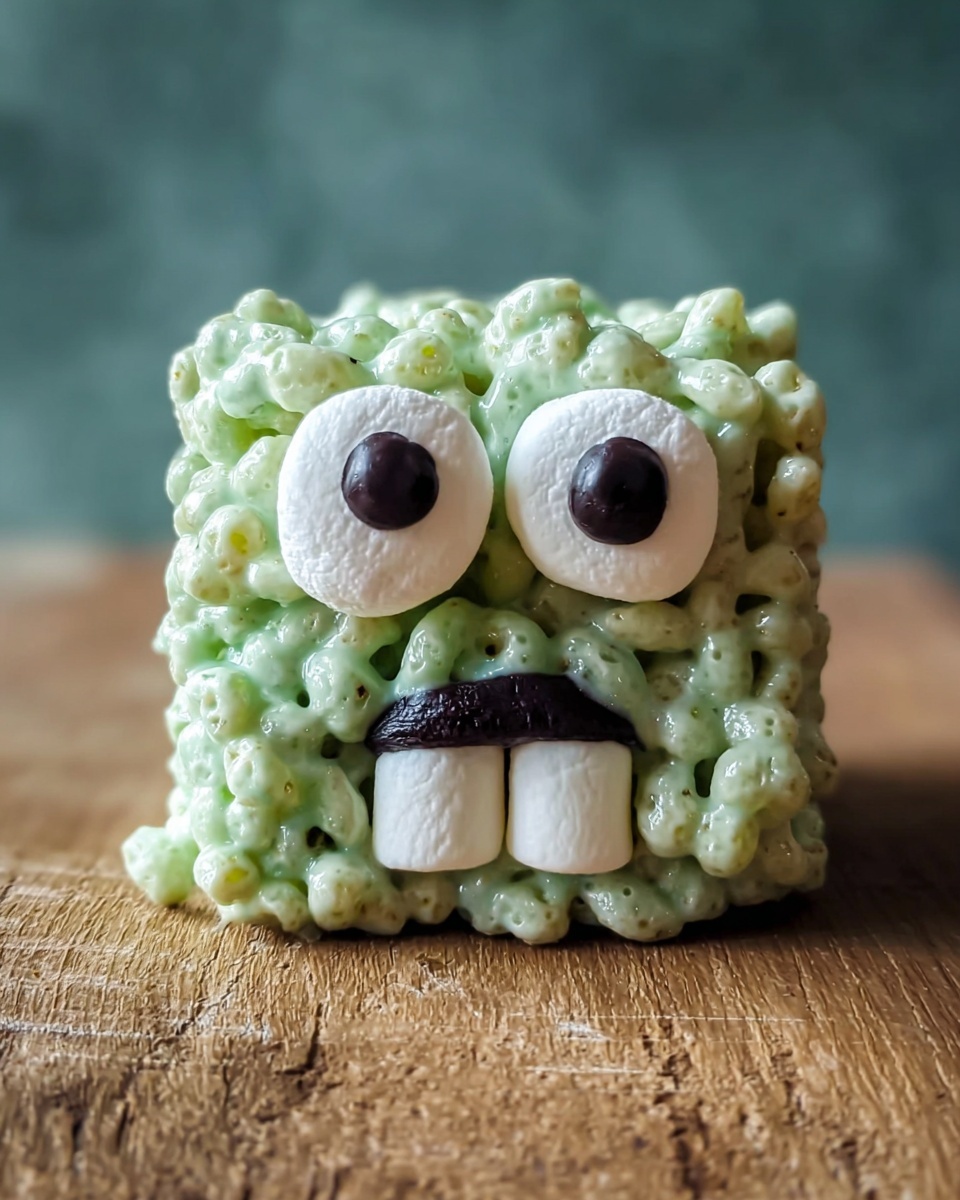
If you want a fun, colorful, and utterly delicious treat that brings out the kid in everyone, the Monster Rice Krispie Treats Recipe is your new best friend. These no-bake sweets are bursting with gooey marshmallow goodness mixed with the classic crunch of Rice Krispies cereal, all jazzed up with playful mini M&M’s and quirky candy eyeballs for that monster vibe. Whether for Halloween, a kids’ party, or just an anytime snack, these treats bring smiles, vibrant colors, and a perfect balance of sweet textures that make every bite an exciting experience.
Ingredients You’ll Need
What’s wonderful about the Monster Rice Krispie Treats Recipe ingredients is how simple yet effective each one is in creating that perfect chewy crunch, vibrant look, and irresistible flavor. These key ingredients combine classic comfort with playful colors and textures that turn every bite into a tiny celebration.
- Rice Krispies cereal (6 cups): The essential crunchy base that gives the treats their signature crispy texture.
- Mini marshmallows (1 10-ounce bag): Melt down to become the sticky, sweet glue holding everything together perfectly.
- Unsalted butter (3 tablespoons): Adds richness and helps melt the marshmallows smoothly for that ideal consistency.
- Vanilla extract (½ teaspoon): Infuses a gentle warmth that enhances the overall flavor without overpowering.
- Mini M&M’s (½ cup): Punctuates the treats with bursts of color and chocolatey bites that make them even more fun.
- Candy eyeballs (¼ cup): The charming monster detail that transforms these treats from ordinary to delightfully spooky.
- Food coloring (green and purple or your choice): Customizes the marshmallow mix into your monster’s signature hue.
- White chocolate chips (¼ cup, optional): For drizzling a sweet, elegant flair that ups the visual appeal and flavor complexity.
How to Make Monster Rice Krispie Treats Recipe
Step 1: Prepare Your Pan
Start by greasing a 9×13-inch baking dish. This is key for easy removal later and ensures that when you press in your mix, nothing sticks and every square comes out perfect. Remember, a light coating of butter or cooking spray does wonders here.
Step 2: Melt the Butter and Marshmallows
In a large saucepan over low heat, melt 3 tablespoons of unsalted butter slowly. Once melted, add your entire bag of mini marshmallows. Stir continuously until the marshmallows are completely melted and silky smooth. This part is magical because it transforms those fluffy little pillows into a sticky sweet binder that holds your treats together.
Step 3: Add Vanilla and Food Coloring
Remove the pan from heat, then stir in ½ teaspoon of vanilla extract for a subtle touch of warmth. Next up, drop in your chosen food coloring—green, purple, or any monster color you prefer. This step gives your treats that unmistakable monster look that kids (and adults) will love.
Step 4: Mix in the Rice Krispies
Quickly add the 6 cups of Rice Krispies cereal and stir until every piece is coated in the colorful marshmallow mixture. The key here is to work quickly before the marshmallow cools and sets, so everything blends perfectly with no clumps.
Step 5: Fold in the Mini M&M’s
After the mixture cools for about a minute but is still warm, gently fold in ½ cup of mini M&M’s. These candies add pops of chocolate and color that make each bite more exciting and fun.
Step 6: Press Into the Pan and Add Candy Eyeballs
Using a greased spatula or a sheet of wax paper, press your mixture evenly into the prepared pan. This step helps create compact, sturdy bars that hold together well. While it’s still slightly warm, press the candy eyeballs in charming clusters across the top to bring your monster treats to life.
Step 7: Optional White Chocolate Drizzle
If you want to add an extra touch of sweetness and pretty decoration, melt the ¼ cup white chocolate chips and drizzle generously over the treat’s surface. This step elevates your Monster Rice Krispie Treats Recipe with a festive, finishing flourish.
Step 8: Cool and Slice
Let your creation cool completely at room temperature before slicing into squares. This ensures they firm up properly and make for clean squares that are perfect for sharing.
How to Serve Monster Rice Krispie Treats Recipe
Garnishes
Beyond the candy eyeballs, you can garnish your treats with extra mini M&M’s, a dusting of edible glitter, or even colorful sprinkles to amp up the playful monster vibe. These finishing touches make them visually irresistible and perfect for kids’ celebrations.
Side Dishes
Serve these treats alongside other fun dessert snacks like fruit kebabs, popcorn balls, or even small cups of hot cocoa. The contrasting textures and flavors make your monster-themed spread festive and exciting for all ages.
Creative Ways to Present
Try cutting the treats into monster shapes using cookie cutters, or serve them stacked on a bright platter with additional candy eyeballs sprinkled around. Wrapping each square in colorful cellophane tied with a ribbon also makes for delightful party favors that everyone will adore.
Make Ahead and Storage
Storing Leftovers
Store any leftover squares in an airtight container at room temperature for up to 3 days. This keeps them fresh and chewy, preserving that signature texture you love.
Freezing
These treats freeze well! Wrap individual squares in plastic wrap and place them in a freezer-safe bag. Freeze for up to a month, then thaw at room temperature before enjoying the full monster experience again.
Reheating
While these treats are best enjoyed fresh or at room temperature, you can warm them slightly in the microwave for 10-15 seconds if you want that warm, melty marshmallow feel again. Just be careful not to overheat or they’ll become too sticky.
FAQs
Can I use regular-sized marshmallows instead of mini ones?
Absolutely! Larger marshmallows will work just fine; just keep an eye on melting times as they might take a little longer and require extra stirring to get that smooth consistency perfect for mixing.
What if I don’t have candy eyeballs?
No worries at all! You can create monster eyes using small white chocolate chips with a dot of melted chocolate, or simply skip them and decorate with colorful sprinkles or candies to keep the fun vibe alive.
Can I make this recipe gluten-free?
Yes, just substitute the Rice Krispies cereal with a gluten-free crispy rice cereal brand. Be sure to check that all other candies and marshmallows are also gluten-free to keep it safe.
How can I customize the colors for different occasions?
The food coloring is super flexible! Choose any colors you love or match the theme of your event, whether it’s bright neon for a birthday or spooky black and orange for Halloween. The marshmallow mix takes color beautifully.
Is it possible to make these treats vegan?
You can make a vegan version by using vegan-friendly marshmallows and plant-based butter substitutes. Just be sure to pick suitable candy decorations that fit your dietary needs.
Final Thoughts
The Monster Rice Krispie Treats Recipe is a joyful blend of nostalgia, creativity, and deliciousness that makes any gathering brighter and sweeter. Simple to make but bursting with personality, these treats invite you to get a little playful in the kitchen and enjoy moments of pure fun. So go ahead, whip up a batch, and share these colorful monsters with your loved ones—they’re sure to become a new favorite!
Print
Monster Rice Krispie Treats Recipe
- Prep Time: 10 minutes
- Cook Time: 5 minutes
- Total Time: 15 minutes
- Yield: 12 treats
- Category: Dessert
- Method: No-Cook
- Cuisine: American
- Diet: Vegetarian
Description
These Monster Rice Krispie Treats are a fun and colorful no-bake dessert perfect for Halloween or any playful occasion. Made with gooey marshmallows, crispy Rice Krispies cereal, and decorated with candy eyeballs and mini M&M’s, these treats bring a whimsical monster theme to your kitchen that kids and adults will love.
Ingredients
Main Ingredients
- 6 cups Rice Krispies cereal
- 1 (10-ounce) bag mini marshmallows
- 3 tablespoons unsalted butter
- ½ teaspoon vanilla extract
Decoration and Color
- Green and purple food coloring (or colors of choice)
- ½ cup mini M&M’s
- ¼ cup candy eyeballs
- ¼ cup white chocolate chips (optional, for drizzling)
Instructions
- Prepare the Baking Dish: Grease a 9×13-inch baking dish with butter or non-stick spray and set it aside to make sure your treats don’t stick.
- Melt Butter and Marshmallows: In a large saucepan over low heat, melt the unsalted butter, then add the mini marshmallows. Stir continuously until the marshmallows melt completely and the mixture is smooth.
- Add Vanilla and Color: Remove the saucepan from heat. Stir in the vanilla extract, then add a few drops of food coloring to tint the mixture to your desired monster color. Quickly stir to incorporate the color evenly.
- Mix with Cereal and M&M’s: Add the Rice Krispies cereal to the colored marshmallow mixture, stirring quickly to coat all the cereal evenly. Let the mixture cool for about one minute, then gently fold in the mini M&M’s for bursts of candy color and flavor.
- Shape the Treats: Transfer the mixture into the prepared baking dish. Using a greased spatula or a piece of wax paper, press the mixture down firmly and evenly to form a flat layer.
- Add Candy Eyeballs: While the treats are still slightly warm and pliable, press the candy eyeballs into the top in clusters to create fun monster faces and eyes.
- Optional White Chocolate Drizzle: If desired, melt the white chocolate chips and drizzle over the top of the treats to add extra flair and texture.
- Cool and Cut: Allow the treats to cool completely at room temperature before cutting them into 12 squares for serving.
Notes
- Customize your monster treats by using different food coloring, sprinkles, or colored candy melts to match any theme or holiday.
- Using gloves or parchment paper when pressing the mixture helps prevent sticking to your hands or utensils.
- Store the treats in an airtight container at room temperature to maintain freshness for up to 3 days.


