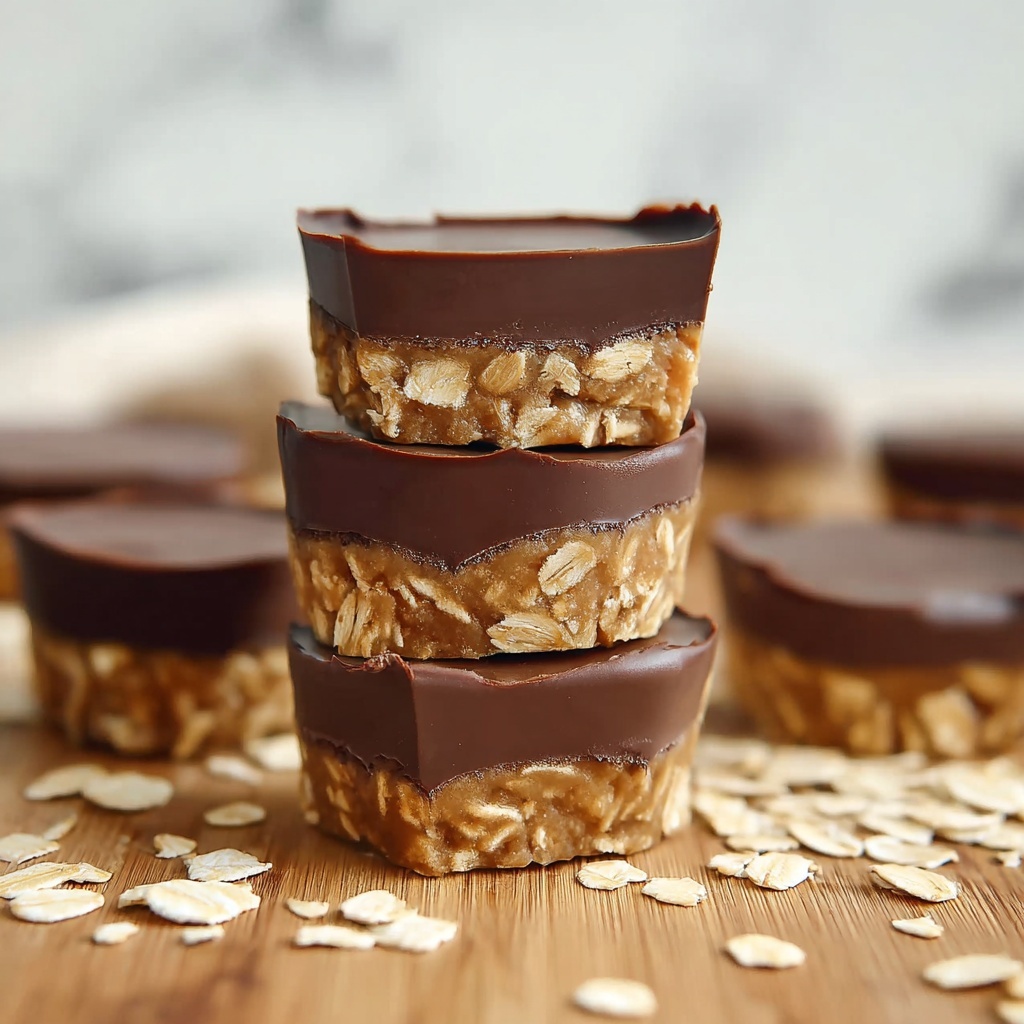
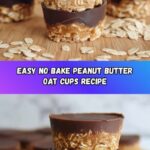
If you’ve been on the lookout for a deliciously simple treat that combines wholesome ingredients with irresistible flavor, look no further than this No Bake Peanut Butter Oat Cups Recipe. Perfectly sweet, satisfyingly chewy, and topped with a dreamy layer of chocolate, these cups are the ideal snack or dessert that requires zero oven time. Whether you’re pressed for time or just want something fuss-free, this recipe brings peanut butter and oats together in the most delightful way—making every bite feel like a little moment of joy.
Ingredients You’ll Need
This No Bake Peanut Butter Oat Cups Recipe relies on a handful of simple, everyday ingredients that come together beautifully to deliver texture and flavor. Each component plays a crucial role—from creating that perfect chewy base to adding a touch of sweetness and the final chocolatey finish.
- Peanut butter: Provides a creamy, nutty richness and acts as the binding agent for the oat mixture.
- Oat flour: Offers a hearty, chewy texture while keeping the cups wholesome and gluten-free if you use certified oats.
- Maple syrup: Adds natural sweetness with a subtle depth that balances the nutty notes.
- Chocolate chips: Deliver a luscious, silky topping that hardens into a satisfying shell.
- Coconut oil (optional): Helps make the melted chocolate smooth and spreadable, adding a slight tropical touch.
How to Make No Bake Peanut Butter Oat Cups Recipe
Step 1: Warm the Peanut Butter and Maple Syrup
Start by microwaving your peanut butter and maple syrup together in a safe bowl. Heat it just until warm, about 40 to 60 seconds, then stir until shiny and smooth. This simple warming step makes mixing in the oats so much easier and ensures your cups have that melt-in-your-mouth creaminess.
Step 2: Mix in the Oat Flour
Now, gradually add the oat flour into your peanut butter mixture. Stir well until it becomes thick and easy to shape — not too crumbly, but with a nice firm texture. This step is crucial because it gives your cups structure and that lovely chewiness that’s so satisfying.
Step 3: Press the Mixture Into Muffin Liners
Line a muffin pan with cupcake liners or opt for a silicone pan if you want an easy release later. Spoon the oat mixture evenly into each cup, then press down firmly with your fingers or a spoon. Getting them nicely compacted ensures the cups hold together well and look neat once set.
Step 4: Melt the Chocolate Topping
In a small bowl, melt your chocolate chips with the optional coconut oil in the microwave. Heat in short 30-second bursts, stirring each time, until everything is silky smooth. This luscious chocolate layer is the part that transforms these cups into something truly irresistible.
Step 5: Top the Cups with Chocolate
Pour the melted chocolate over each peanut butter oat cup. Use the back of a spoon to spread it evenly if you want that perfect smooth finish. This step adds a beautiful, glossy surface that hardens into a slight crunch—a perfect contrast to the chewy base.
Step 6: Chill Until Set
Pop the entire pan in the refrigerator for 2 to 3 hours to let the cups firm up. Patience here really pays off because it allows the chocolate to harden and the flavors to meld together beautifully. Once set, remove the cups carefully from the liners or pan, and they’re ready to enjoy!
How to Serve No Bake Peanut Butter Oat Cups Recipe
Garnishes
While these cups are deliciously perfect on their own, a sprinkle of flaky sea salt on top of the chocolate before chilling enhances the sweet and salty vibe wonderfully. Alternatively, sprinkle some crushed nuts, shredded coconut, or a dusting of cocoa powder for extra flair. These little touches can make your cups feel extra special, especially if sharing with friends.
Side Dishes
Pair these No Bake Peanut Butter Oat Cups Recipe treats with a cup of freshly brewed coffee or a warm tea for an afternoon pick-me-up. They also complement a smoothie bowl or a fresh fruit salad beautifully if you’re aiming for a balanced breakfast or snack time experience that satisfies sweet cravings without overwhelming richness.
Creative Ways to Present
For a fun twist, serve these oat cups in colorful mini cupcake liners or place them on a decorative plate layered with parchment paper. If you’re hosting, arrange them on a tiered dessert stand for a charming display that invites guests to dig in. You could also wrap them individually in parchment with a cute ribbon for a takeaway treat or party favor.
Make Ahead and Storage
Storing Leftovers
Leftover No Bake Peanut Butter Oat Cups Recipe treats keep wonderfully in an airtight container in the refrigerator. They’ll stay fresh and chewy for up to a week, perfect for grabbing a quick snack whenever the craving hits. Just be sure to keep them chilled so the chocolate topping stays firm.
Freezing
You can freeze these oat cups for longer storage. Wrap each cup individually in plastic wrap or parchment paper, then place them in a freezer-safe container or zip-top bag. They’ll hold up well for up to 2 months. When you want one, just thaw it in the fridge overnight for a moist texture or enjoy it slightly frozen for a refreshing summer treat.
Reheating
Because these cups don’t contain any baked ingredients, reheating is not necessary and not recommended. If you prefer them a little softer, simply let them sit at room temperature for 10-15 minutes before enjoying. This allows the chocolate to soften slightly without losing that satisfying texture.
FAQs
Can I use a different nut butter instead of peanut butter?
Absolutely! Almond butter or cashew butter can be great alternatives, offering a slightly different flavor profile but the same creamy consistency needed to bind the oats together.
Is it possible to make these cups vegan?
Yes! Using a dairy-free chocolate and ensuring your maple syrup is pure will keep this recipe completely vegan-friendly and just as delicious.
What if I don’t have oat flour—can I use rolled oats?
You can pulse rolled oats in a food processor or blender until finely ground to make your own oat flour. This keeps the texture just right for moldable peanut butter oat cups.
Can I add extras like nuts or dried fruit?
Definitely! Feel free to stir in chopped nuts, dried cranberries, or even mini chocolate chips to the oat mixture before pressing into the pan for an extra burst of texture and flavor.
What’s the best way to prevent the chocolate from melting too quickly?
Keeping your cups refrigerated until serving is the best approach. If it’s a warm day, store and serve directly from the fridge so the chocolate stays firm and the cups maintain their delightful structure.
Final Thoughts
There’s something truly comforting about a No Bake Peanut Butter Oat Cups Recipe that you can whip up in minutes, with such rewarding results. These no-fuss, crave-worthy treats offer the perfect balance of naturally sweet, nutty, and chocolaty flavors wrapped in a chewy, satisfying texture. I can’t wait for you to try making these—you’ll find they become a favorite go-to snack, whether for yourself or to share with those you love.
Print
No Bake Peanut Butter Oat Cups Recipe
- Prep Time: 10 minutes
- Cook Time: 0 minutes
- Total Time: 2 hours 10 minutes
- Yield: 12 cups (approximately 12 servings)
- Category: Dessert
- Method: No-Cook
- Cuisine: American
- Diet: Gluten Free
Description
These No Bake Peanut Butter Oat Cups are a delicious and easy-to-make treat featuring creamy peanut butter, wholesome oat flour, and a rich chocolate topping. Perfect for a quick snack or dessert, they require no baking and come together in minutes, then chill to set for a satisfying, sweet, and chewy cup.
Ingredients
Base
- 1.5 cups peanut butter
- 1.5 cups oat flour (finely processed rolled oats)
- 1/4 cup maple syrup
Topping
- 1 cup chocolate chips
- 1 tsp coconut oil (optional)
Instructions
- Warm peanut butter and maple syrup: In a microwave-safe bowl, combine the peanut butter and maple syrup. Microwave on high for 40-60 seconds until the mixture is warm, then stir well until smooth and fully combined.
- Mix in oat flour: Gradually add the oat flour to the peanut butter mixture, stirring continuously until a thick, moldable dough forms that holds together well.
- Prepare muffin pan: Line a muffin pan with cupcake liners or lightly grease a silicone muffin pan. Scoop the peanut butter-oat mixture into each muffin cavity, pressing it down firmly to pack and shape the cups evenly.
- Melt chocolate topping: In a small microwave-safe bowl, combine chocolate chips and optional coconut oil. Heat in 30-second increments, stirring between each, until the chocolate is fully melted and smooth.
- Top the peanut butter cups: Pour the melted chocolate over each oat cup, spreading it evenly with the back of a spoon or spatula to cover the tops.
- Chill to set: Place the muffin pan in the refrigerator and chill for 2-3 hours until the chocolate topping is firm and the cups hold their shape. Carefully remove them from the pan before serving.
Notes
- You can substitute maple syrup with honey or agave syrup if desired.
- Use natural peanut butter for a less sweet, more wholesome flavor.
- Oat flour can be made by grinding rolled oats in a food processor until fine.
- The coconut oil in the chocolate topping helps create a smoother texture but can be omitted.
- Store leftover peanut butter oat cups in an airtight container in the refrigerator for up to one week.
- For a nuttier taste, consider lightly toasting the oat flour before mixing.
- These cups are naturally gluten-free if certified gluten-free oats are used.
