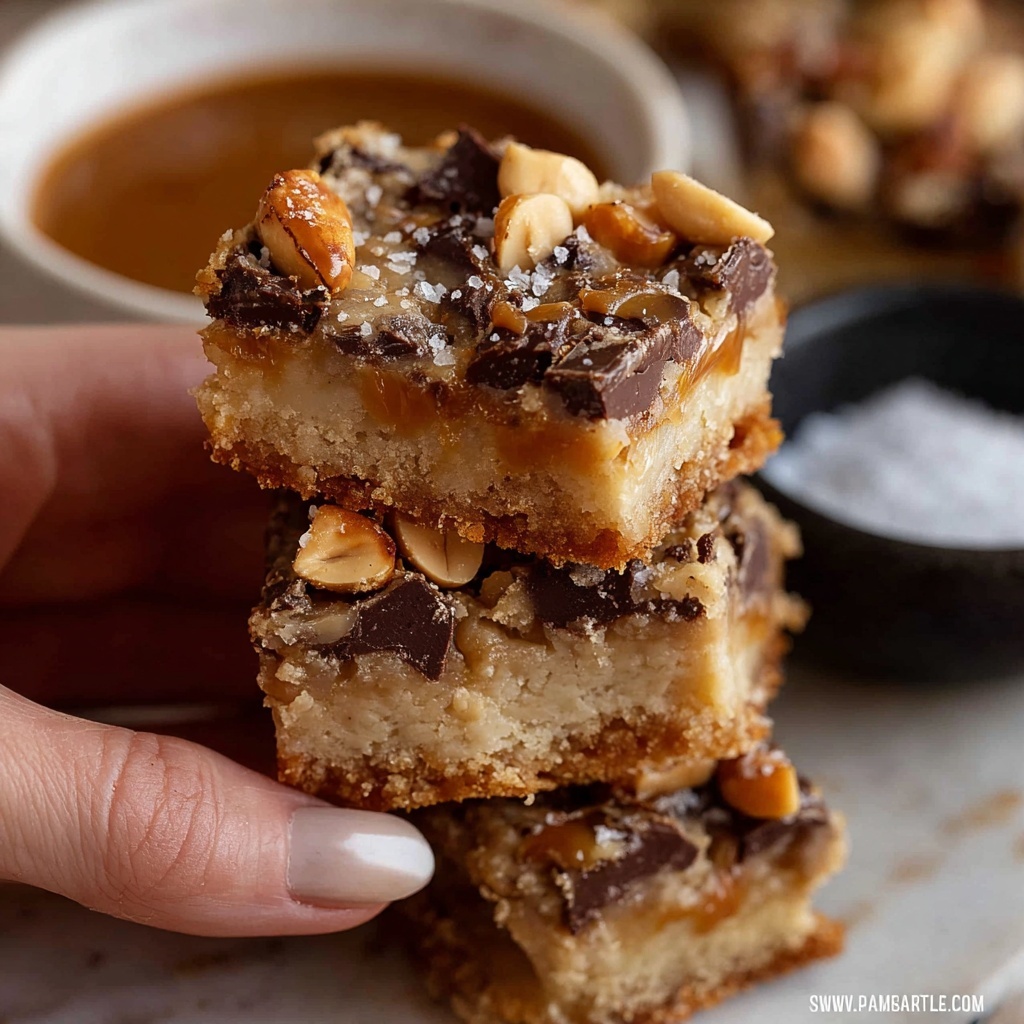
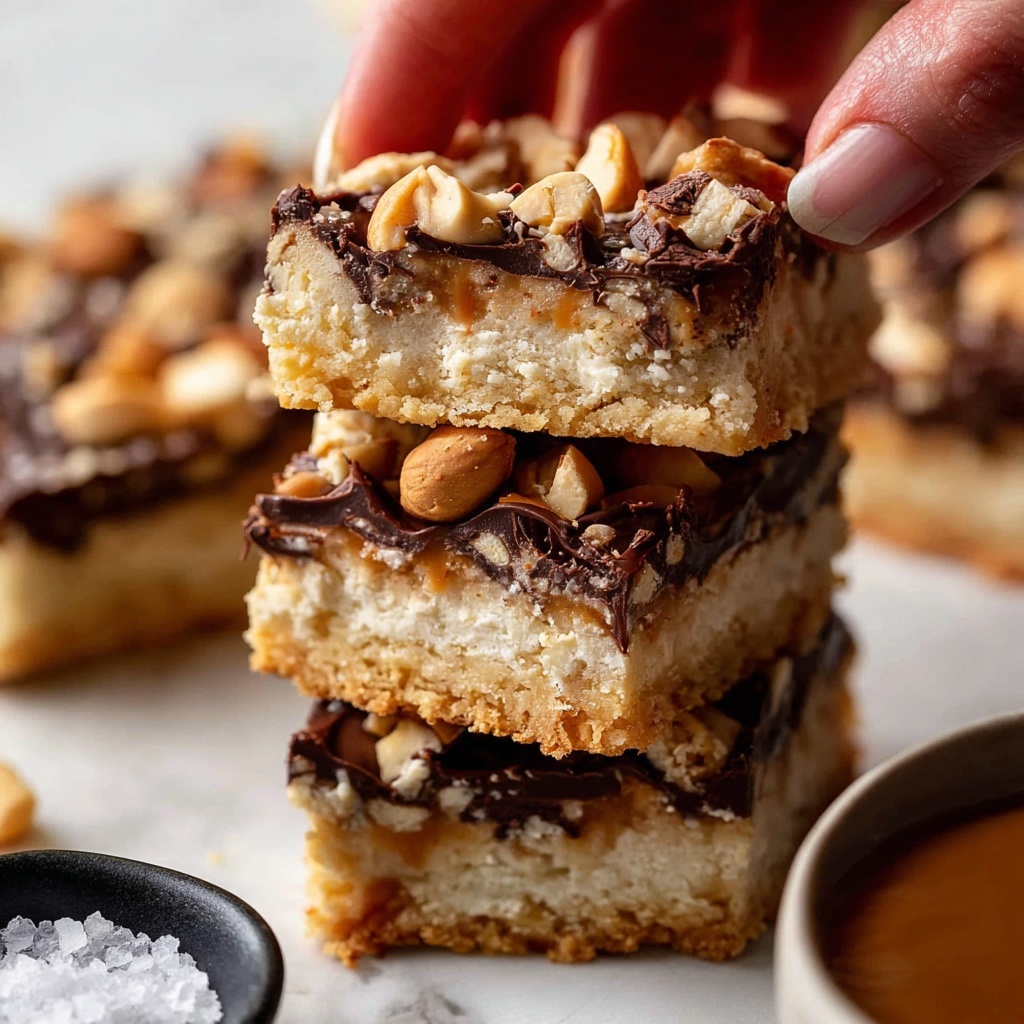
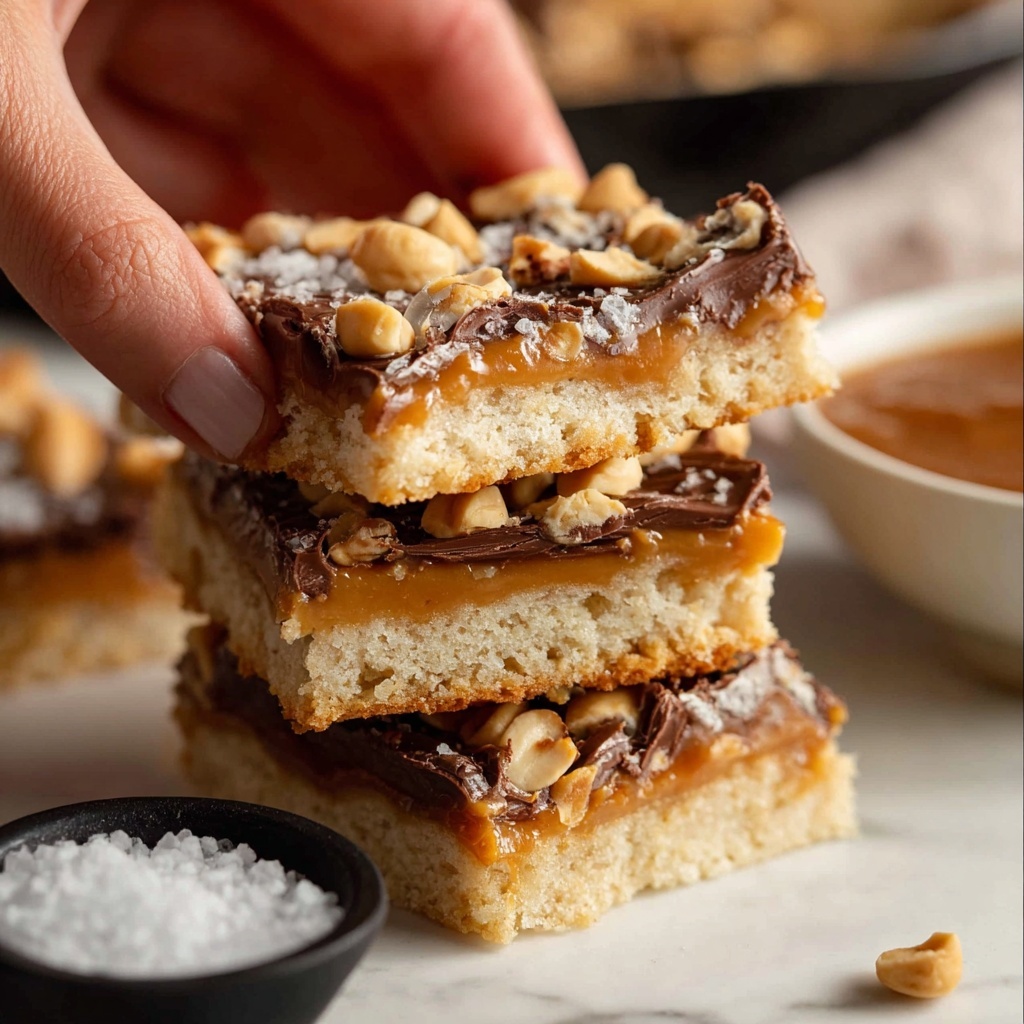
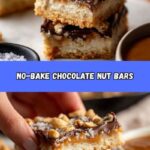
If you’re craving something sweet, crunchy, and utterly delightful without the fuss of dirtying multiple dishes, the No-bowl Chocolate Nut Bars Recipe is your new best friend. This easy-to-make treat combines buttery biscuit crumbs, toasted nuts, chewy coconut, rich chocolate, and the perfect touch of sweetened condensed milk all layered and baked straight in one pan. It’s a clever, no-hassle way to whip up a homemade dessert that’s both nostalgic and surprisingly sophisticated, perfect for an afternoon snack, lunchbox surprise, or sharing with friends over coffee.
Ingredients You’ll Need
The magic of the No-bowl Chocolate Nut Bars Recipe lies in its simple and thoughtfully chosen ingredients. Each one plays a distinct role — whether adding crunch, sweetness, or richness — creating layers of texture and flavor that’ll keep you coming back for more.
- Unsalted butter (100g, cut into chunks): Melts beautifully to bind the biscuit base and add a luscious richness.
- Plain biscuits (1 cup, crushed): Provides the crispy, crumbly base essential for structural balance and subtle sweetness.
- Desiccated coconut (1 cup, unsweetened): Adds chewy texture and a hint of tropical flavor to brighten the bars.
- Unsalted peanuts (1 cup): Offers a crunch and salty contrast; you can swap for any nuts you love.
- Dark chocolate chips (1 cup): Melts into gooey pockets of rich chocolate, satisfying every chocoholic’s dream.
- Sweetened condensed milk (1 can, 395g): The sweet glue that brings all these ingredients together with velvety clasp.
How to Make No-bowl Chocolate Nut Bars Recipe
Step 1: Preheat your oven
Start by heating your oven to 180°C (350°F) or 160°C fan-forced. Setting the right temperature early ensures the bars bake evenly and develop that perfect golden edge we all love.
Step 2: Prepare your pan
Grab a 20cm (8-inch) square pan and give it a light spray of oil — this helps everything release easily later. Then, press in a sheet of baking paper; you won’t need to fuss about perfection here, just enough to line the base and slightly up the sides for easy lift-out.
Step 3: Melt the butter in the pan
Place your cut butter chunks directly into the lined pan and pop it in the oven for about 5 minutes. Watching the butter melt right in the pan is part of the fun and keeps everything neat since there’s no other bowl involved.
Step 4: Create the biscuit base
Once melted, swirl the pan gently to spread the butter evenly across the base. Then sprinkle the crushed biscuits on top and press them down gently. Don’t worry about making it perfectly even — rustic texture is part of the charm and its deliciousness.
Step 5: Layer the good stuff
Scatter the desiccated coconut over the biscuit base. Then sprinkle about two-thirds of your peanuts and chocolate chips, saving some for the very top. Pour the entire can of sweetened condensed milk over these layers, spreading it for even coverage with the back of a spoon or spatula. Finally, top with the reserved nuts and choc chips, adding a little extra visual appeal and crunch.
Step 6: Bake until golden
Place the pan back into the oven and bake for about 30 minutes or until you notice the edges of the top layer turning a lovely golden brown. This gentle baking melds all those incredible flavors and textures perfectly together.
Step 7: Cool and cut
Patience is key here! Let the pan cool completely — either three hours on the counter or one hour at room temperature plus another hour in the fridge. Then, use the paper overhang to lift the bars out and cut into 16 squares. Get ready to enjoy some serious homemade goodness.
How to Serve No-bowl Chocolate Nut Bars Recipe
Garnishes
These bars stand out on their own, but a light dusting of cocoa powder, a sprinkle of flaky sea salt, or a drizzle of melted chocolate on top can elevate their appearance and flavor even further. Fresh berries or a few mint leaves on the side offer a fresh contrast that’s hard to resist.
Side Dishes
Serve alongside a cup of strong coffee or a creamy latte for an unbeatable afternoon indulgence. They also pair beautifully with a scoop of vanilla ice cream or whipped cream if you’re turning dessert into a proper celebration.
Creative Ways to Present
Try cutting these bars into fun shapes using cookie cutters for parties or layering them in a glass jar layered with whipped cream and berries for an elegant dessert parfait. Wrapping individual squares in parchment paper makes them ideal little gifts or grab-and-go treats.
Make Ahead and Storage
Storing Leftovers
Store leftover bars in an airtight container at room temperature for up to four days to retain their chewy, crunchy texture. If it’s warmer in your kitchen, the fridge is a great alternative to keep everything fresh and prevent the chocolate from melting.
Freezing
You can freeze these bars wrapped tightly in plastic wrap and stored in a resealable freezer bag for up to two months. Thaw them overnight in the fridge before serving to enjoy their full flavor and ideal texture.
Reheating
Warm bars gently in a low oven or microwave for a few seconds to bring back that melted chocolate softness — just don’t overdo it or they’ll become too gooey to handle. They taste wonderful warm or at room temperature, so find your perfect balance!
FAQs
Can I use different nuts for this recipe?
Absolutely! While peanuts are classic here, feel free to swap for almonds, walnuts, pecans, or even mixed nuts, depending on what you have on hand or your personal preference. Each nut will bring a unique flavor and crunch.
Do I have to use sweetened condensed milk?
Sweetened condensed milk is key to the bars’ chewy texture and rich sweetness, so it’s highly recommended. However, if you want a slightly less sweet option, you could experiment with alternatives but be aware it may alter the texture.
Is it possible to make this gluten-free?
Yes! Use gluten-free biscuits for the base, and double-check that your chocolate chips and other ingredients are gluten-free certified. This makes the bars accessible for friends with gluten sensitivities without compromising on taste.
Can these bars be made vegan?
For a vegan twist, substitute the butter with a plant-based alternative and use vegan condensed milk (available in many stores or homemade). Vegan chocolate chips will complete the transformation, though keep in mind the texture might be slightly different.
How do I prevent the bars from sticking when cutting?
Ensure the bars have fully cooled and set before cutting. Using a sharp knife warmed with hot water and wiped dry for each cut can help create clean edges without sticking or crumbling.
Final Thoughts
If you’re looking for a dessert that’s straightforward but feels like a special treat, the No-bowl Chocolate Nut Bars Recipe is an absolute winner. Its fuss-free approach combined with layers of texture and flavor makes it a perfect anytime snack you’ll want to make again and again. Trust me, once you try these bars, they’ll become a go-to favorite that you’ll be excited to share with everyone you love.
Print
No-bowl Chocolate Nut Bars Recipe
- Prep Time: 10 minutes
- Cook Time: 30 minutes
- Total Time: 40 minutes plus cooling time (3 hours recommended)
- Yield: 16 bars
- Category: Dessert
- Method: Baking
- Cuisine: International
Description
These No-bowl Chocolate Nut Bars are an easy, no-fuss treat combining buttery biscuit crumbs, crunchy nuts, shredded coconut, and rich chocolate chips all held together with sweetened condensed milk. Baked in one pan with minimal prep and no mixing bowls, they’re perfect for a quick wholesome snack or dessert that delivers a satisfying combination of textures and flavors.
Ingredients
Base Ingredients
- 100g (7 tbsp) unsalted butter, cut into chunks
- 1 cup (100g) plain biscuits, crushed (e.g., Marie, Arrowroot, digestives, Graham crackers)
Mix-ins and Toppings
- 1 cup desiccated coconut, unsweetened
- 1 cup unsalted peanuts or other nuts of choice
- 1 cup dark chocolate chips (semi-sweet chips)
- 395g (14 oz) sweetened condensed milk (1 can)
Instructions
- Preheat the oven: Set your oven temperature to 180°C (350°F) or 160°C fan-forced to prepare for baking the bars.
- Prepare the pan: Lightly spray a 20cm (8 inch) square baking pan with oil, then press in a sheet of baking paper. Precision is not necessary; this will help with easy removal later.
- Melt the butter: Place the chunks of butter directly in the pan and place it in the oven for about 5 minutes to melt the butter.
- Create biscuit base: Swirl the pan to spread the melted butter evenly, then sprinkle the crushed biscuits over the butter. Spread and gently press the biscuit layer down to form a base.
- Layer toppings and condensed milk: Scatter the desiccated coconut over the biscuit base, then sprinkle about two-thirds of the peanuts and chocolate chips, reserving some for the top. Pour the condensed milk evenly over the layers and spread for uniform coverage. Lastly, top with the remaining nuts and chocolate chips.
- Bake the bars: Place in the oven and bake for 30 minutes or until the edges are golden brown and set.
- Cool and serve: Allow the bars to cool completely before slicing. Cooling can be done on the counter for 3 hours or 1 hour on the counter followed by 1 hour in the fridge. Use the paper overhang to lift the bars out of the pan and cut into 16 squares to serve.
Notes
- Note 1: Plain biscuits such as Marie, Arrowroot, digestives, or Graham crackers are ideal for the base.
- Note 2: Nuts can be swapped out according to preference, and semi-sweet chocolate chips work well for the chocolate component.
- Note 3: Sweetened condensed milk is essential to bind the mixture and give a rich sweetness.
- Ensure the bars are fully cooled before cutting to maintain their shape.
- The recipe requires no mixing bowls, making cleanup quick and easy.
