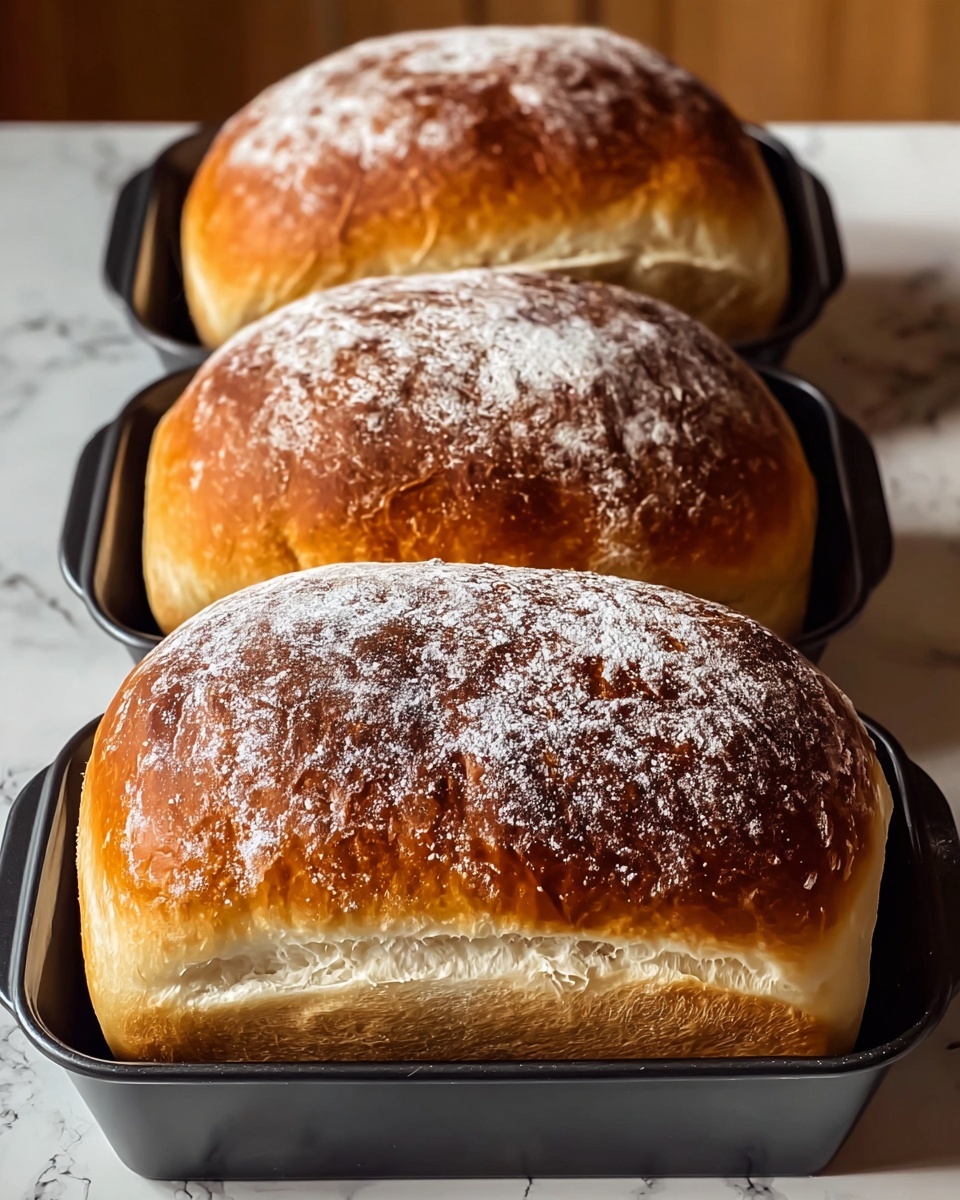
If you have ever dreamed of pulling a heavenly crusty loaf fresh out of your oven without the fuss of complicated kneading, then you’ll absolutely adore this No-Knead Artisan Bread Recipe. It’s the ultimate game-changer for home bakers who crave that rustic, bakery-quality bread with a perfectly crisp crust and a soft, chewy interior. The magic lies in its simplicity—minimal ingredients, minimal hands-on time, and maximum deliciousness. Trust me, once you master this recipe, you’ll be making homemade bread your new favorite hobby.
Ingredients You’ll Need
This No-Knead Artisan Bread Recipe calls for just a handful of pantry essentials, each playing a vital role in creating that perfect texture and flavor. These ingredients are easy to find and work beautifully together to produce an irresistible loaf that looks and tastes like it came from a bakery.
- 3 cups all-purpose flour: The foundation of the bread, providing structure and that tender crumb.
- 1 ½ teaspoons salt: Enhances flavor and strengthens gluten to improve dough texture.
- ½ teaspoon active dry yeast: The tiny powerhouse responsible for the bread’s rise and delightful air pockets.
- 1 ½ cups warm water (about 110°F): Activates the yeast and hydrates the flour for that perfect dough consistency.
How to Make No-Knead Artisan Bread Recipe
Step 1: Mix Your Ingredients
Start by whisking together the flour, salt, and yeast in a large bowl. Then pour in the warm water and stir until you have a shaggy, sticky dough. This mixture is intentionally wet and loose, which helps develop that airy, hole-filled texture without any kneading. Cover the bowl tight with plastic wrap or a clean kitchen towel, and let your dough rest at room temperature for 12 to 18 hours. During this time, the yeast works its magic, doubling the dough’s size and filling it with bubbles—good signs that your bread will be wonderfully light and flavorful.
Step 2: Preheat and Shape
Once your dough has beautifully risen, preheat your oven to 450°F. Place a Dutch oven with its lid inside to heat up for at least 30 minutes. Meanwhile, tip your dough onto a generously floured surface and gently shape it into a round ball, taking care not to deflate all those precious bubbles. Cover it with a towel and let it rest for another 30 minutes, allowing the gluten to relax and the dough to puff up slightly again while your Dutch oven gets hot.
Step 3: Bake to Perfection
Carefully remove the blazing-hot Dutch oven from your oven and transfer your dough inside. Using parchment paper to help lift it makes this step easier and prevents sticking. Put the lid back on and bake for 30 minutes—this traps steam inside, giving you that crusty artisan exterior. After 30 minutes, take off the lid and continue baking for 10 to 15 more minutes until your bread turns a gorgeous golden brown and the crust crisps up beautifully.
Step 4: Cool and Enjoy
Once baked, gently remove your loaf from the Dutch oven and place it on a wire rack to cool for at least 30 minutes. This resting time is key as the crumb finishes setting and the flavors fully develop. Then comes the best part—slicing into this crunchy, chewy masterpiece and savoring every bite.
How to Serve No-Knead Artisan Bread Recipe
Garnishes
This bread’s versatility means you can dress it up in countless ways. Sprinkle flaky sea salt or herbs like rosemary on top after baking for added flavor and flair. A brush of garlic or olive oil pre-baking can also take the crust to another level of deliciousness.
Side Dishes
No loaf is complete without complementing sides. This bread pairs wonderfully with soups like tomato basil or creamy mushroom, fresh salads, or even a platter of cheeses and charcuterie. It’s also wonderful simply slathered with butter or your favorite jam for breakfast or a snack.
Creative Ways to Present
Imagine serving this No-Knead Artisan Bread Recipe sliced thick for bruschetta topped with ripe tomatoes and basil or transforming it into garlic bread that steals the spotlight at any dinner. You can even cube and toast it for homemade croutons that bring crunchy goodness to your salads and soups.
Make Ahead and Storage
Storing Leftovers
If you find yourself with leftover bread, wrap it tightly in a clean kitchen towel or store in a bread box to keep the crust crisp while the inside stays soft. Avoid plastic bags for day-to-day storage as they can make the crust chewy and less enjoyable.
Freezing
This No-Knead Artisan Bread Recipe freezes beautifully. Slice the loaf before freezing and keep slices in an airtight container or freezer bag. This makes it easy to toast only what you need and preserve the rest for future cravings.
Reheating
To revive your bread’s fresh-baked texture, preheat your oven to 350°F and warm the bread on a baking sheet for 10 to 15 minutes. This will restore the crust’s crispness and the crumb’s softness, making your leftover loaf taste fresh again.
FAQs
Do I really not need to knead the dough?
Yes! This No-Knead Artisan Bread Recipe relies on a long fermentation period which develops the gluten naturally. The result is a wonderfully chewy and airy texture without any kneading effort on your part.
Can I use bread flour instead of all-purpose flour?
Absolutely! Bread flour contains more protein which can create a chewier texture and a slightly higher rise. Feel free to experiment and see which you prefer in your loaf.
What if I don’t have a Dutch oven?
A heavy oven-safe pot with a lid works well too. If you don’t have one, you can bake your dough on a preheated baking stone or sheet and create steam by placing a pan of water in the oven to mimic the steam effect.
Can I add flavors like herbs or garlic?
Definitely! Incorporating minced garlic, chopped herbs, or even shredded cheese into your dough before the long rise adds delicious layers of flavor that personalize your artisan bread.
How do I know when the bread is fully baked?
The crust should be a deep golden brown and sound hollow when tapped on the bottom. If you have a thermometer, the internal temperature should reach around 200°F for perfect doneness.
Final Thoughts
You simply cannot go wrong with the No-Knead Artisan Bread Recipe as your go-to homemade bread. It brings together ease, flavor, and that artisan vibe into one satisfying loaf that anyone can bake. So grab your ingredients, preheat your oven, and prepare to impress yourself and others with the magic of truly effortless homemade bread.
Print
No-Knead Artisan Bread Recipe
- Prep Time: 10 minutes (plus 12–18 hours resting)
- Cook Time: 45 minutes
- Total Time: 13 hours (including resting time)
- Yield: 1 loaf (about 8 slices)
- Category: Bread
- Method: Baking
- Cuisine: American
- Diet: Vegan
Description
This No-Knead Artisan Bread recipe offers an easy way to make delicious, crusty homemade bread with minimal effort. Using just a few simple ingredients and a long resting period, you can achieve a bakery-quality loaf with a golden crust and chewy interior. The bread is baked in a hot Dutch oven to trap steam, giving it an authentic artisan texture perfect for sandwiches or serving alongside your favorite meals.
Ingredients
Ingredients
- 3 cups all-purpose flour
- 1 ½ teaspoons salt
- ½ teaspoon active dry yeast
- 1 ½ cups warm water (about 110°F)
Instructions
- Mix Ingredients and Rest: In a large mixing bowl, whisk together the flour, salt, and yeast. Add the warm water and stir with a wooden spoon or spatula until a shaggy dough forms. Cover the bowl tightly with plastic wrap or a clean kitchen towel and let it rest at room temperature for 12 to 18 hours, or until the dough has doubled in size and is bubbly on the surface.
- Preheat Oven and Prepare Dough: Preheat your oven to 450°F. Place a Dutch oven with its lid inside the oven to heat for at least 30 minutes. Meanwhile, turn the dough onto a well-floured surface and shape it into a ball using lightly floured hands. Let it rest, covered with a towel, for about 30 minutes while the Dutch oven heats.
- Bake the Bread: Carefully remove the hot Dutch oven from the oven, place the dough inside using parchment paper if desired, cover with the lid, and bake for 30 minutes. Then remove the lid and bake for an additional 10-15 minutes until the crust is golden brown and crisp.
- Cool and Serve: Remove the bread from the Dutch oven and let it cool on a wire rack for at least 30 minutes before slicing to ensure the crumb sets properly.
Notes
- You can add herbs, garlic, or cheese to the dough for extra flavor.
- Bread flour can be used instead of all-purpose flour for a chewier texture.
- Make sure your Dutch oven is oven-safe up to 450°F.


