
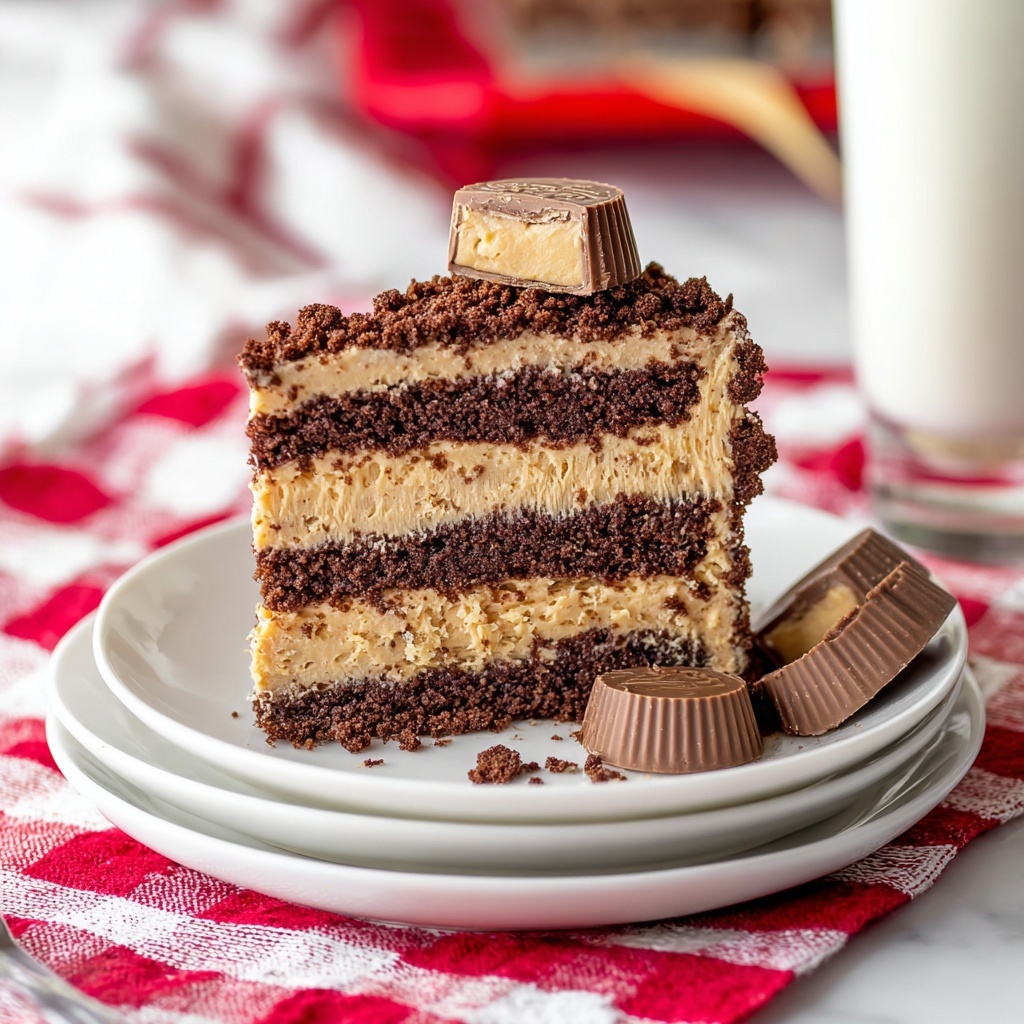
If you have a serious sweet tooth and love the magical combo of creamy peanut butter and rich chocolate, then this Peanut Butter Icebox Cake Recipe is about to become your new best friend. This no-bake dessert layers silky peanut butter filling with crunchy chocolate graham crackers to create a luscious, dreamy treat that melts in your mouth. The beauty of this cake is how effortlessly it comes together, transforming simple ingredients into an elegant, crowd-pleasing delight that’s perfect for any occasion or just a cozy night in. Trust me, once you try this Peanut Butter Icebox Cake Recipe, you’ll be hooked!

Ingredients You’ll Need
These ingredients may look straightforward, but each plays a crucial role in building the perfect balance of flavors and textures in this Peanut Butter Icebox Cake Recipe. Their simplicity lets the natural richness of peanut butter and the nostalgic crunch of graham crackers shine through.
- Chocolate graham crackers: Provide a sturdy, slightly crunchy layer with a hint of cocoa that complements the peanut butter beautifully.
- Cream cheese (softened): Adds a smooth, tangy creaminess that contrasts the sweetness and keeps the filling luscious.
- Peanut butter (smooth): The star ingredient, delivering that rich, nutty flavor that defines this cake.
- Powdered sugar: Sweetens the filling gently while ensuring a silky texture without graininess.
- Whipped topping (or Cool Whip thawed): Lightens the filling, giving the cake a fluffy, airy consistency that melts on your tongue.
- Peanut butter cups: Perfect for garnish, adding extra chocolatey goodness and a fun, indulgent touch.
How to Make Peanut Butter Icebox Cake Recipe
Step 1: Whip Up the Creamy Peanut Butter Mixture
Start by beating the softened cream cheese and smooth peanut butter together in a large bowl. The goal is a silky, lump-free texture that serves as the luscious base of your filling. This mixture is where all the creamy richness begins.
Step 2: Sweeten the Mixture
Next, add the powdered sugar and continue mixing until the filling is smooth and sweetened just right. This step balances the peanut butter’s natural saltiness and cream cheese tang with a gentle sweetness that keeps the cake irresistible.
Step 3: Fold in the Whipped Topping
Gently fold in the whipped topping or thawed Cool Whip to lighten the filling without deflating it. This fluffy addition transforms the dense peanut butter cream into a cloud-like filling that perfectly complements the crunchy graham crackers.
Step 4: Prepare Your Baking Dish
Line an 8×8 baking dish with plastic wrap, ensuring there’s plenty of overhang on the edges. This will help you lift the cake out once it’s set, making serving a breeze and keeping everything neat.
Step 5: Create the First Graham Cracker Layer
Lay down a layer of chocolate graham crackers at the base of the dish, arranging about three across and filling the gaps with broken pieces. This forms the sturdy foundation for your peanut butter layers.
Step 6: Spread the Peanut Butter Filling
Spoon about a third of your peanut butter mixture over the graham crackers and spread it evenly. The filling should fully cover the crackers to meld the layers together as it chills.
Step 7: Continue Layering
Repeat with another layer of graham crackers, followed by another third of the peanut butter mixture, then repeat the sequence one more time. Finish with a final layer of crushed graham crackers for added texture and visual appeal.
Step 8: Chill Overnight
Fold the plastic wrap over the top of the assembled cake to cover it completely. Place the dish in the freezer overnight or for at least eight hours—the chilling allows those flavors to marry and the crackers to soften just enough to create that perfect cake-like texture.
Step 9: Thaw Before Serving
When you’re ready to indulge, remove the cake from the freezer and let it thaw for about an hour. This ensures each bite is creamy and soft, not frozen solid.
Step 10: Garnish and Slice
Top your Peanut Butter Icebox Cake with peanut butter cups for both an eye-catching presentation and a decadent chocolate-peanut butter boost. Slice, serve, and prepare for all the compliments coming your way!
How to Serve Peanut Butter Icebox Cake Recipe
Garnishes
Beyond peanut butter cups, try crushing some extra chocolate graham crackers or sprinkling chopped roasted peanuts on top. A drizzle of chocolate or caramel sauce also amps up the visual and flavor appeal, creating a look as decadent as the taste.
Side Dishes
Though this cake is a dessert star on its own, serving it alongside fresh berries or a simple scoop of vanilla ice cream provides a refreshing contrast. The fruit’s natural tartness cuts through the richness, making every bite balanced and delightful.
Creative Ways to Present
Try serving individual portions in small glass jars or parfait cups layered beautifully with extra whipped topping and crushed graham crackers for an Instagram-worthy treat. Or, get festive by shaping the cake in a loaf pan and slicing it into bars for an easy grab-and-go dessert option.
Make Ahead and Storage
Storing Leftovers
Wrap leftover Peanut Butter Icebox Cake tightly with plastic wrap or transfer to an airtight container. Store it in the refrigerator for up to three days to enjoy later without sacrificing texture or flavor.
Freezing
You can freeze leftovers wrapped well to prevent freezer burn for up to a month. When you want to enjoy it again, simply thaw overnight in the refrigerator for the best texture and taste.
Reheating
This dessert is best enjoyed chilled or at room temperature, so no reheating required. Just allow it to thaw properly if frozen, and serve to experience that perfect creamy texture we all crave.
FAQs
Can I use crunchy peanut butter instead of smooth?
Absolutely! Using crunchy peanut butter will add delightful texture to the filling and some extra peanutty crunch, making your Peanut Butter Icebox Cake Recipe even more exciting to eat.
Do I have to freeze the cake overnight?
While the freezer method speeds up the setting process and softens the crackers, chilling in the refrigerator for at least 8 hours will also work if you prefer not to freeze it.
Can I substitute the chocolate graham crackers?
Yes, you can experiment with regular graham crackers or even chocolate wafers for a different flavor profile. Just remember that the chocolate graham crackers add a lovely cocoa note that pairs wonderfully with peanut butter.
Is there a dairy-free version of this recipe?
You can swap cream cheese and whipped topping for their dairy-free alternatives. Make sure to choose smooth peanut butter and check all ingredients to accommodate dietary needs.
How long does this cake last once thawed?
Once thawed, it’s best to enjoy the cake within 2 to 3 days when kept properly refrigerated to maintain its freshness and texture.
Final Thoughts
I can’t recommend making this Peanut Butter Icebox Cake Recipe enough—its combination of creamy, crunchy, sweet, and salty hits all the right notes every single time. It’s the kind of dessert that’s perfect to share with friends or treat yourself after a long day. Dive in, savor each bite, and enjoy the happiness it brings to your table!
Print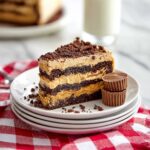
Peanut Butter Icebox Cake Recipe
- Prep Time: 20 minutes
- Cook Time: 0 minutes
- Total Time: 8 hours 20 minutes
- Yield: 9 servings
- Category: Dessert
- Method: No-Cook
- Cuisine: American
- Diet: Vegetarian
Description
This Peanut Butter Icebox Cake is a no-bake, creamy dessert that layers rich peanut butter cream and chocolate graham crackers to create a luscious, easy-to-make treat. Set overnight in the freezer, it offers a perfect balance of sweet and nutty flavors, garnished with peanut butter cups for an extra indulgent touch. Ideal for peanut butter lovers looking for a simple yet impressive dessert.
Ingredients
Base
- 16 chocolate graham crackers
Peanut Butter Filling
- 1 (8 oz) package cream cheese, softened
- 1 cup smooth peanut butter
- 1.25 cups powdered sugar
- 1 (8 oz) container whipped topping (or Cool Whip), thawed
Garnish
- Peanut butter cups, for topping
Instructions
- Prepare the peanut butter mixture. In a large bowl, beat together the softened cream cheese and smooth peanut butter until the mixture is completely smooth and creamy.
- Add powdered sugar. Gradually mix in the powdered sugar into the peanut butter and cream cheese mixture until fully incorporated and smooth.
- Fold in whipped topping. Gently fold the thawed whipped topping into the peanut butter mixture to maintain a light, airy texture.
- Line the baking dish. Line an 8×8 inch baking dish with plastic wrap, leaving enough overhang on the sides to cover the top later.
- First layer of graham crackers. Arrange a layer of chocolate graham crackers on the bottom of the dish, usually three across, breaking pieces to fill gaps as needed.
- Spread peanut butter mixture. Spoon about one-third of the peanut butter cream mixture over the graham crackers and spread it evenly.
- Add second graham cracker layer. Place another layer of graham crackers over the peanut butter cream layer.
- Repeat layering. Add another third of the peanut butter mixture, then graham crackers, then the remaining peanut butter mixture, and finally top with crushed graham crackers for texture.
- Cover and freeze. Fold the plastic wrap over the top of the cake to cover it completely and place the dish in the freezer. Freeze overnight or for at least 8 hours to allow the layers to set.
- Thaw before serving. About an hour before serving, remove the cake from the freezer and let it thaw to a sliceable consistency at room temperature.
- Garnish and serve. Top the cake with peanut butter cups, slice, and serve chilled for a delicious dessert experience.
Notes
- Ensure the cream cheese is softened to room temperature for smooth mixing.
- Use plastic wrap generously to make removal and slicing easier.
- Allow sufficient freezing time to get clean, firm slices.
- For an extra chocolatey touch, use chocolate peanut butter cups as garnish.
- This dessert can be stored in the freezer for up to 3 days.

