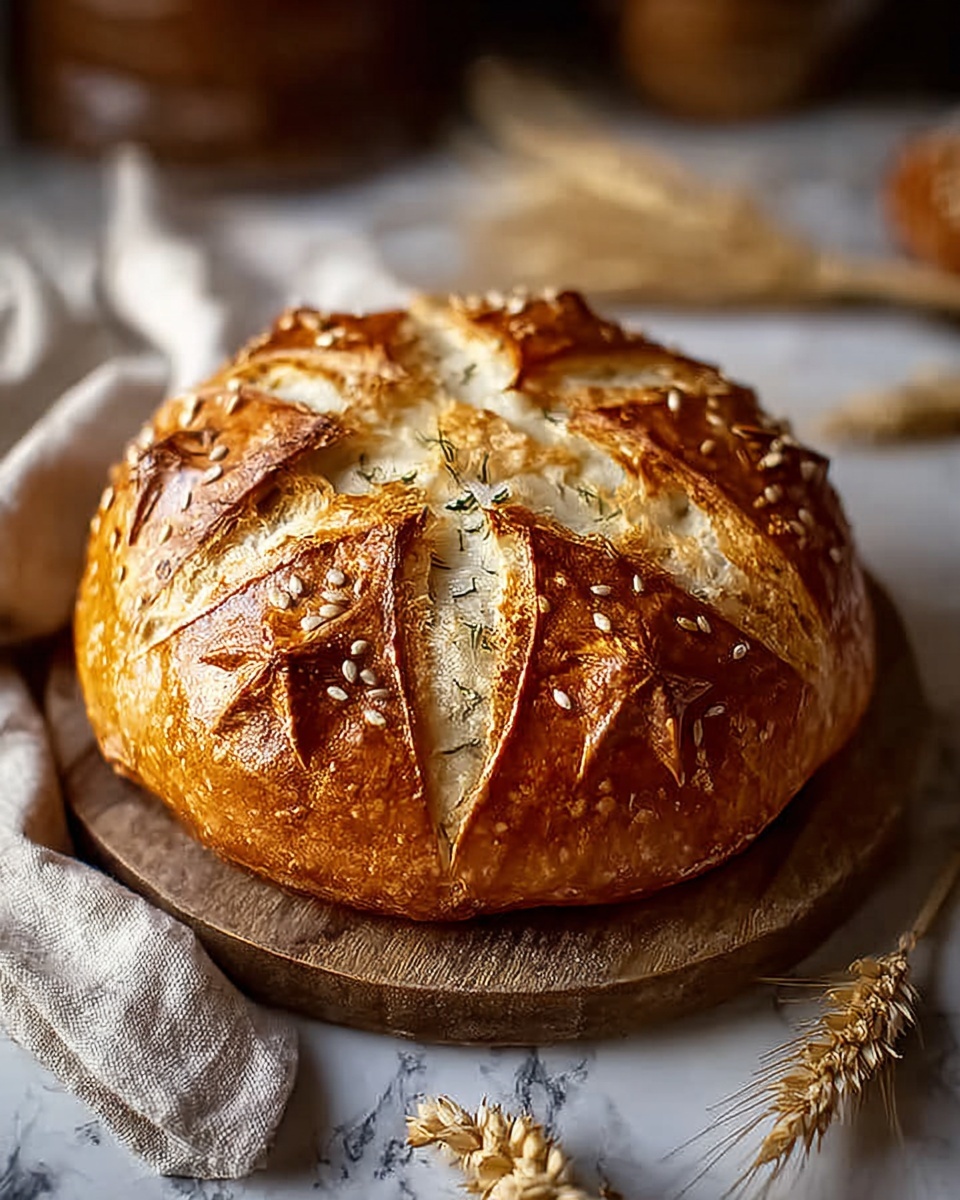
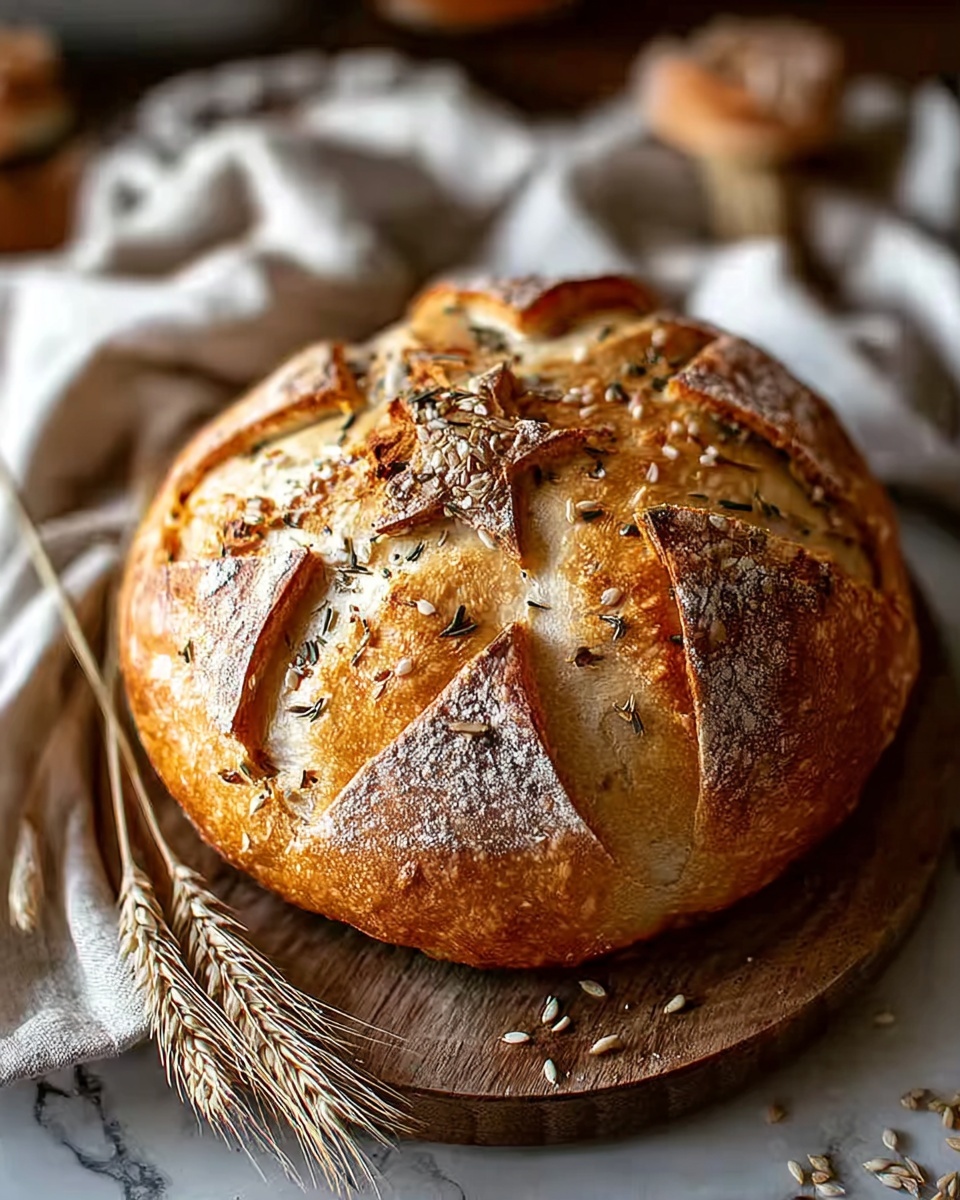
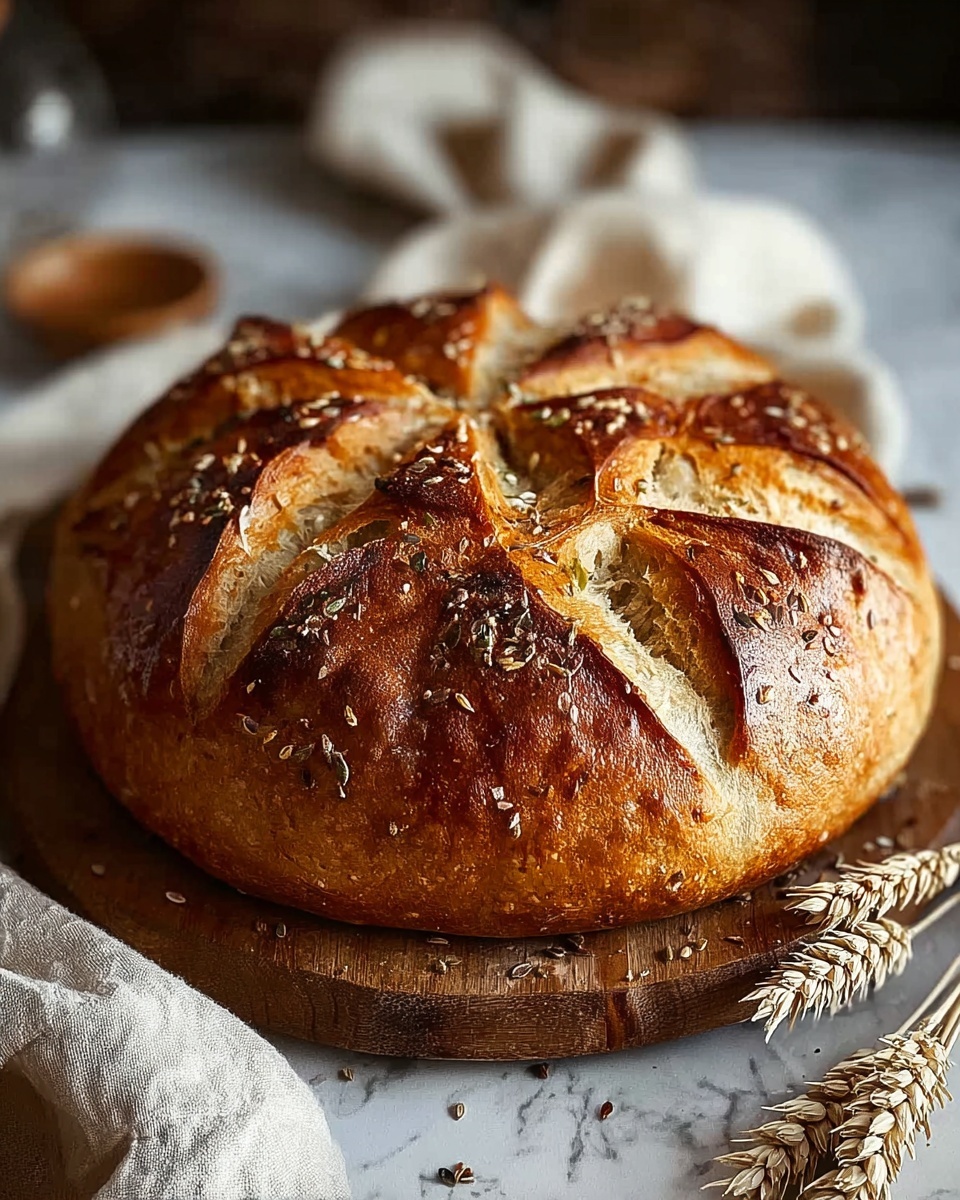
There is something truly magical about the Rustic German Whole-Wheat Bread Recipe that captures the heart of traditional baking while filling your kitchen with the irresistible aroma of freshly baked bread. This loaf is hearty, wholesome, and bursting with the nutty flavor of whole-wheat flour, perfectly balanced by a gentle crust that is both crisp and inviting. Whether you’re a seasoned baker or a curious beginner, this recipe delivers a comforting slice of Germany right to your home with every bite.
Ingredients You’ll Need
The beauty of the Rustic German Whole-Wheat Bread Recipe lies in its simplicity. Each ingredient plays a vital role in creating the perfect balance of texture, flavor, and that irresistible rustic appearance. You don’t need any fancy add-ons—just pure, honest ingredients that come together to make something truly special.
- 400 g whole-wheat flour: Provides a hearty, nutty flavor and dense texture characteristic of rustic German bread.
- 100 g bread flour: Adds the right gluten strength to give the bread structure and a gentle chew.
- 1 tsp sugar: Helps activate the yeast and adds a hint of subtle sweetness.
- 2 tsp salt: Enhances flavor depth and controls yeast activity for a balanced rise.
- 1 tsp dry yeast: The essential agent that makes your dough rise, creating that perfect airy crumb.
- 350 ml lukewarm water: Hydrates the flours and activates the yeast, creating the dough’s right consistency.
How to Make Rustic German Whole-Wheat Bread Recipe
Step 1: Activate the Yeast
Start by merging lukewarm water, sugar, and dry yeast in a bowl, then stir gently. Let this mixture rest for 5 to 10 minutes until it becomes foamy on the surface. This foaming is your yeast waking up and readying to work its magic, setting the foundation for your bread’s rise.
Step 2: Mix Dry Ingredients
In a large mixing bowl, whisk together the whole-wheat flour, bread flour, and salt. Combining these dry ingredients evenly ensures every bite of your bread is consistently flavorful and well textured.
Step 3: Form the Dough
Pour the activated yeast mixture into the flour blend, stirring until a sticky dough forms. Give it a brief kneading by hand right in the bowl—just enough to bring everything together. This dough will feel a bit tacky, but that’s exactly what you want for a beautifully moist loaf.
Step 4: First Rise
Cover your bowl with a kitchen towel or plastic wrap and place it in a warm spot. Let the dough rise for about an hour or until it has doubled in size. This is where the yeast really works, producing bubbles and air that create the wonderful crumb texture.
Step 5: Shape the Loaf
Lightly flour a clean surface, then gently shape the risen dough into a rustic round loaf. Remember, don’t overwork it here—embrace the charm of a naturally imperfect shape that gives this bread its authentic rustic character.
Step 6: Second Proof
Place your shaped dough onto parchment paper or into a proofing basket if you have one, cover again, and let it rise for another 30 to 45 minutes. This final proof helps achieve that lightness inside the crusty exterior.
Step 7: Preheat the Oven
While your dough is finishing its second rise, preheat your oven to 230°C (450°F). If you’re using a Dutch oven, place it inside to heat up. This step is key for that signature crisp crust.
Step 8: Score and Bake
Carefully score the top of your dough with a sharp blade or knife—those cuts allow the bread to expand beautifully in the oven. Bake your loaf inside the hot Dutch oven or on a preheated baking tray for 35 to 40 minutes. Halfway through baking, remove the lid of the Dutch oven to let the crust develop a stunning golden-brown crunch.
Step 9: Cool and Slice
Once out of the oven, resist the urge to cut immediately. Allow your Rustic German Whole-Wheat Bread to cool for at least 20 minutes to set its crumb, then slice it up and enjoy that freshly baked, wholesome goodness.
How to Serve Rustic German Whole-Wheat Bread Recipe
Garnishes
This bread shines with simple accompaniments that highlight its robust flavor. A smear of creamy butter, a drizzle of honey, or a sprinkle of coarse salt can elevate each slice. For an extra rustic touch, sprinkle the crust with whole seeds like sunflower or caraway before baking.
Side Dishes
The hearty character of this bread pairs beautifully with a variety of dishes. Serve it alongside traditional German delicacies like hearty sausages, sauerkraut, or rich stews. It also works wonders with soups, fresh cheese spreads, or a colorful plate of roasted vegetables.
Creative Ways to Present
Turn your Rustic German Whole-Wheat Bread into a centerpiece by making open-faced sandwiches topped with smoked salmon, radishes, or avocado. Toast slices lightly for breakfast, layering them with nut butters and fresh fruits for a morning treat. You can even cube leftover bread for a warm, crunchy salad topping.
Make Ahead and Storage
Storing Leftovers
Store leftover bread at room temperature in a paper bag or loosely wrapped in a kitchen towel to keep the crust crisp and the crumb moist. Avoid airtight plastic bags which can soften the crust.
Freezing
To preserve freshness, slice your Rustic German Whole-Wheat Bread and freeze it in a resealable freezer bag. This way, you can toast slices directly from the freezer without thawing.
Reheating
To bring your bread back to life, warm slices in a toaster or oven at medium heat for a few minutes. This revives the crust’s crunch and softens the crumb, making it taste just-baked again.
FAQs
Can I use only whole-wheat flour for this recipe?
Using 100% whole-wheat flour is possible but the bread will be denser and may not rise as much because whole-wheat flour has less gluten than bread flour. The combination in this recipe balances texture and flavor.
What if I don’t have a Dutch oven?
No worries! You can bake the bread on a preheated baking tray. To get a crisp crust, place an oven-safe dish with water on the bottom rack to create steam during baking.
How long does this bread keep fresh?
Stored properly at room temperature, this bread stays fresh for about 2 to 3 days. After that, it’s best to freeze slices to maintain quality.
Can I add seeds or nuts to this bread?
Absolutely! Adding sunflower seeds, pumpkin seeds, or chopped nuts can give your bread extra texture and flavor. Add them during the mixing stage for even distribution.
Is this recipe suitable for beginners?
Yes! The Rustic German Whole-Wheat Bread Recipe is straightforward and forgiving, perfect for bakers new to bread making who want to create a delicious homemade loaf.
Final Thoughts
If you’re looking to bring a little authentic German charm into your kitchen, the Rustic German Whole-Wheat Bread Recipe is your perfect go-to. It’s simple, satisfying, and truly rewarding—a loaf that tastes as wonderful as it smells. Give it a try, and soon you’ll wonder why you ever bought bread from the store.
Print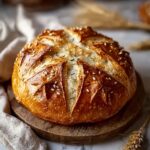
Rustic German Whole-Wheat Bread Recipe
- Prep Time: 15 minutes
- Cook Time: 40 minutes
- Total Time: 1 hour 55 minutes
- Yield: 1 loaf (10–12 slices)
- Category: Bread
- Method: Baking
- Cuisine: German
- Diet: Vegetarian
Description
This Rustic German Bread recipe produces a hearty, flavorful loaf with a crusty exterior and tender crumb, perfect for sandwiches or as an accompaniment to soups and stews. Made with a blend of whole-wheat and bread flours, activated yeast, and a simple fermentation process, it delivers traditional German-style artisan bread that is both wholesome and satisfying.
Ingredients
Dry Ingredients
- 400 g whole-wheat flour
- 100 g bread flour
- 1 tsp sugar
- 2 tsp salt
- 1 tsp dry yeast
Wet Ingredients
- 350 ml lukewarm water
Instructions
- Activate the Yeast: Combine the lukewarm water, sugar, and dry yeast in a bowl. Stir gently and let it sit for 5–10 minutes until the mixture becomes foamy, indicating the yeast is active.
- Mix Dry Ingredients: In a large mixing bowl, whisk together the whole-wheat flour, bread flour, and salt to evenly distribute the ingredients.
- Form the Dough: Pour the yeast mixture into the flour mixture. Stir together until a sticky dough forms, then knead briefly just to combine all ingredients thoroughly.
- First Rise: Cover the bowl with a clean towel or plastic wrap and let the dough rise in a warm place for about 1 hour, or until it has doubled in size.
- Shape the Loaf: Lightly flour a clean surface and shape the risen dough into a rustic round loaf. Avoid over-kneading to maintain a good texture.
- Second Proof: Place the shaped dough on parchment paper or in a proofing basket. Cover and let it rise again for 30 to 45 minutes until slightly puffy.
- Preheat Oven: Preheat the oven to 230°C (450°F). If using a Dutch oven, place it inside the oven while it preheats to ensure it is very hot.
- Score and Bake: Using a sharp knife or lame, score the top of the dough to allow for proper expansion during baking. Bake the dough covered in the Dutch oven or on a hot baking tray for 35 to 40 minutes. Remove the lid halfway through baking to develop an extra crusty exterior.
- Cool and Slice: Once baked, remove the bread from the oven and let it cool on a wire rack for at least 20 minutes before slicing to allow the crumb to set properly.
Notes
- Ensure the water is lukewarm (around 38-43°C or 100-110°F) to activate the yeast without killing it.
- Using a Dutch oven helps create steam that promotes a crisp crust, but a baking tray can work as well.
- Do not skip the cooling step as slicing too soon can cause the bread to become gummy.
- For enhanced flavor, allow the dough to ferment overnight in the refrigerator for the first rise.
- If you don’t have a proofing basket, use a bowl lined with a floured kitchen towel.


