
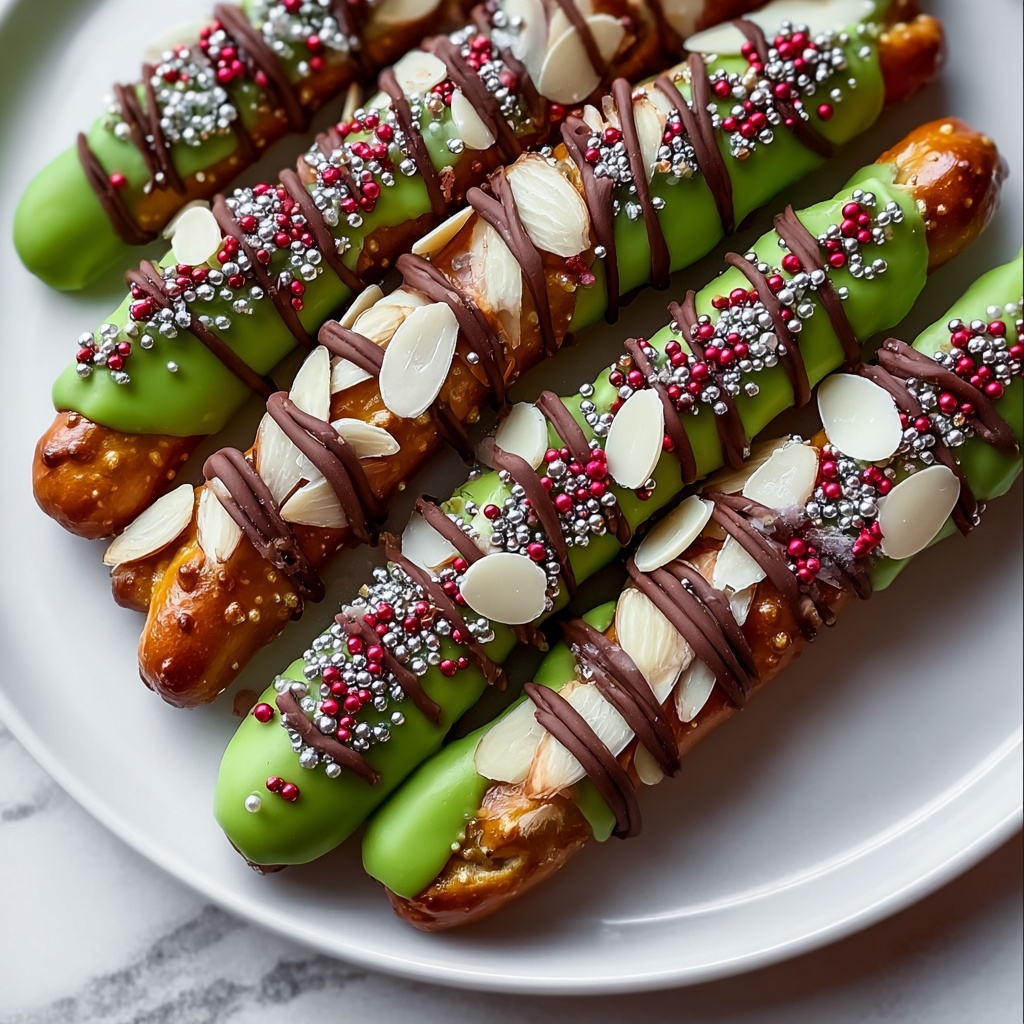
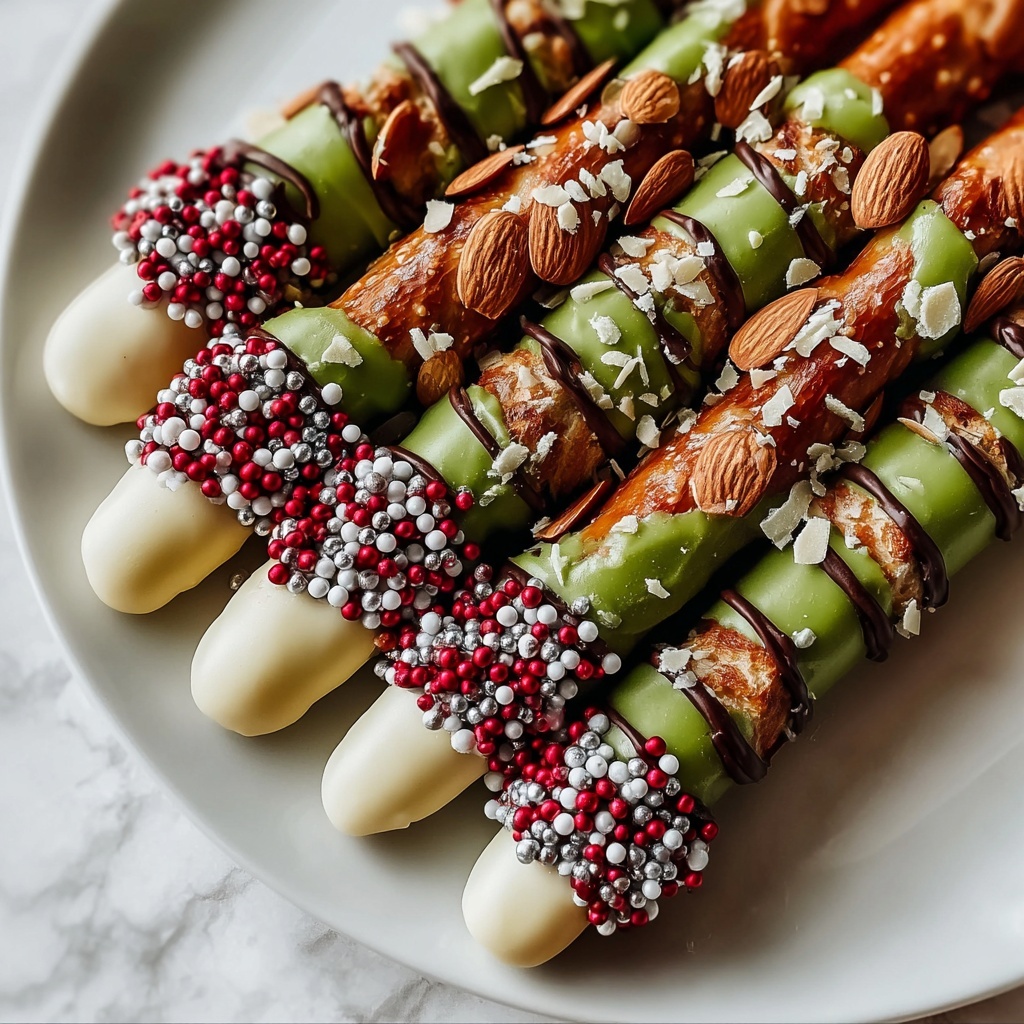
Halloween parties and spooky gatherings become instantly more fun and delicious with this Witch Finger Pretzel Rods Recipe. Imagine crunchy pretzel rods transformed into eerie, green witch fingers topped with almond nails and sinister red details — it’s a treat that’s as fun to make as it is to eat. This playful snack cleverly balances sweet, salty, and festive vibes, making it a standout addition to your Halloween spread or any time you want a bit of creepy charm on your snack table.
Ingredients You’ll Need
Gathering the right ingredients for the Witch Finger Pretzel Rods Recipe is surprisingly simple, yet each element plays an essential role in creating that spooky yet scrumptious look and flavor. From crispy pretzels providing the perfect crunch to the vibrant green chocolate coating that brings the witch finger to life, every ingredient contributes to both the taste and the visual appeal.
- Large pretzel rods: These create the sturdy “finger” base that’s crunchy and perfect for dipping.
- White chocolate or candy melts: They melt smoothly and take on color beautifully, coating the pretzels with a sweet, creamy layer.
- Green food coloring: This adds the unmistakable witchy hue to your chocolate, making the fingers instantly eye-catching.
- Whole almonds: Placed at the tip, these act as creepy “fingernails” for that authentic witch finger effect.
- Red gel icing: Essential for drawing knuckle lines and “blood” details to bring the fingers to life.
- Optional black gel icing: Adds extra skull-like details or deeper shading to intensify the spooky look.
How to Make Witch Finger Pretzel Rods Recipe
Step 1: Prepare Your Workspace
Start by lining a baking sheet with parchment paper to keep things tidy and make cleanup a breeze. Having your station ready means you can focus on the fun part—decorating!
Step 2: Melt the Chocolate
Place the white chocolate or candy melts in a microwave-safe bowl and heat in 30-second bursts. Stir thoroughly between each interval until the chocolate is completely melted and silky smooth. This ensures an even coating on your pretzels.
Step 3: Add Color
Drop in a few drops of green food coloring, stirring well until the chocolate turns into the perfect witchy shade of green. Adjust the color to your liking—brighter, deeper, spooky green—the choice is yours.
Step 4: Dip the Pretzel Rods
Dip each pretzel rod into the green chocolate, covering about two-thirds from the tip down. Let the excess drip back into the bowl for a neat finish, then lay the dipped rods on the prepared baking sheet.
Step 5: Attach the Almond “Nails”
Before the chocolate hardens, press a whole almond onto the tip of each pretzel to mimic a witches’ fingernail. This small detail makes a huge difference in bringing the witch finger to life.
Step 6: Set the Chocolate
Allow the chocolate to set completely. Placing the baking sheet in the refrigerator speeds up the process so you can move on to decorating faster.
Step 7: Draw the Red Knuckle Lines
Using red gel icing, draw a knuckle line right below the almond nail to create a realistic finger joint effect. This touch adds creepy realism that guests will love.
Step 8: Add Optional Black Details
For extra impact, use black gel icing to sketch additional knuckle lines or shading. It deepens the spooky vibe and makes the witch fingers truly pop.
Step 9: Final Drying
Let all icing details dry completely before handling or serving so the decorations stay perfect and don’t smudge.
How to Serve Witch Finger Pretzel Rods Recipe
Garnishes
Enhance your Witch Finger Pretzel Rods Recipe presentation with a sprinkle of edible glitter or a dusting of cocoa powder to give the fingers a mystical shimmer or shadowy depth. Fresh rosemary sprigs can mimic “witchy” herbs alongside the platter for added effect.
Side Dishes
Serve these eerie fingers alongside a bowl of tangy pumpkin hummus, creamy spinach dip, or even a blood-red marinara sauce for dipping. These sides complement the salty-sweet flavors and juice up the Halloween theme.
Creative Ways to Present
Stand your witch fingers upright in a tall glass filled with black beans, rice, or candy corn to emulate a creepy “finger bouquet.” Alternatively, scatter them across a tray of candy skulls and cobweb cotton for a haunting centerpiece guests won’t forget.
Make Ahead and Storage
Storing Leftovers
Place leftover Witch Finger Pretzel Rods Recipe in an airtight container at room temperature for up to three days. Make sure they’re away from heat or humidity to keep the chocolate coating firm and crisp.
Freezing
If you want to prepare these fingers well in advance, freeze them wrapped tightly in parchment or plastic wrap inside a freezer bag for up to one month. Thaw them at room temperature before serving for best texture and appearance.
Reheating
Because this treat is best enjoyed cold and crisp, reheating is not recommended. Instead, simply bring frozen fingers to room temperature and enjoy them as originally designed—delightfully crunchy and perfectly spooky.
FAQs
Can I use dark chocolate instead of white chocolate?
Absolutely! Dark chocolate gives a richer taste, but the green food coloring may show up differently. White chocolate or candy melts are preferred for vibrant colors, but feel free to experiment.
What can I substitute for whole almonds if I have allergies?
Sliced almonds, pumpkin seeds, or even small candy pieces can mimic nails if allergies are a concern. Just choose something that sticks well and looks similar.
How long does it take for the chocolate to harden?
At room temperature, the chocolate usually sets within 30-60 minutes. Using the refrigerator cuts the time down to about 15-20 minutes.
Can these pretzel rods be made ahead for a party?
Yes! You can prepare them a day or two in advance and store them properly. This makes party day stress-free, leaving you more time to enjoy celebrating!
What’s the best way to avoid smudging the icing decorations?
Patience is key—allow the icing to dry fully on a flat surface without touching the decorations. Using gel icing helps since it sets with a firm texture. Refrigerate for faster drying if you’re in a hurry.
Final Thoughts
There’s something truly joyful about turning simple ingredients like pretzels and chocolate into a spooky, delightful treat with this Witch Finger Pretzel Rods Recipe. It’s fun, festive, and perfect for getting friends and family into the Halloween spirit. I can’t wait for you to try it and watch how these creepy fingers become the highlight of your celebrations!
Print
Witch Finger Pretzel Rods Recipe
- Prep Time: 0h 15m
- Cook Time: 0h 5m
- Total Time: 0h 20m
- Yield: About 20-25 witch finger pretzel rods depending on bag size
- Category: Dessert
- Method: No-Cook
- Cuisine: American
Description
Create spooky and delicious Witch Finger Pretzel Rods perfect for Halloween parties. These crunchy pretzel rods are dipped in green-tinted white chocolate and decorated with almonds as fingernails and red gel icing to resemble creepy knuckle details. Easy to make and a fun treat for all ages!
Ingredients
Ingredients
- 1 bag of large pretzel rods
- 1 cup white chocolate or candy melts
- A few drops of green food coloring
- Whole almonds
- Red gel icing
- Optional: Black gel icing for detailing
Instructions
- Prepare Baking Sheet: Line a baking sheet with parchment paper to make cleanup easy and to prevent sticking.
- Melt Chocolate: Place the white chocolate or candy melts in a microwave-safe bowl and heat in 30-second intervals, stirring after each until completely smooth and melted.
- Add Coloring: Stir in a few drops of green food coloring into the melted chocolate until the desired green color is achieved.
- Dip Pretzels: Dip each pretzel rod into the green chocolate, covering about two-thirds of the length. Let the excess chocolate drip off before laying the rods on the parchment-lined baking sheet.
- Add Almond Fingernails: While the chocolate is still wet, press a whole almond onto the tip of each pretzel to resemble a fingernail.
- Set Chocolate: Allow the chocolate coating to set completely. To speed this up, place the pretzels in the refrigerator.
- Decorate Fingers: Use red gel icing to draw knuckle lines below the almond for a realistic finger effect.
- Optional Detailing: Add black gel icing detailing or extra knuckle lines to enhance the spooky look.
- Dry and Serve: Let all icing dry fully before serving or displaying your witch finger pretzel treats.
Notes
- Use candy melts for easier melting and more consistent texture if preferred over chocolate.
- Adjust green food coloring quantity to get the perfect witchy shade.
- Refrigerate after dipping to speed up setting time.
- Handle the pretzels carefully after dipping to avoid smudging the chocolate or icing.
- Red gel icing adds a realistic bloody look; use sparingly for best effect.


